GItOps to deploy Instana and Grafana
Goals
In this lab you wil learn
- How to use Instana to monitor an OpenShift cluster
- How to use Instana to monitor a microservices application running on the cluster.
- How to use Grafana to display charts based on metrics captured by Instana
You will utilize GitOps to deploy the following components to an OpenShift Cluster.
- Instana Agent
- Robot Shop Application
- Grafana
Prerequisites
Before starting this lab you should have the following environments.
- Instana Server
- Openshift 4.8 Cluster
Also before starting this lab you need the following installed locally
- git cli or if you are on a mac you can use command
xcode-select --install - helm cli
- oc cli version 4.7 or higher
Create an Instana server instance
- Go to Product Deployment Guides page on Techzone
- Click on the Try It - Get a GitOps Cluster tab (under the top banner)
- Click on the Instana - self deploy on VSI environment
- Select Reserve now
- You can modify the Name if you wish.
Instana VSIfor example - For Purpose select Practice / Self-Education
- Enter a Purpose Description
- Select a Preferred Geography closest to your location
- Extend the End Date for 2 weeks
- Click Submit
Create an OpenShift cluster
- Go to TechZone Certified Base Images
- Click on the VMWare on IBM Cloud Environments tab (under the top banner)
- Click on the appropriate environment any will do, including the one preinstalled with gitops
- Select Reserve now
- You can modify the Name if you wish.
OpenShift GitOps Clusterfor example - For Purpose select Practice / Self-Education
- Enter a Purpose Description.
- Select a Preferred Geography closest to your location
- Extend the End Date for 2 weeks
- Select Worker Node Count of 3
- Select Worker Node Flavor of 8 CPU x 32 GB
- Select an OCS Size of 500 GB
- Select the Openshift version of 4.10
- Click Submit
Bootstrap the cluster
In this section you will prepare the gitops environment if you are not using the self-hosted gitops reservation.
if you used the gitops reservation in techzone you can skip to the next section.
-
Log in to your Openshift Cluster from the terminal
- Navigate to your Openshift cluster's web console created in the Prerequisites
-
Click the user dropdown and click on Copy login command

-
Click Display Token
-
Copy the oc login command

-
Open a terminal window. Paste and execute the oc login command.

-
Clone the multi-tenancy-gitops repo
- Create a directory and change into the new directory
mkdir instana-lab && cd instana-lab - Clone the multi-tenancy-gitops repo and change into the cloned directory
git clone https://github.com/cloud-native-toolkit/multi-tenancy-gitops.git &&
cd multi-tenancy-gitops
- Create a directory and change into the new directory
-
Run the bootstrap script
- Create an environment variable to tell the script to use Gitea
export USE_GITEA=true -
Create an environment variable to tell the script the output directory to clone the multi-tenancy-gitops repos into
Important
The OUTPUT_DIR will be referenced throughout the lab and if you use another value than gitops-instana you will have to update the commands before executing them
export OUTPUT_DIR=gitops-instana -
Run the bootstrap script. The script installs the Gitea operator into the cluster, clones the multi-tenancy-gitops repos and pushes them to Gitea, then bootstraps Argo CD.
Note
The script takes around 20 minutes to run so after you start it, it would be a good time for a break :-)
./scripts/bootstrap.sh -
When the script completes it displays the URLs and commands to retrieve credentials to log in to Argo CD and Gitea.
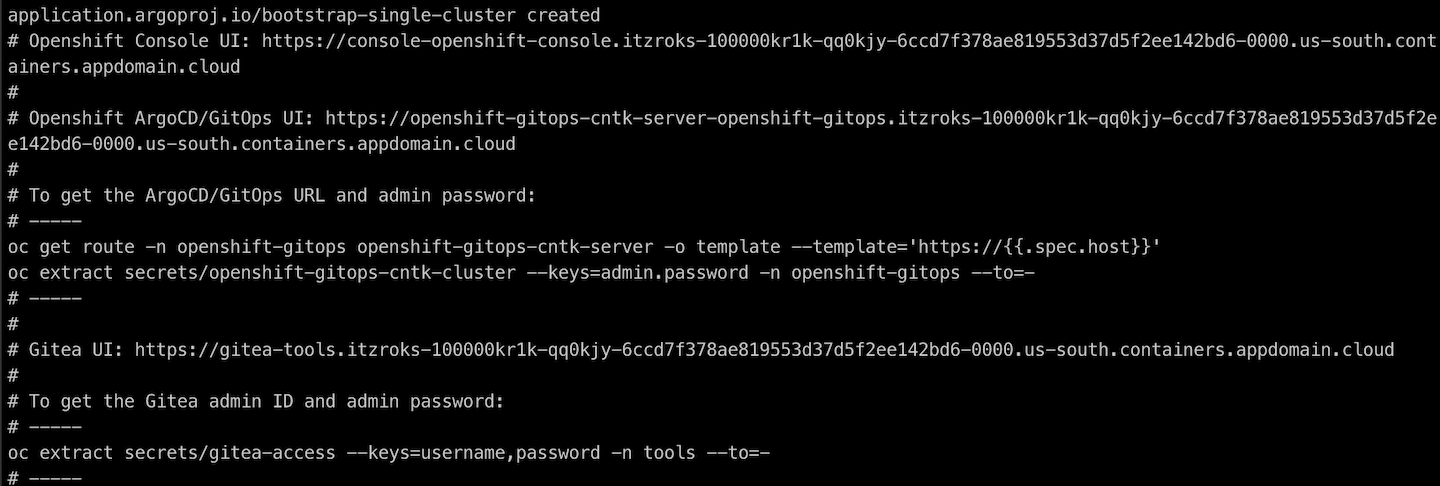
-
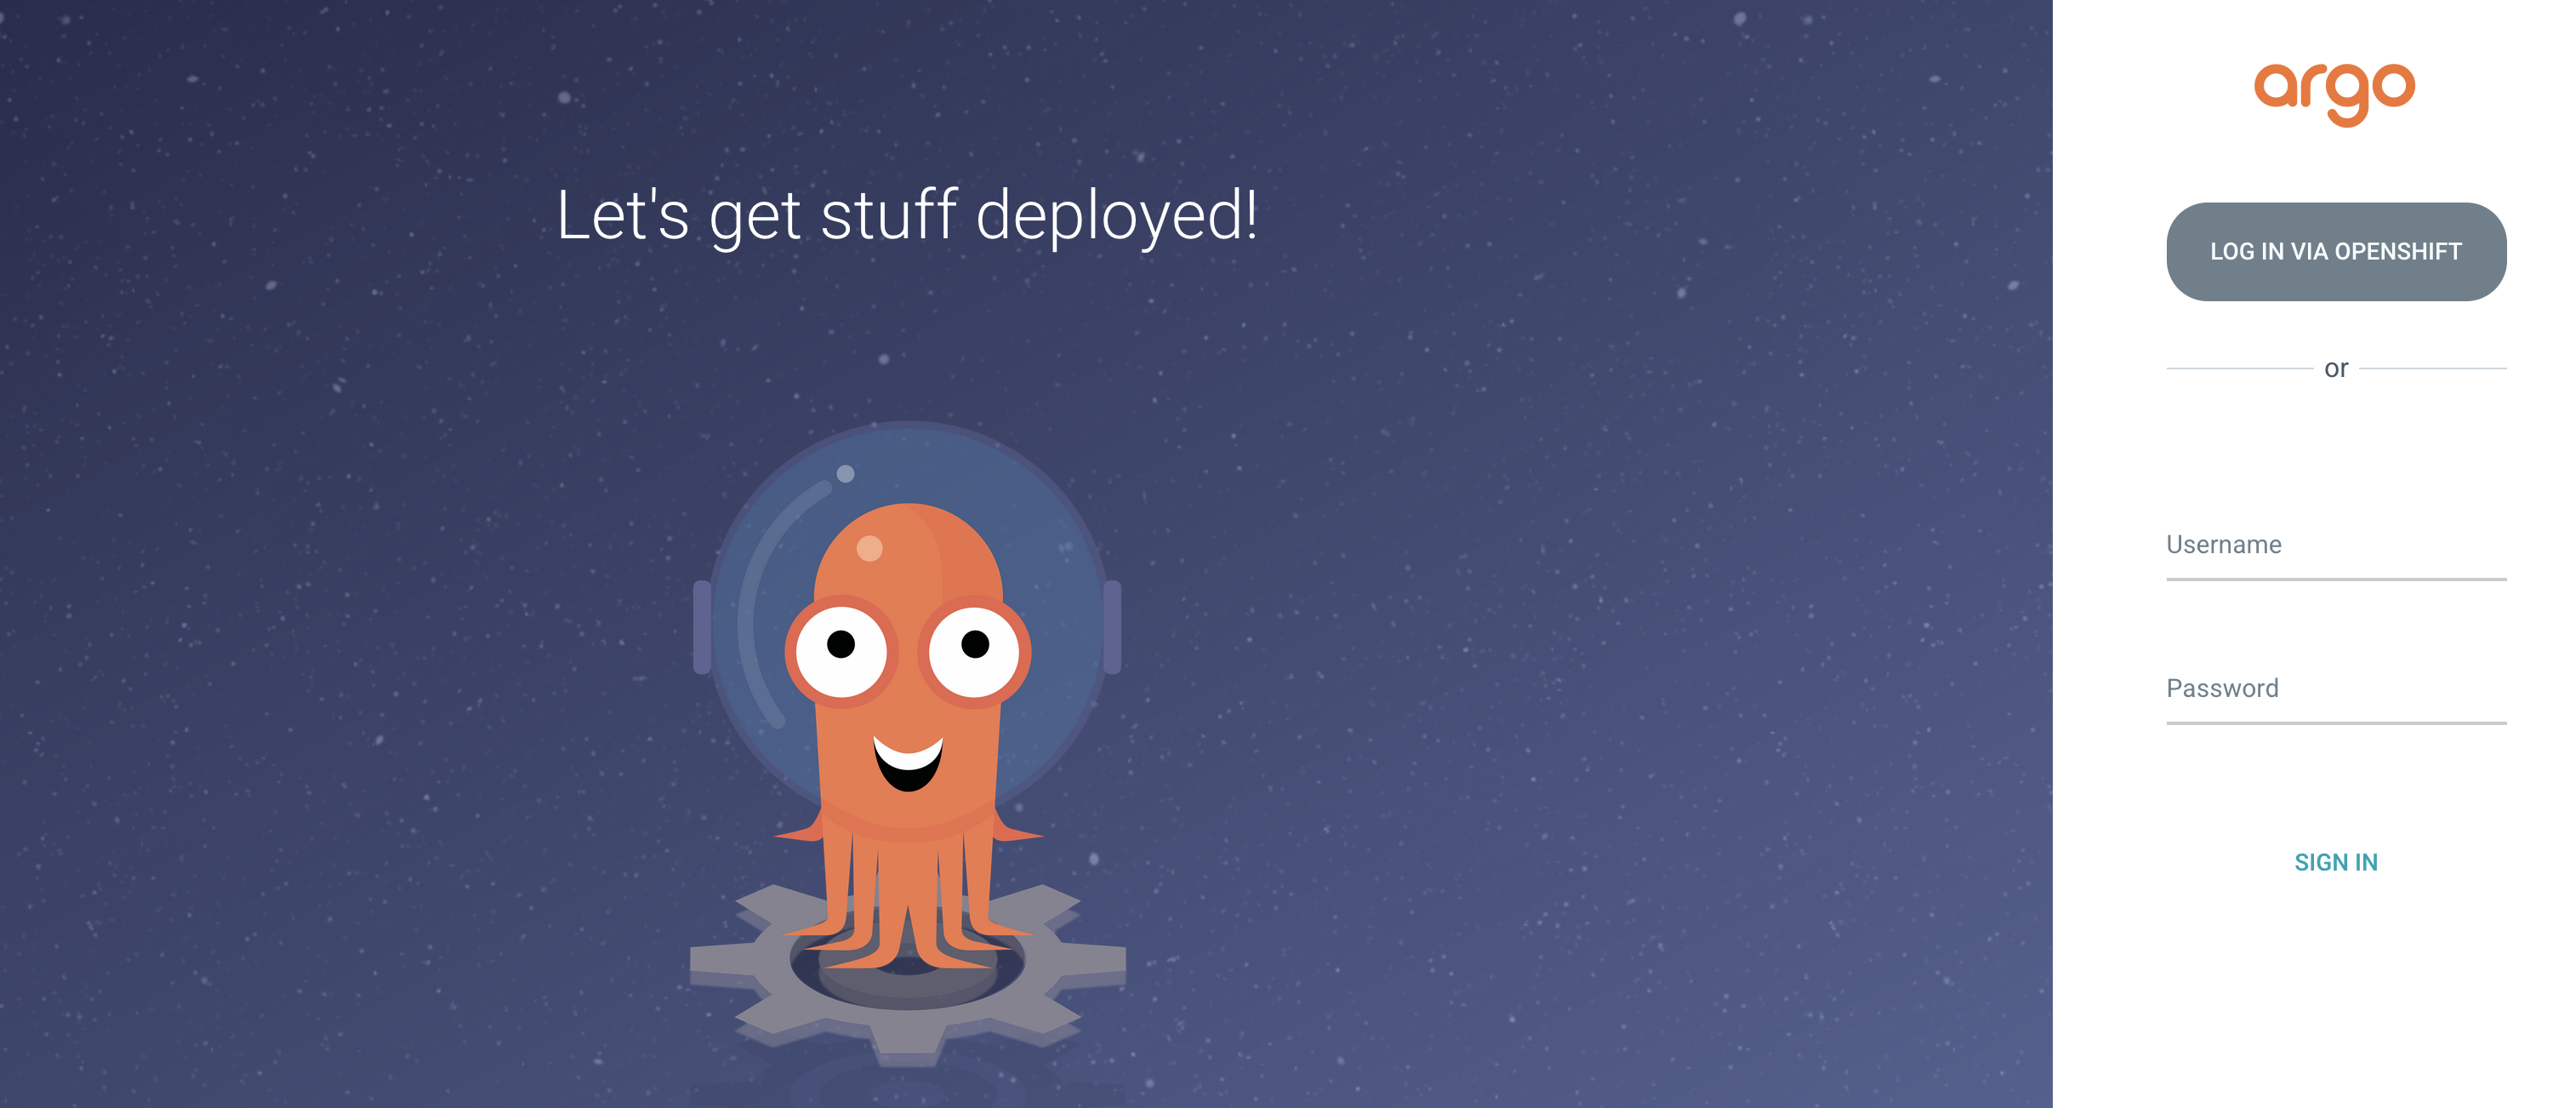
Copy ArgoCD/GitOps UI URL returned from the script and open it in a browser. Click the LOG IN VIA OPENSHIFT button
-
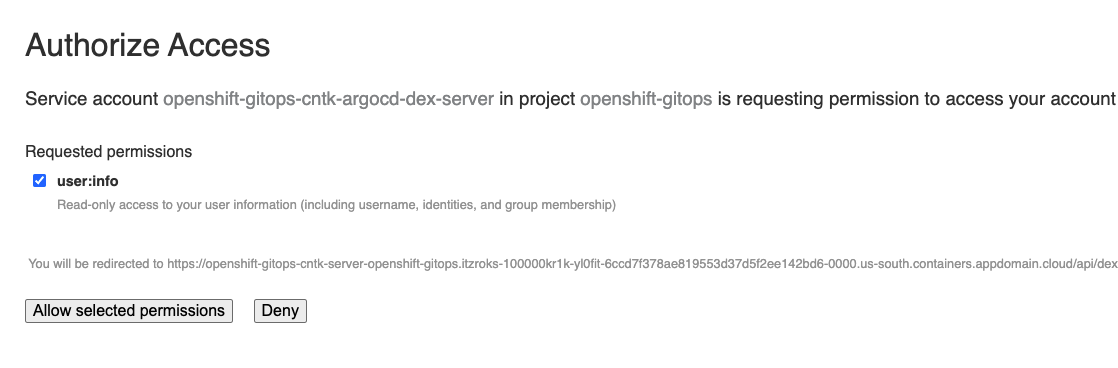
Click the Allow selected permissions button to authorize access
-
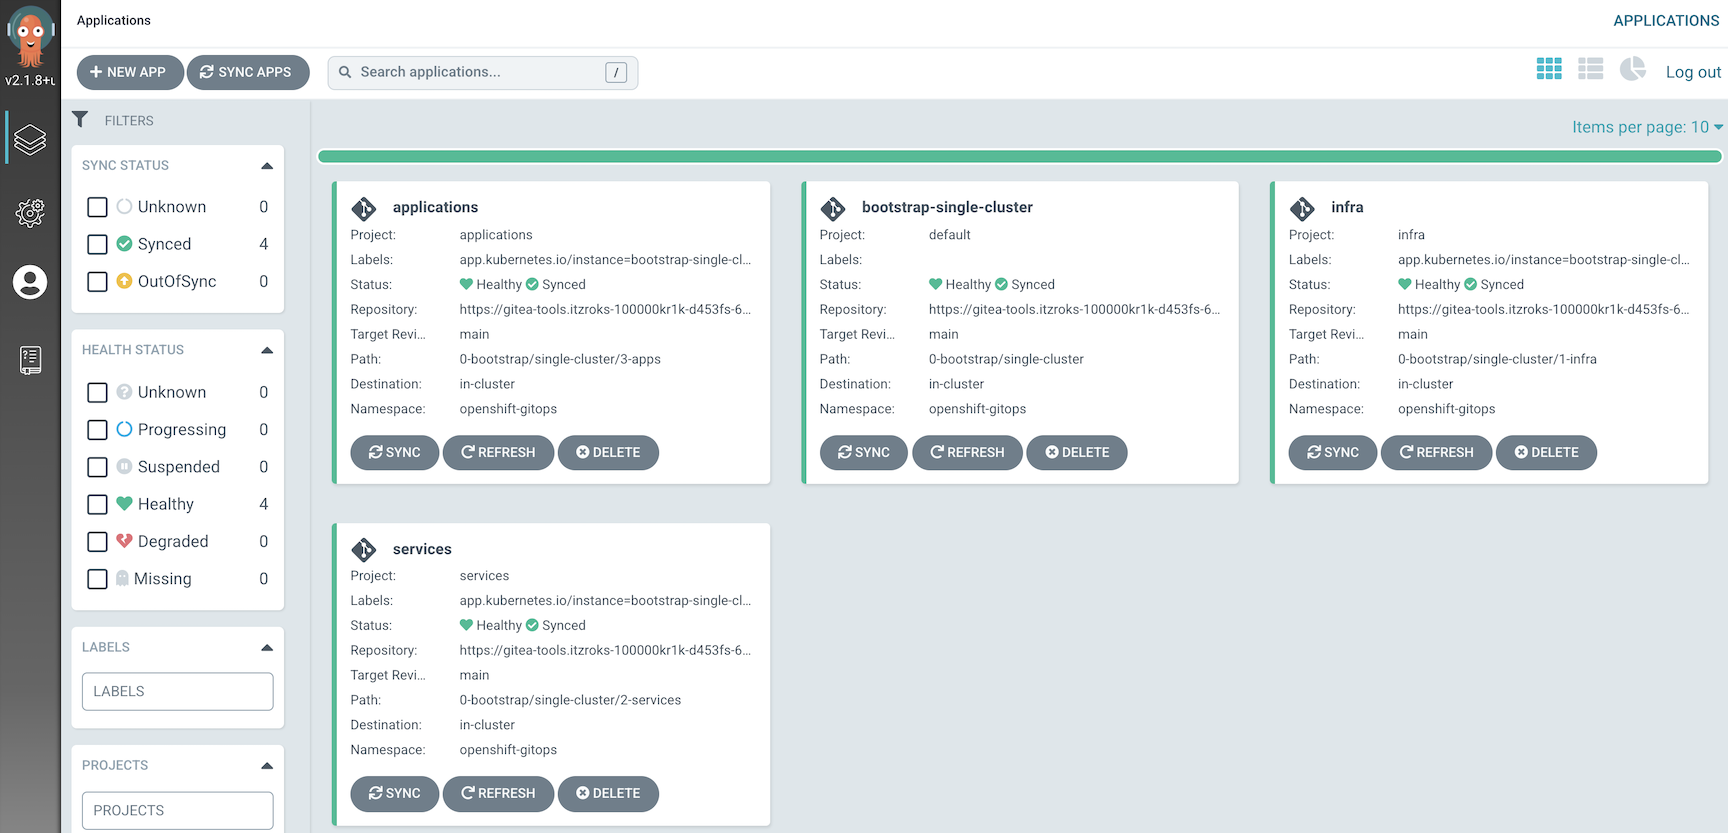
The Argo CD UI displays the Argo applications.
-
Open Gitea in a browser using the Gitea URL returned from the script
- Run the command to retrieve the Gitea id and password.
oc extract secrets/gitea-access --keys=username,password -n tools --to=- -
Use the Sign in button in the upper right to log in and view the multi-tenancy-gitops repos.

- Create an environment variable to tell the script to use Gitea
-
Review the gitops repositories and local file structure created by the bootstrap script
-
The bootstrap script cloned the
multi-tenancy-gitopsrepositories into thegitops-orgorganization in Gitea. Click Organizations then click on the gitops-org organization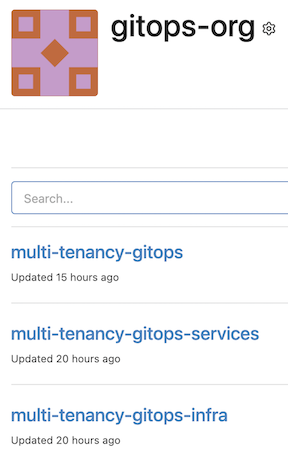
-
The local gitops repos are under the
OUTPUT_DIRyou defined above. The structure is seen below wheregitops-0-bootstrapis the local repo for themulti-tenancy-gitopsrepo;gitops-1-infrais the local repo for themulti-tenancy-gitops-infrarepo andgitops-2-servicesis the local repo for themulti-tenancy-gitops-servicesrepo.➜ tree -L 1 gitops-instana gitops-instana ├── gitops-0-bootstrap ├── gitops-1-infra └── gitops-2-services -
In the
gitops-0-bootstrapdirectory the bootstrap script configured thesingle-clusterGITOPS_PROFILE in the0-bootstrap/single-clusterdirectory. That directory contains the following➜ tree -L 1 gitops-instana/gitops-0-bootstrap/0-bootstrap/single-cluster gitops-instana/gitops-0-bootstrap/0-bootstrap/single-cluster ├── 1-infra ├── 2-services ├── 3-apps ├── bootstrap.yaml └── kustomization.yaml -
The
1-infradirectory contains theyamlfiles that defines references to the infrastructure objects that are deployed from themulti-tenancy-gitops-infrarepo.tree -L 1 gitops-instana/gitops-0-bootstrap/0-bootstrap/single-cluster/1-infra gitops-instana/gitops-0-bootstrap/0-bootstrap/single-cluster/1-infra ├── 1-infra.yaml ├── argocd └── kustomization.yaml -
The
2-servicesdirectory contains theyamlfiles that defines references to the services objects that are deployed from themulti-tenancy-gitops-servicesrepo.tree -L 1 gitops-instana/gitops-0-bootstrap/0-bootstrap/single-cluster/2-services gitops-instana/gitops-0-bootstrap/0-bootstrap/single-cluster/2-services ├── 2-services.yaml ├── argocd └── kustomization.yaml -
The
3-appsdirectory contains theyamlfiles that defines references to the application objects that are deployed from themulti-tenancy-gitops-appsrepo. This repo isn't used for thesingle-clusterGITOPS_PROFILE so it wasn't cloned and pushed to Gitea.tree -L 1 gitops-instana/gitops-0-bootstrap/0-bootstrap/single-cluster/3-apps gitops-instana/gitops-0-bootstrap/0-bootstrap/single-cluster/3-apps ├── 3-apps.yaml ├── argocd └── kustomization.yaml
-
Install Instana Agent
In this section you will install the Instana Agent into the instana-agent namespace in the cluster. The agent collects metrics data from the cluster and sends it to the Instana server.
Infrastructure
Modify the 1-infra/kustomization.yaml file to create a instana-agent namespace
- Change directory to the
<OUTPUT_DIR>/gitops-0-bootstrap/0-bootstrap/single-cluster/1-infradirectory where<OUTPUT_DIR>is the value of the environment variable created abovecd gitops-instana/gitops-0-bootstrap/0-bootstrap/single-cluster/1-infra - Edit the Infrastructure layer
${GITOPS_PROFILE}/1-infra/kustomization.yamlwith the editor of your choice.vim kustomization.yaml -
Uncomment the following line, save and exit the editor
- argocd/namespace-instana-agent.yaml -
Commit the changes to the
multi-tenancy-gitopsrepogit add . && git commit -m "add instana-agent namespace" && git push origin -
When Argo CD detects the change it will create and deploy the new objects. Instead of waiting for the Argo polling process to detect the change you can click Refresh on the
infraapplication to manually trigger the refresh from themulti-tenancy-gitopsrepo.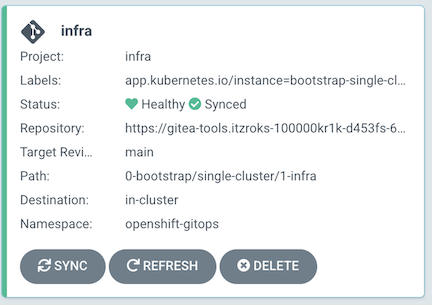
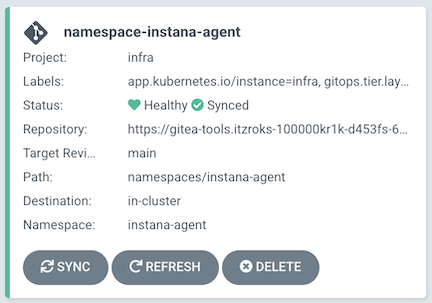
-
In Argo CD you should see the new namespace-instana-agent application
-
On the OpenShift console you should see a new
instana-agentproject namespace
Services
In this section we will deploy the Instana agent to the instana-agent namespace created above.
-
Edit the Services layer
${GITOPS_PROFILE}/2-services/kustomization.yaml- Navigate to the
/multi-tenancy-gitops/gitops-instana/gitops-0-bootstrap/0-bootstrap/single-cluster/2-servicesdirectorycd ../2-services - Edit the Services layer
${GITOPS_PROFILE}/2-services/kustomization.yamlwith the editor of your choice.vim kustomization.yaml - Uncomment the following line under the
# Monitoringsection, save and exit the editor- argocd/instances/instana-agent.yaml - Don't commit the changes to git yet, we have to make additional changes
- Navigate to the
-
Store your Instana Agent Key in a secret in the
instana-agentnamespace in your cluster.-
The Instana agent needs the Instana Agent Key of the Instana server you created in the prerequisites. You can find your Instana Agent Key in Techzone under My library -> My reservations. Click on your
Instana - self deploy on VSIreservation tile you created in the prerequisites to view the details. The Instana Agent Key is also included in the email you received from Techzone when you created the Instana server.
Note
You should not share the Instana Agent Key with anyone
-
The secret key field has to contain the value
keyand the value contains your Instana Agent Key. Run the following command, replace<AGENT-KEY>with your Instana Agent Keyoc create secret generic instana-agent-key -n instana-agent \ --from-literal=key=<AGENT-KEY>
-
-
Edit the Instana agent
${GITOPS_PROFILE}/2-services/argocd/instances/instana-agent.yaml- Navigate to the
/multi-tenancy-gitops/gitops-instana/gitops-0-bootstrap/0-bootstrap/single-cluster/2-services/argocd/instancesdirectorycd argocd/instances -
Edit the
instana-agent.yamlfile with the editor of your choice.vim instana-agent.yaml -
Modify the
spec.source.helm.values.instana-agent.agent.keysSecretvalue on line 47. Update it so it matches the secret you deployed above. For example in the command above the value of the secret would beinstana-agent-keyso that should be the value.# the values you'd otherwise set in `.agent.key` and `agent.downloadKey`. keysSecret: instana-agent-key - Modify the
spec.source.helm.values.instana-agent.agent.endpointHostvalue on line 53. Update it to be thePublic IPaddress of your Instana server. This will be on theInstana - self deploy on VSIreservation details in Techzone as well as in the email.# agent.endpointHost is the hostname of the Instana server your agents will connect to. endpointHost: 169.62.165.247 - Modify the
spec.source.helm.values.instana-agent.cluster.namevalue on line 166. The value represents the name that will be assigned to this cluster in Instana. For example'Onboarding cluster'cluster: # cluster.name represents the name that will be assigned to this cluster in Instana name: 'Onboarding cluster' - Modify the
spec.source.helm.values.instana-agent.zone.namevalue on line 215. The value represents the custom zone that detected technologies will be assigned to. For example'Onboarding zone'zone: # zone.name is the custom zone that detected technologies will be assigned to name: 'Onboarding zone' -
Save your changes and exit the editor
-
Navigate back up the the
2-servicesdirectory and commit the changes to Giteacd ../.. && git add . && git commit -m "add instana-agent" && git push origin
- Navigate to the
-
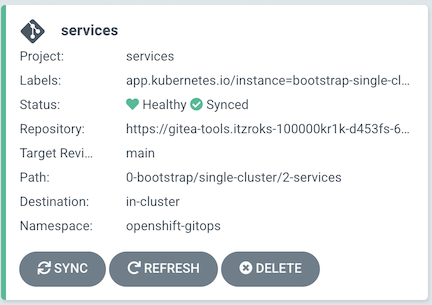
In Argo CD click Refresh on the services application to manually trigger the changes.
-
In Argo CD you should see the new instana-agent-instance application. Its status will eventually change to
Healthy/Synced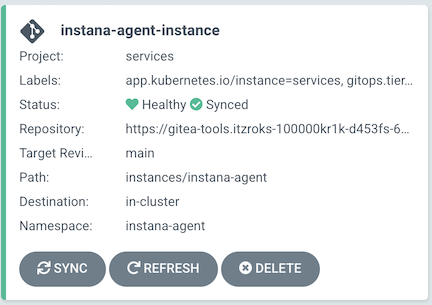
-
Review the new zone/cluster in the Instana UI
-
Log in to your Instana Server UI. You can find the
Instana URL,Instana emailandInstana passwordfrom your Techzone reservations email or page. NOTE: Use theInstana passwordNOT thepassword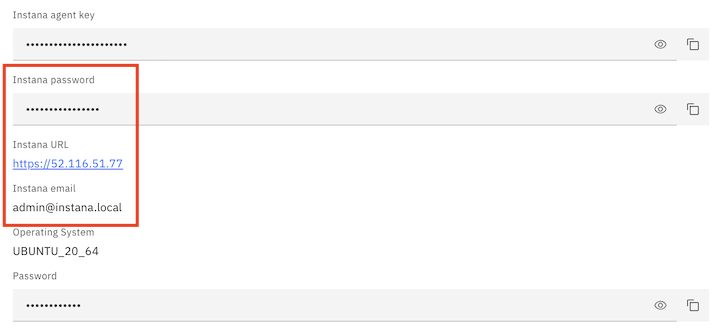
-
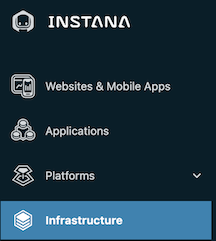
Click on the "Stacks" icon on the left to open the Infrastructure view
-
Click on the Live button in the upper right of the screen

-
It takes a few minutes for the agents to register with the server but eventually you should see your
Onboarding zone. FYI, theInstanaTechnologyZonezone is the Instana server instance itself.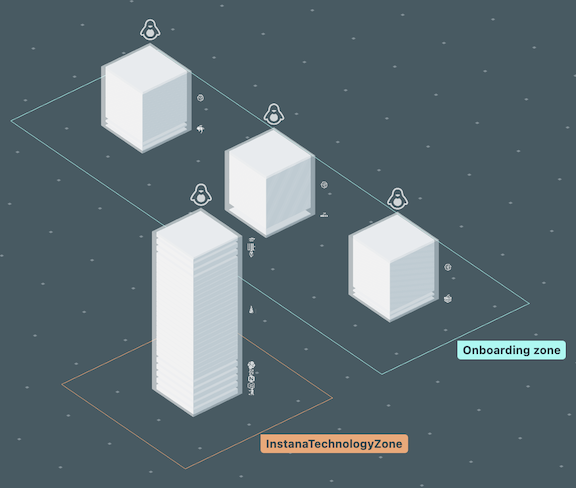
-
Click on one of the 3
CRI-O containersin theOnboarding Zoneand an info panel opens up. Click on the Dashboard button to view the details.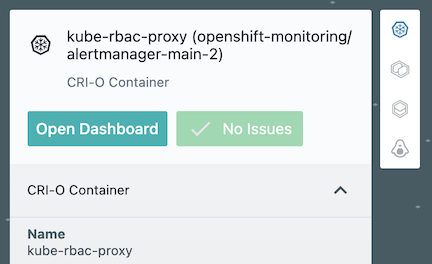
-
On the zone dashboard click on the Stack button and select your
Onboarding clusterto view the details on the cluster.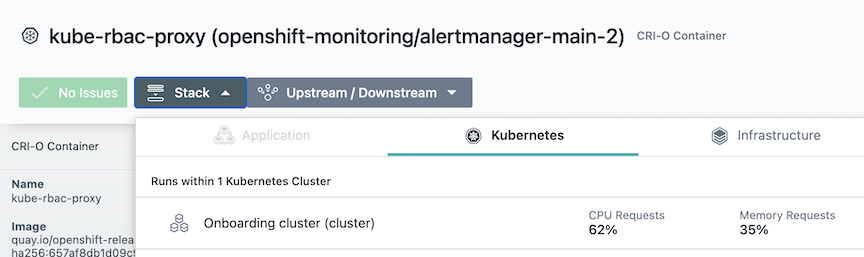
-
You can also navigate to the
Onboarding clusterusing the Platforms -> Kubernetes menu.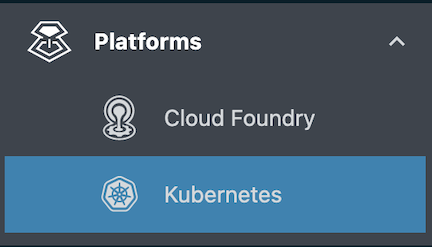
-
Install Robot Shop Application
In this section you will install the Robot Shop application into the robot-shop namespace in the cluster. The application is an example microservice application that can be used to learn monitoring techniques.
Infrastructure
Modify the 1-infra/kustomization.yaml file to create a robot-shop namespace
- Navigate to the
/multi-tenancy-gitops/gitops-instana/gitops-0-bootstrap/0-bootstrap/single-cluster/1-infradirectorycd ../1-infra - Edit the Infrastructure layer
${GITOPS_PROFILE}/1-infra/kustomization.yamlwith the editor of your choice.vim kustomization.yaml - Uncomment the following line, save and exit the editor
- namespace-robot-shop.yaml - Commit the changes to the
multi-tenancy-gitopsrepo
git add . && git commit -m "add robot-shop namespace" && git push origin -
In Argo CD click Refresh on the infra application to manually trigger the changes.
-
In Argo CD you should see the new namespace-robot-shop application
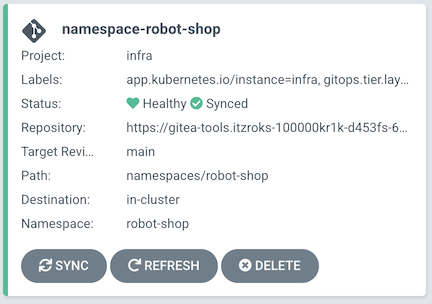
-
On the OpenShift dashboard you should see a new
robot-shopproject namespace
Services
In this section we will deploy the Robot Shop application to the robot-shop namespace created above.
-
Edit the Services layer
${GITOPS_PROFILE}/2-services/kustomization.yaml- Navigate to the
/multi-tenancy-gitops/gitops-instana/gitops-0-bootstrap/0-bootstrap/single-cluster/2-servicesdirectorycd ../2-services - Edit the Services layer
${GITOPS_PROFILE}/2-services/kustomization.yamlwith the editor of your choice.vim kustomization.yaml -
Uncomment the following line under the
# Monitoringsection, save and exit the editor- argocd/instances/instana-robot-shop.yaml -
Don't commit the changes to git yet, we have to make additional changes
- Navigate to the
-
Edit the Instana robot shop yaml
${GITOPS_PROFILE}/2-services/argocd/instances/instana-robot-shop.yaml-
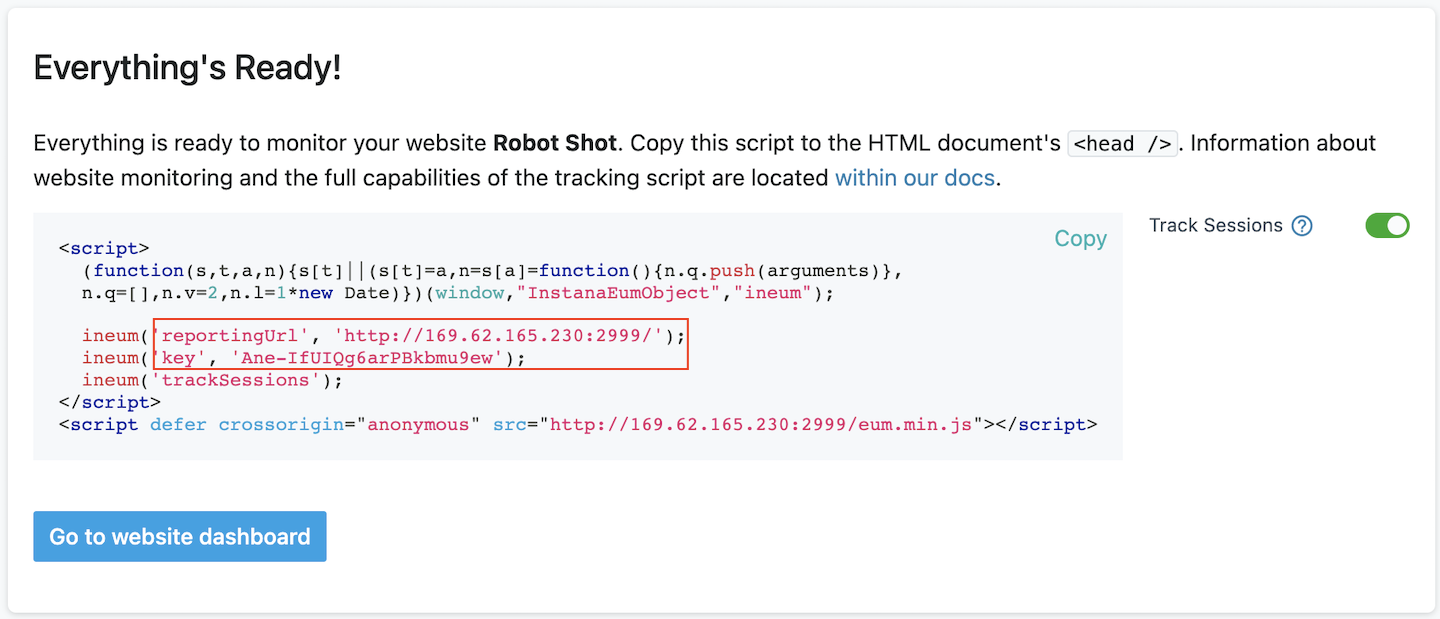
The Robot Shop application has a web based UI. You can configure it to send metric information to an Instana Server. To do this you need to create a Website application in Instana. In the Instana UI click Website & Mobile Apps menu.

-
Enter a name, such as
Robot Shop, for you Website application and click Add Website.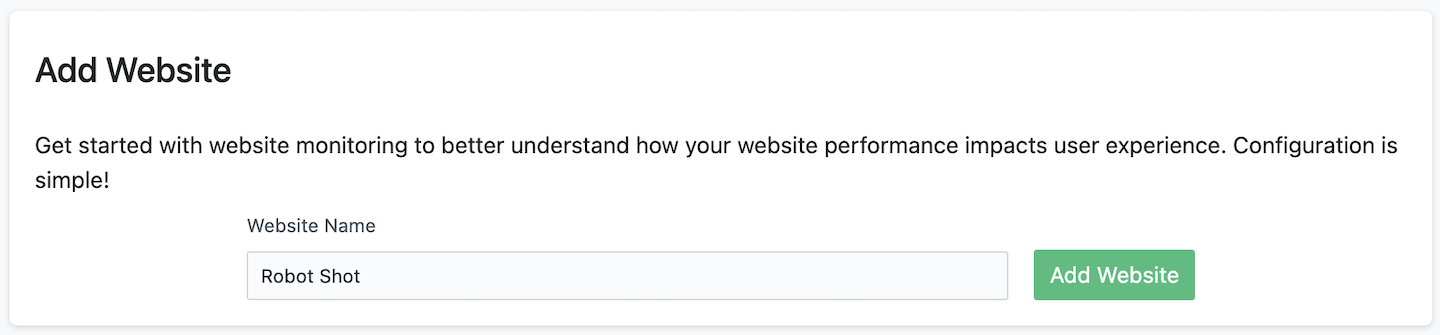
-
From the JavaScript snippet you will need the reportingUrl and key values
-
Store the End User Monitoring (EUM) key value in a secret. The secret key field has to contain the value
keyand the value contains your key value. Run the following command, replace<EUM-KEY>with your key value you received in the JavaScript snippet from the previous step.Note
Do NOT enter the '

oc create secret generic instana-eum-key -n robot-shop \ --from-literal=key=<EUM-KEY> -
Navigate to the
/multi-tenancy-gitops/gitops-instana/gitops-0-bootstrap/0-bootstrap/single-cluster/2-services/argocd/instancesdirectorycd argocd/instances -
Edit the
instana-robot-shop.yamlfile with the editor of your choice.vim instana-robot-shop.yaml -
Modify the
spec.source.helm.values.instana-robot-shop.robot-shop.eum.keysSecretvalue on line 40. Update it if needed so it matches the secret you deployed above. For example in the command above the value of the secret would beinstana-eum-keyso use that as the value.keysSecret: instana-eum-key -
Modify the
spec.source.helm.values.instana-robot-shop.robot-shop.eum.urlvalue on line 41. Update it to be theurlvalue you received in the JavaScript snippetNote
Do not add the trailing /
url: http://169.62.165.230:2999 -
Save your changes and exit the editor
-
Navigate back up the the
2-servicesdirectory and commit the changes to Giteacd ../.. && git add . && git commit -m "add robot-shop" && git push origin
-
-
In Argo CD click Refresh on the services application to manually trigger the changes.
-
In Argo CD you should see the new robot-shop application. After a few minutes its status will change to
Healthy/Synced
-
Verify End User Monitoring configuration
-
In the Openshift console navigate to Workloads -> Pods
-
At the top select the Project
robot-shop -
Find the pod name that starts with web and click on it to view the details
-
Click on the Logs tab
-
Scroll to the top of the logs and verify you see the message
Enabling Instana EUM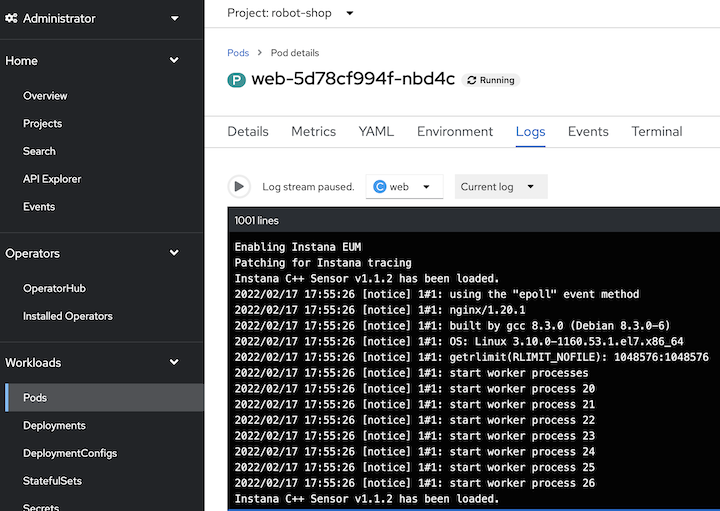
-
Review Metrics
-
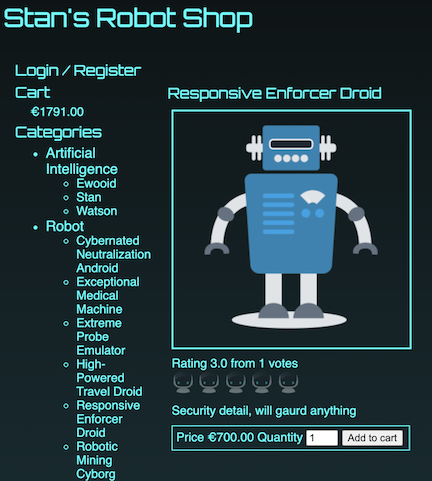
Navigate around the Robot Shop application to generate some metrics in Instana. Retrieve the Robot Shop URL with the following command and open it in a browser
Note
Be sure not to include the % from the end of the URL returned with the following command
oc get route -n robot-shop web -o template --template='http://{{.spec.host}}' -
Select Items under the Categories. Add them to your cart. Rate them.
-
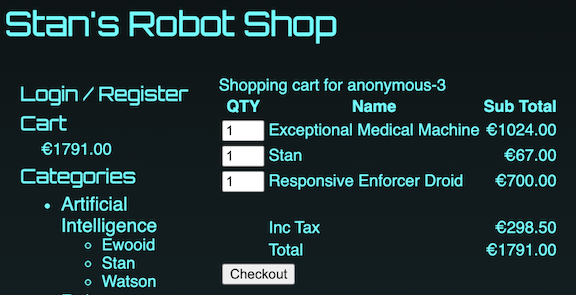
Click on Cart to view your cart. Click Checkout
-
After the Countries have loaded select one, ex.
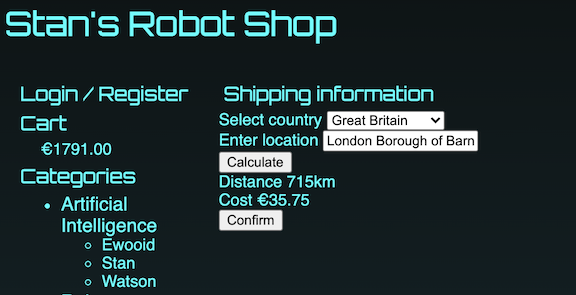
Great Britain. Start entering a location, ex.lonto filter the list and select one. Click Calculate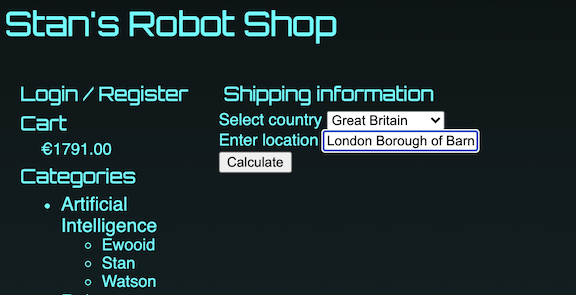
-
Click Confirm
-
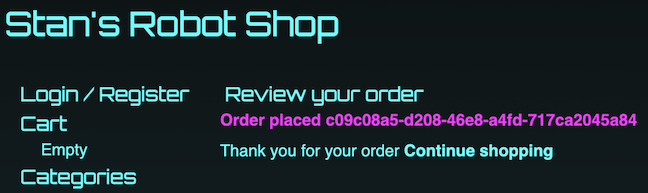
Click Pay Now

-
And your order will be complete
-
Switch back to your Instana browser window. Click Go to website dashboard from JavaScript snippet window, or navigate to Websites & Mobile Apps and click on your application name.
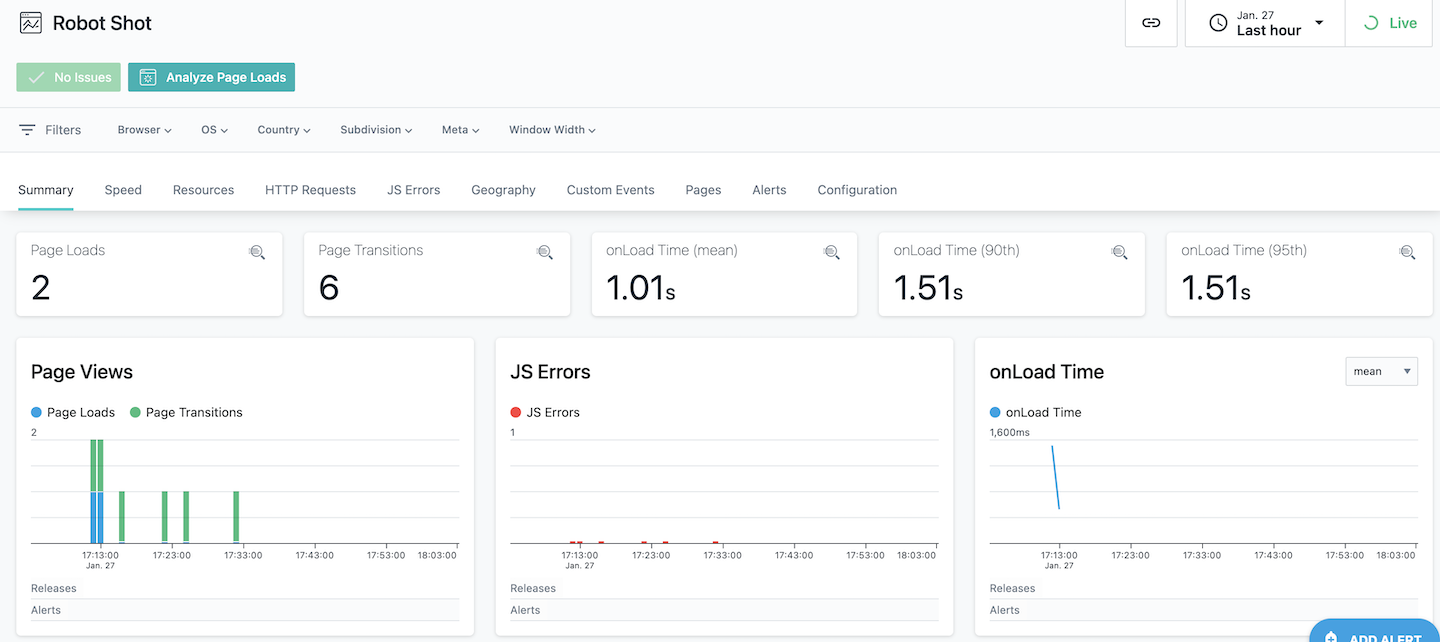
-
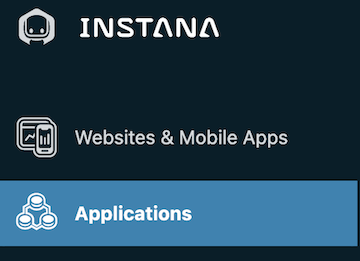
On the Instana menu click Applications from JavaScript snippet window, or navigate to Websites & Mobile Apps and click on your application name.
-
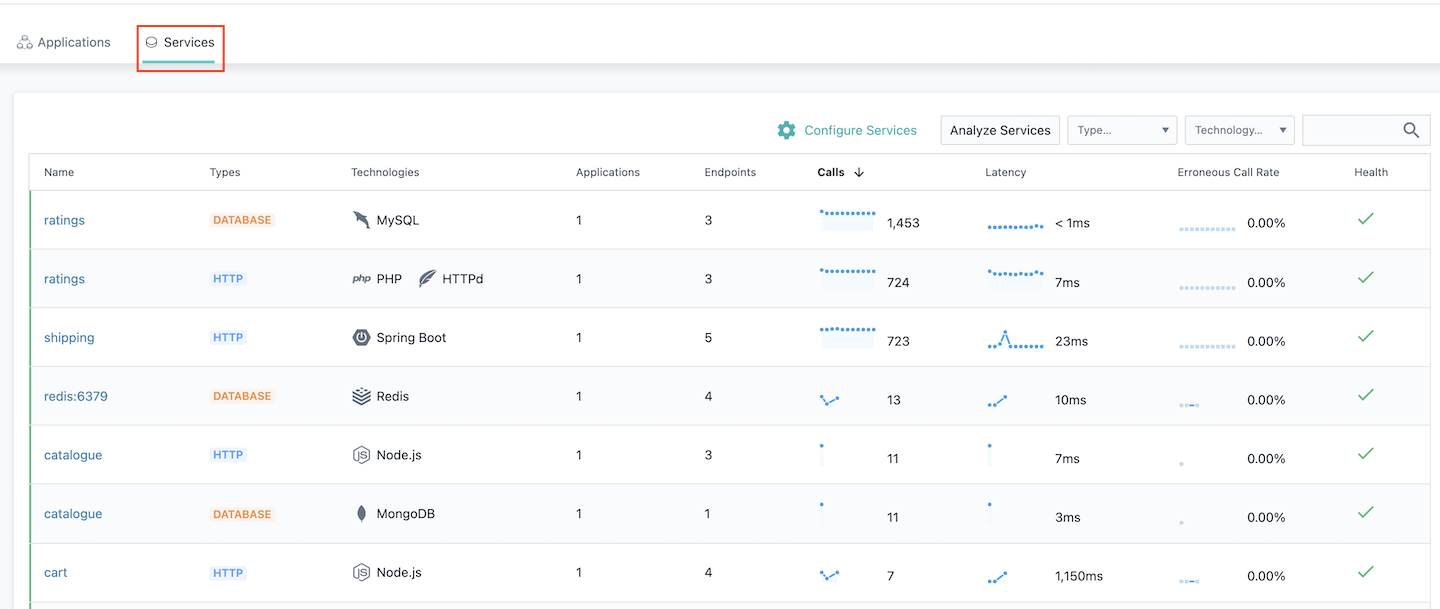
Click on the Services tab at the top to view the list of services
-
Click on the Applications tab at the top then click on All Services to view the summary of all services

-
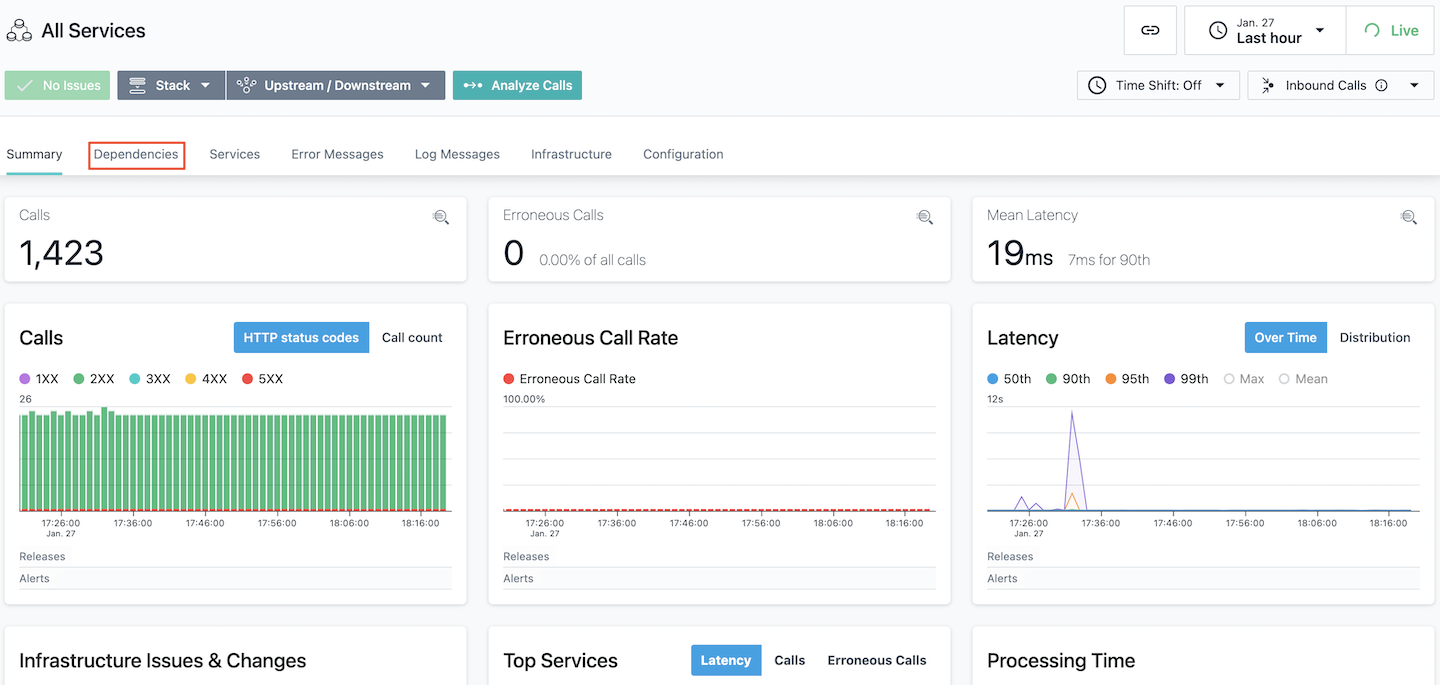
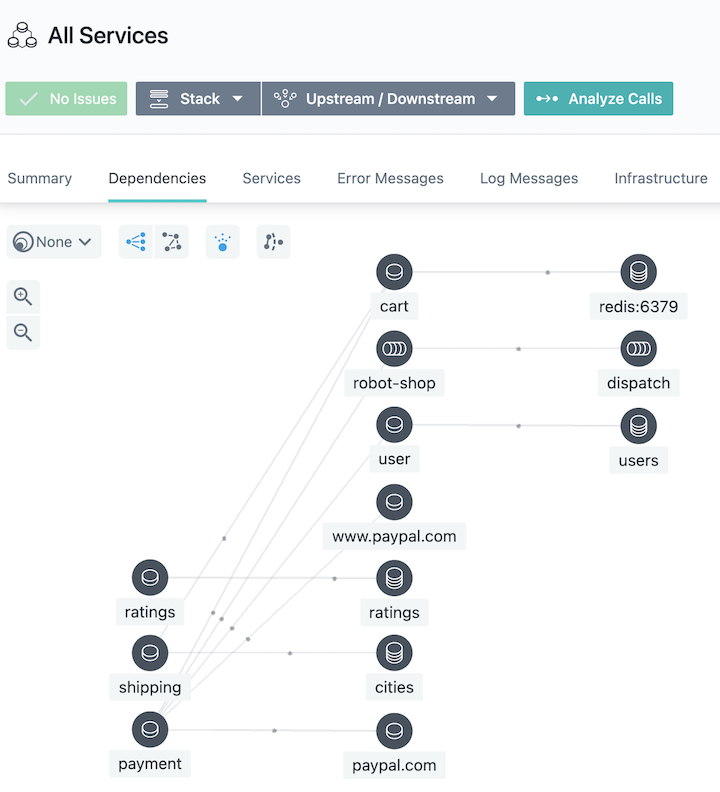
From the services summary page click on the Dependencies tab to view the services dependencies
-
The Dependencies view shows the dependencies between the services
Install Grafana
In this section you will install the Grafana operator and a Grafana instance into the tools namespace in the cluster. Grafana will be used to display graphs from data in Instana
Infrastructure
Modify the 1-infra/kustomization.yaml file to setup the tools namespace. In this case the tools namespace already exists because it was created by the bootstrap.sh script. We need to deploy the tools infrastructure objects because in addition to the namespace it also deploys an operator group needed by the Grafana operator.
- Navigate to the
/multi-tenancy-gitops/gitops-instana/gitops-0-bootstrap/0-bootstrap/single-cluster/1-infradirectorycd ../1-infra - Edit the Infrastructure layer
${GITOPS_PROFILE}/1-infra/kustomization.yamlwith the editor of your choice.vim kustomization.yaml -
Uncomment the following line, save and exit the editor
- argocd/namespace-tools.yaml -
Commit the changes to the
multi-tenancy-gitopsrepogit add . && git commit -m "add tools namespace" && git push origin -
In Argo CD click Refresh on the infra application to manually trigger the changes.
-
You should see the new namespace-tools application created in Argo with a status of "Healthy/Synced". This will update the objects in the
toolsnamespace in Openshift.
Secret
Before we can deploy the Grafana service we first we need to configure a secret used by Grafana to communicate with Instana
-
The Grafana service needs two pieces of information from Instana, the Instana host URL and an API Token. The Instana host URL can be found on the Techzone Reservation tile as described above. To retrieve the API Token log in to the Instana server and click on the
Settingsgear on the menu
-
Under
Access Controlclick onAPI Tokens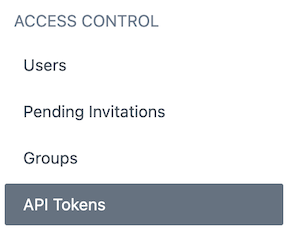
-
The Techzone
Instana - self deploy on VSIreservation process created anAPI Token.
-
If you used a different process to create your Instana server you can create an
API Token-
Start by clicking on
Add API Token
-
Give your API Token a name

-
Scroll to the bottom and click Save to save your API Token. There is no need to give it any additional permissions

-
-
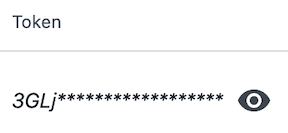
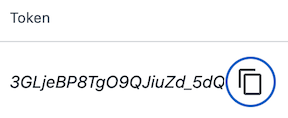
Click the eye to view your API Token
-
Click copy to copy your API Token
-
Execute the following command to create the
instana-backendsecret in thetoolsnamespace. Be sure to replace<API-TOKEN>and<INSTANA-URL>with your values
oc create secret generic instana-backend -n tools \
--from-literal=API_TOKEN=<API-TOKEN> \
--from-literal=INSTANA_URL=<INSTANA-URL>
Services
In this section we will deploy the Grafana Service.
-
Edit the Services layer
${GITOPS_PROFILE}/2-services/kustomization.yaml- Navigate to the
/multi-tenancy-gitops/gitops-instana/gitops-0-bootstrap/0-bootstrap/single-cluster/2-servicesdirectorycd ../2-services - Edit the Services layer
${GITOPS_PROFILE}/2-services/kustomization.yamlwith the editor of your choice.vim kustomization.yaml -
Uncomment the following lines under the
# CICDsection, save and exit the editorImportant
Make sure you uncomment the grafana-instana.yaml yaml and NOT the grafana-instance.yaml
- argocd/operators/grafana-operator.yaml
- argocd/instances/grafana-instana.yaml
- Navigate to the
-
Commit the changes to the cluster
git add . && git commit -m "add grafana" && git push origin -
In Argo CD click Refresh on the services application to manually trigger the changes.
-
In Argo CD you should see the new grafana-operator and grafana-instana applications. After a few minutes their status will change to
Healthy/Synced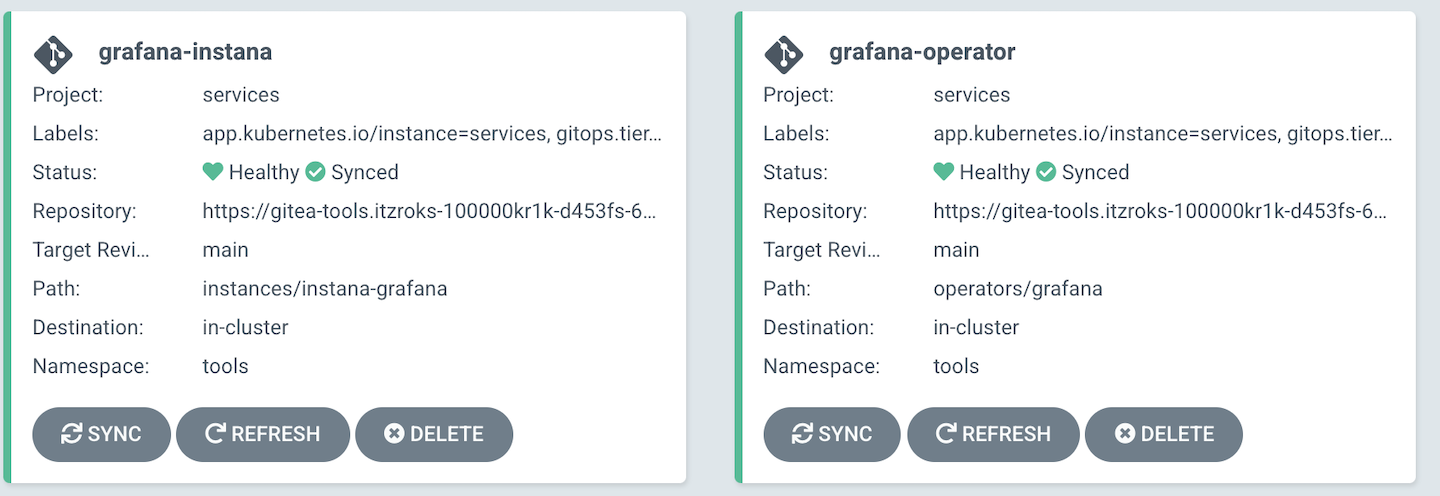
Grafana Charts
In this section you will log in to the Grafana UI and view charts based on data from Instana
- Run the commands below to retrieve the Grafana URL and credentials. Open the Grafana UI in a new browser tab.
Note
Be sure not to include any extra characters from the end of the URL returned with the following command
oc get route -n tools grafana-route -o template --template='https://{{.spec.host}}' &&
oc extract -n tools secrets/grafana-admin-credentials --to=-
-
In the lower left-hand side of the screen click Sign In

-
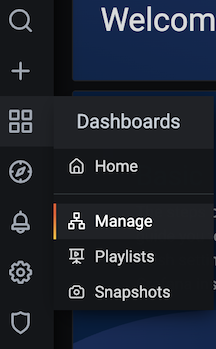
After logging in, on the left hover over the 4 squares to display the Dashboards menu and click Manage
-
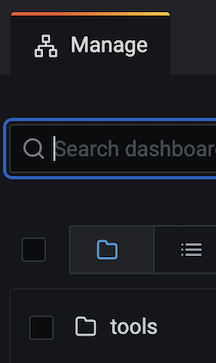
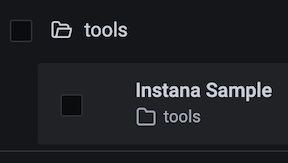
Click on the tools folder
-
Click on the Instana Sample dashboard
-
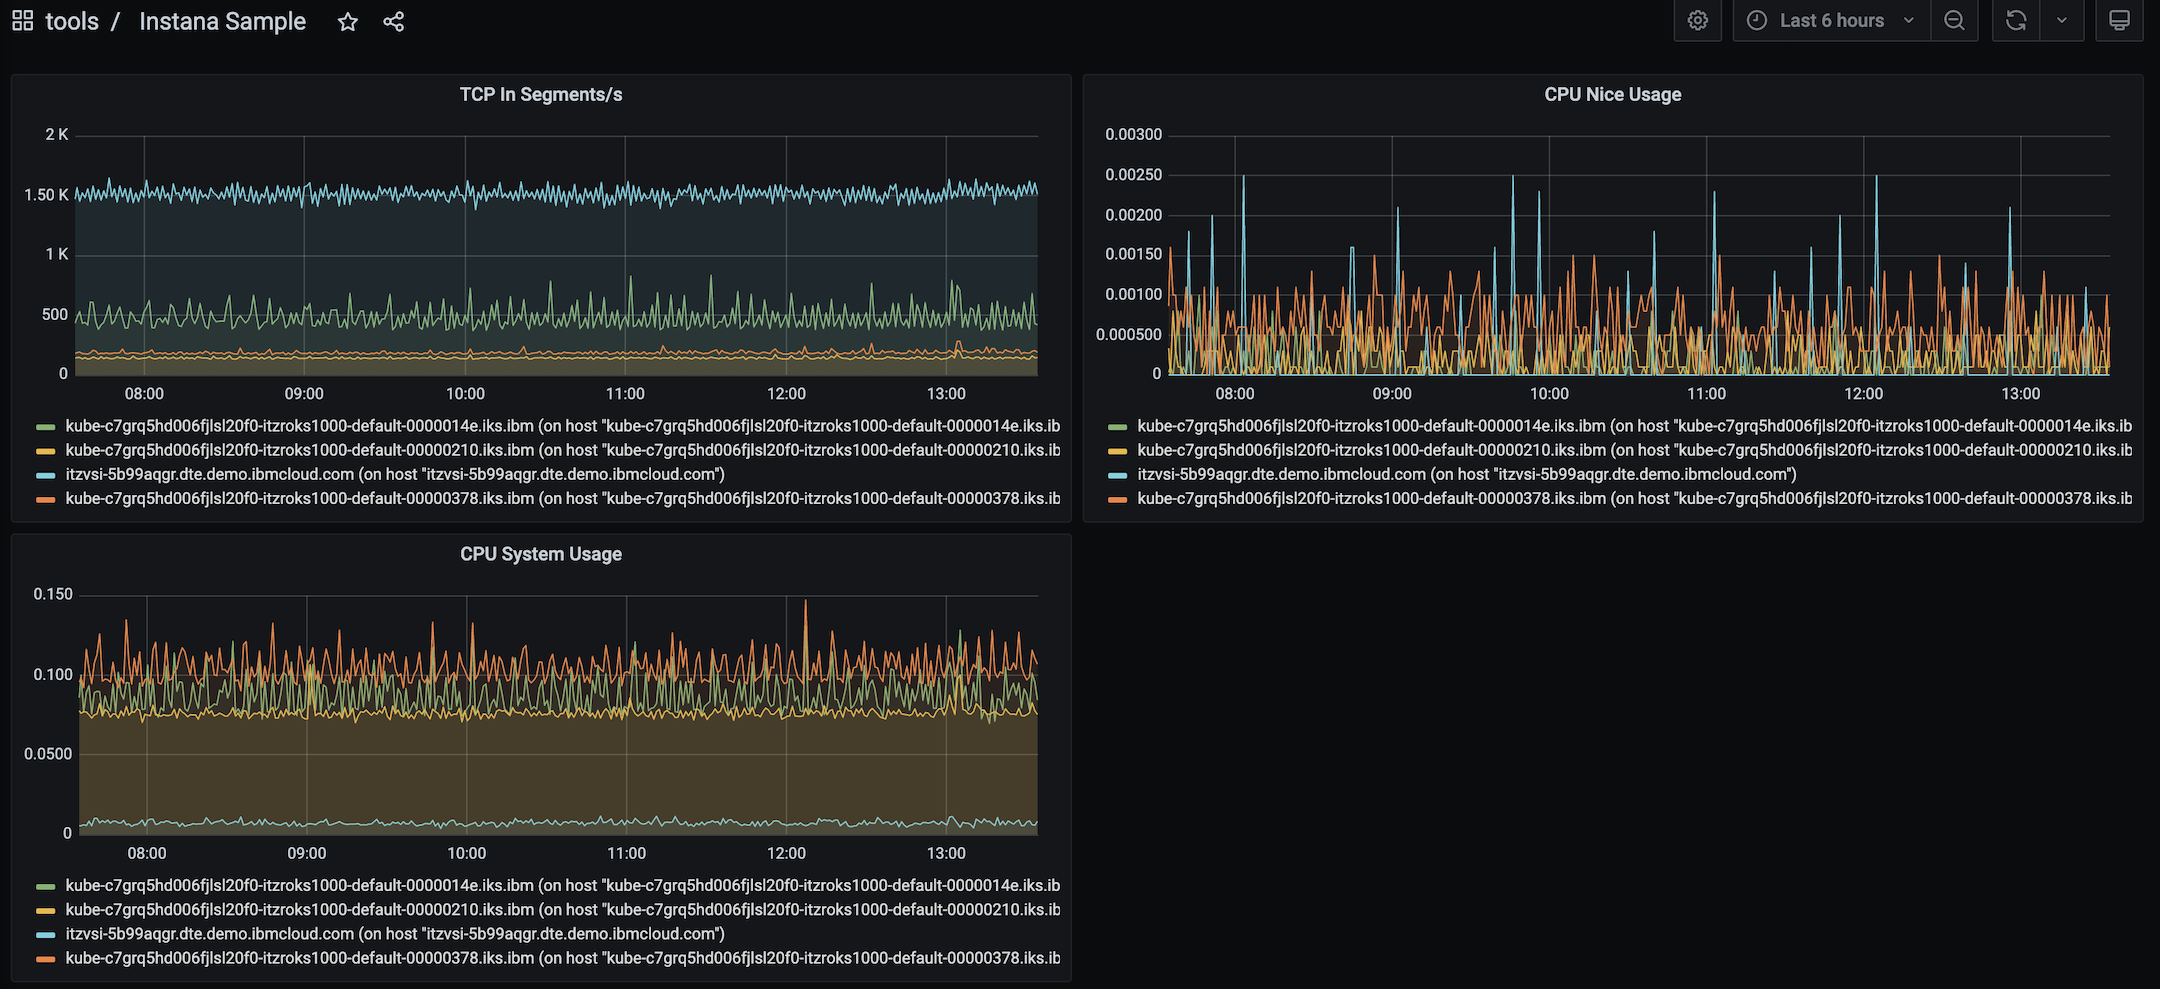
The Instana Sample dashboard is displayed
Congratulations!
You have completed this lab