Cloud Pak for Data - Data Governance - Healthcare Demo
Introduction
The instructions in this section will walk you through the steps necessary for setting up a demo environment that can be quickly shown to customers to showcase the art of the possible.
This demo in no way removes the need for following the tutorial style instructions that are documented in other sections of this guide. The instructions below will set up a pre-canned application demo environment to show to the customers.
Pre-requisites
Create a custom Git Organization
Create a new Git Organization to host the different GitOps repositories.
Note
Make sure you do not populate your GitHub organization with cloned repositories. The GitHub organization must be empty and will be populated automatically by the environment provisioning.
Instructions:
-
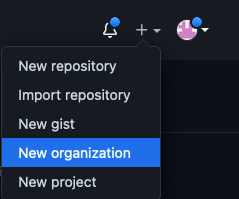
Log in to http://github.com and select the option to create a New organization.
-
Click on
Create a free organizationplan. -
Complete the wizard by filling in the
Organization account nameandContact emailfields. Select theMy personal accountbullet and complete the verification step and click Next. -
Skip the step to add members to the Organization.
-
Complete the
Welcome to GitHubquestionnaire and click Submit. -
Congratulations, you have successfully created a new Github Organization.
Note
Please ensure your GitHub organization is Public and not Private.
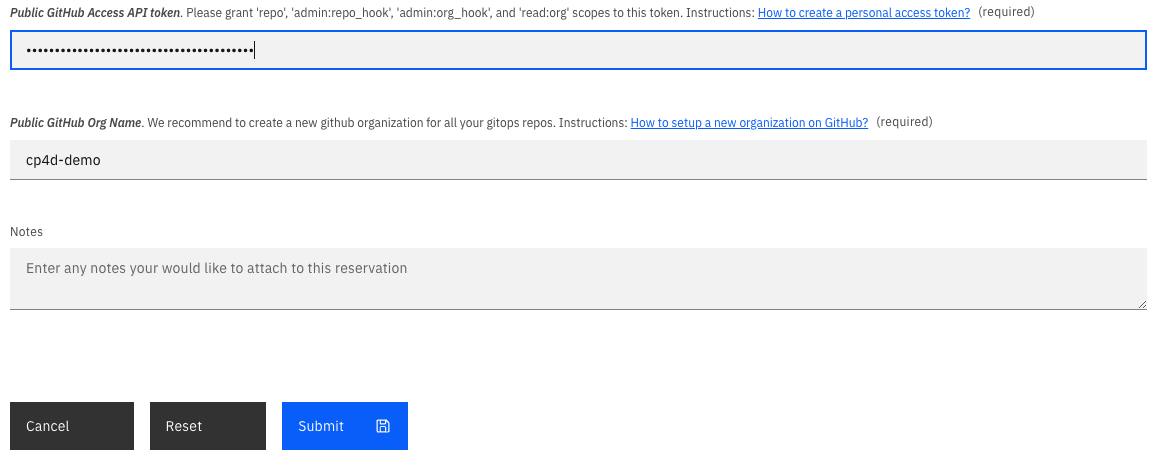
Create a Git Personal Access Token (PAT)
Create a new Git Personal Access Token with the appropriate scopes. This will be required to run the application pipelines or to set up webhooks.
Instructions:
-
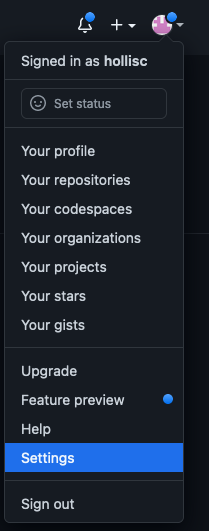
Log in to http://github.com and click on Settings.
-
Select Developer settings and click on Personal access tokens.
-
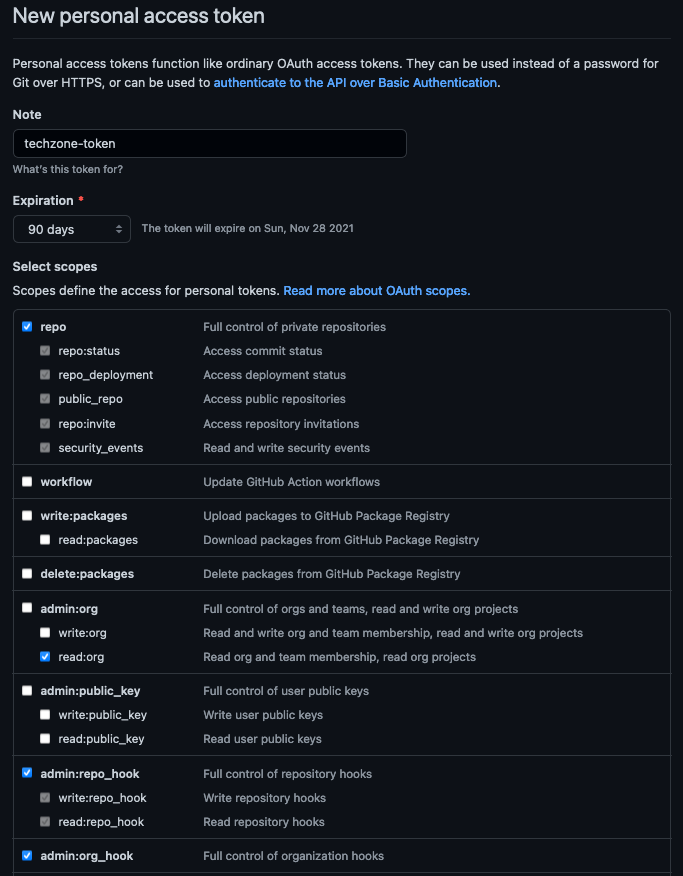
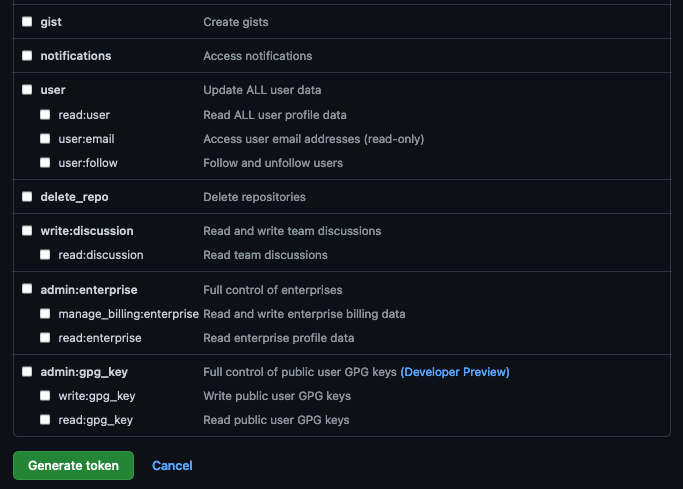
Provide a name for the token, set the
Expirationto 90 days ,set the following scopes and click Generate token.GitHub Personal Access Token scopes
-
Copy and save the Personal Access Token. You will not be able to retrieve this value again later.
Red Hat OpenShift on IBM Cloud cluster with CP4D Healthcare Demo
Create the cluster
-
Provision a Red Hat OpenShift on IBM Cloud cluster with CP4D Healthcare Demo from IBM Technology Zone. Select the
ROKS Cluster with CP4D Healthcare Demotile.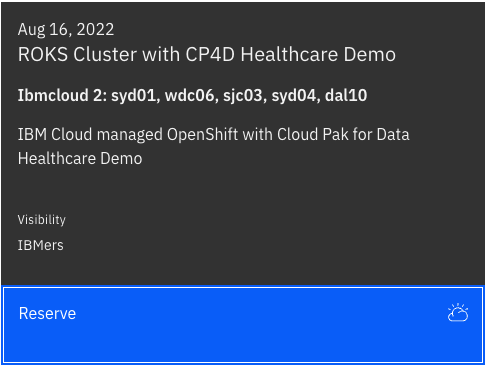
-
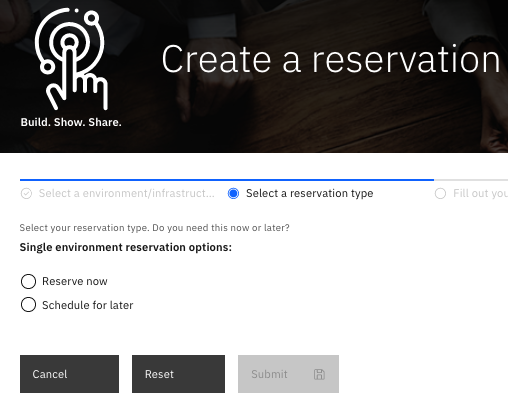
Click the Reserve now radio button.
-
Provide a name for the cluster, select Practice / Self-Education for the purpose and choose the region to provision the cluster.
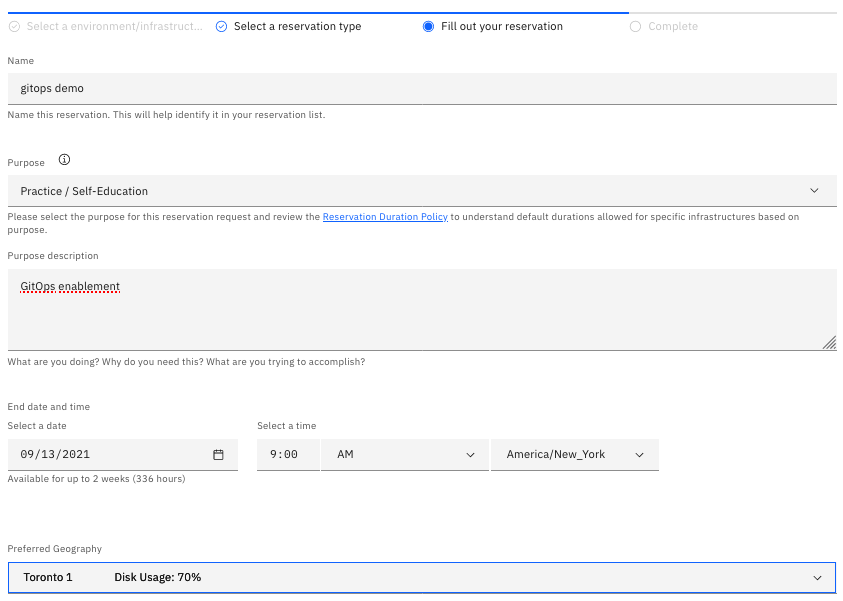
-
Once a Preferred Geography has been selected, provide the GitHub Access API Token and GitHub Organization created from the Pre-requisites section. Finally, click Submit.
Note
Ensure that you enter just the name of your GitHub Public Organization (for instance gitops-magic-2022) and not the full URL.
Use the cluster
You will receive an email once the cluster provisioning is complete. The email will contain details on the cluster including the ArgoCD Console URL and admin credentials. This same information can also be found on the My reservations from IBM Technology Zone.

Once your cluster is ready, proceed to the next step.
Install required CLIs
- Install the Github CLI (version 1.14.0+)
-
Install the OpenShift CLI
oc(version 4.7 or 4.8)-
Log into your OCP cluster, substituting the
--tokenand--serverparameters with your values:oc login --token=<token> --server=<server>If you are unsure of these values, click your user ID in the OpenShift web console and select
Copy login command.
-
-
Install the kubeseal CLI
The kubeseal utility uses asymmetric crypto to encrypt secrets that only the controller can decrypt. These encrypted secrets are encoded in a SealedSecret resource which can safely be checked into your gitops repo. The controller will decrypt the secretes and install into your cluster.
Cloud Pak for Data Installation
-
By now, you should already have a Red Hat OpenShift on IBM Cloud cluster with GitOps configuration bootstrapped for you. Furthermore, the deployment of Cloud Pak for Data (CP4D) 4.0.x, Watson Knowledge Catalog (WKC), DataStage (DS) and Data Virtualization (DV) services will be in progress.
If you open ArgoCD, which is the GitOps tool being installed by the Red Hat OpenShift GitOps Operator, using the Argo CD URL provided in the email shown in the previous section, you will see that your ArgoCD GitOps application has been bootstrapped to monitor the
multi-tenancy-gitopsrepository that has been forked into the GitHub organization you provided when requesting the quickstart environment. The CP4D resources mentioned above has already been selected and the deployment will take approximately 3.5 hours.Once Cloud Pak for Data and the selected services has been successfully installed, the Healthcare Demo assets will also be automatically deployed. A review of the installed demo assets will be covered below.
Verifying the Installations
-
Verify the status of the Cloud Pak for Data control plane
oc get ZenService lite-cr -n tools -o jsonpath="{.status.zenStatus}{'\n'}"Cloud Pak for Data control plane is ready when the command returns
Completed. If the command returns another status, wait for some more time and rerun the command. -
Verify the status of DataStage
oc get DataStage datastage-cr -n tools -o jsonpath="{.status.dsStatus} {'\n'}"DataStage is ready when the command returns
Completed. If the command returns another status, wait for some more time and rerun the command. -
Verify the status of Data Virtualization
oc get DvService dv-service -n tools -o jsonpath="{.status.reconcileStatus}{'\n'}"Data Virtualization is ready when the command returns
Completed. If the command returns another status, wait for some more time and rerun the command. -
Verify the status of Watson Knowledge Catalog
oc get WKC wkc-cr -n tools -o jsonpath='{.status.wkcStatus} {"\n"}'Watson Knowledge Catalog is ready when the command returns
Completed. If the command returns another status, wait for some more time and rerun the command.Tip
In the event that the status of the WKC instance has failed, check the pods (
igc-ui-react-*,gov-admin-ui-*,gov-quality-ui-*,gov-enterprise-search-ui-*). If the pods are continuously restarting, the likely cause is that there is insufficient time before the readiness probe restarts the pod.To resolve this issue, access the OpenShift console, modify the Deployment of the pods and add the following
startupProbeto.spec.template.spec.containers.startupProbe: tcpSocket: port: 50000 failureThreshold: 30 periodSeconds: 300
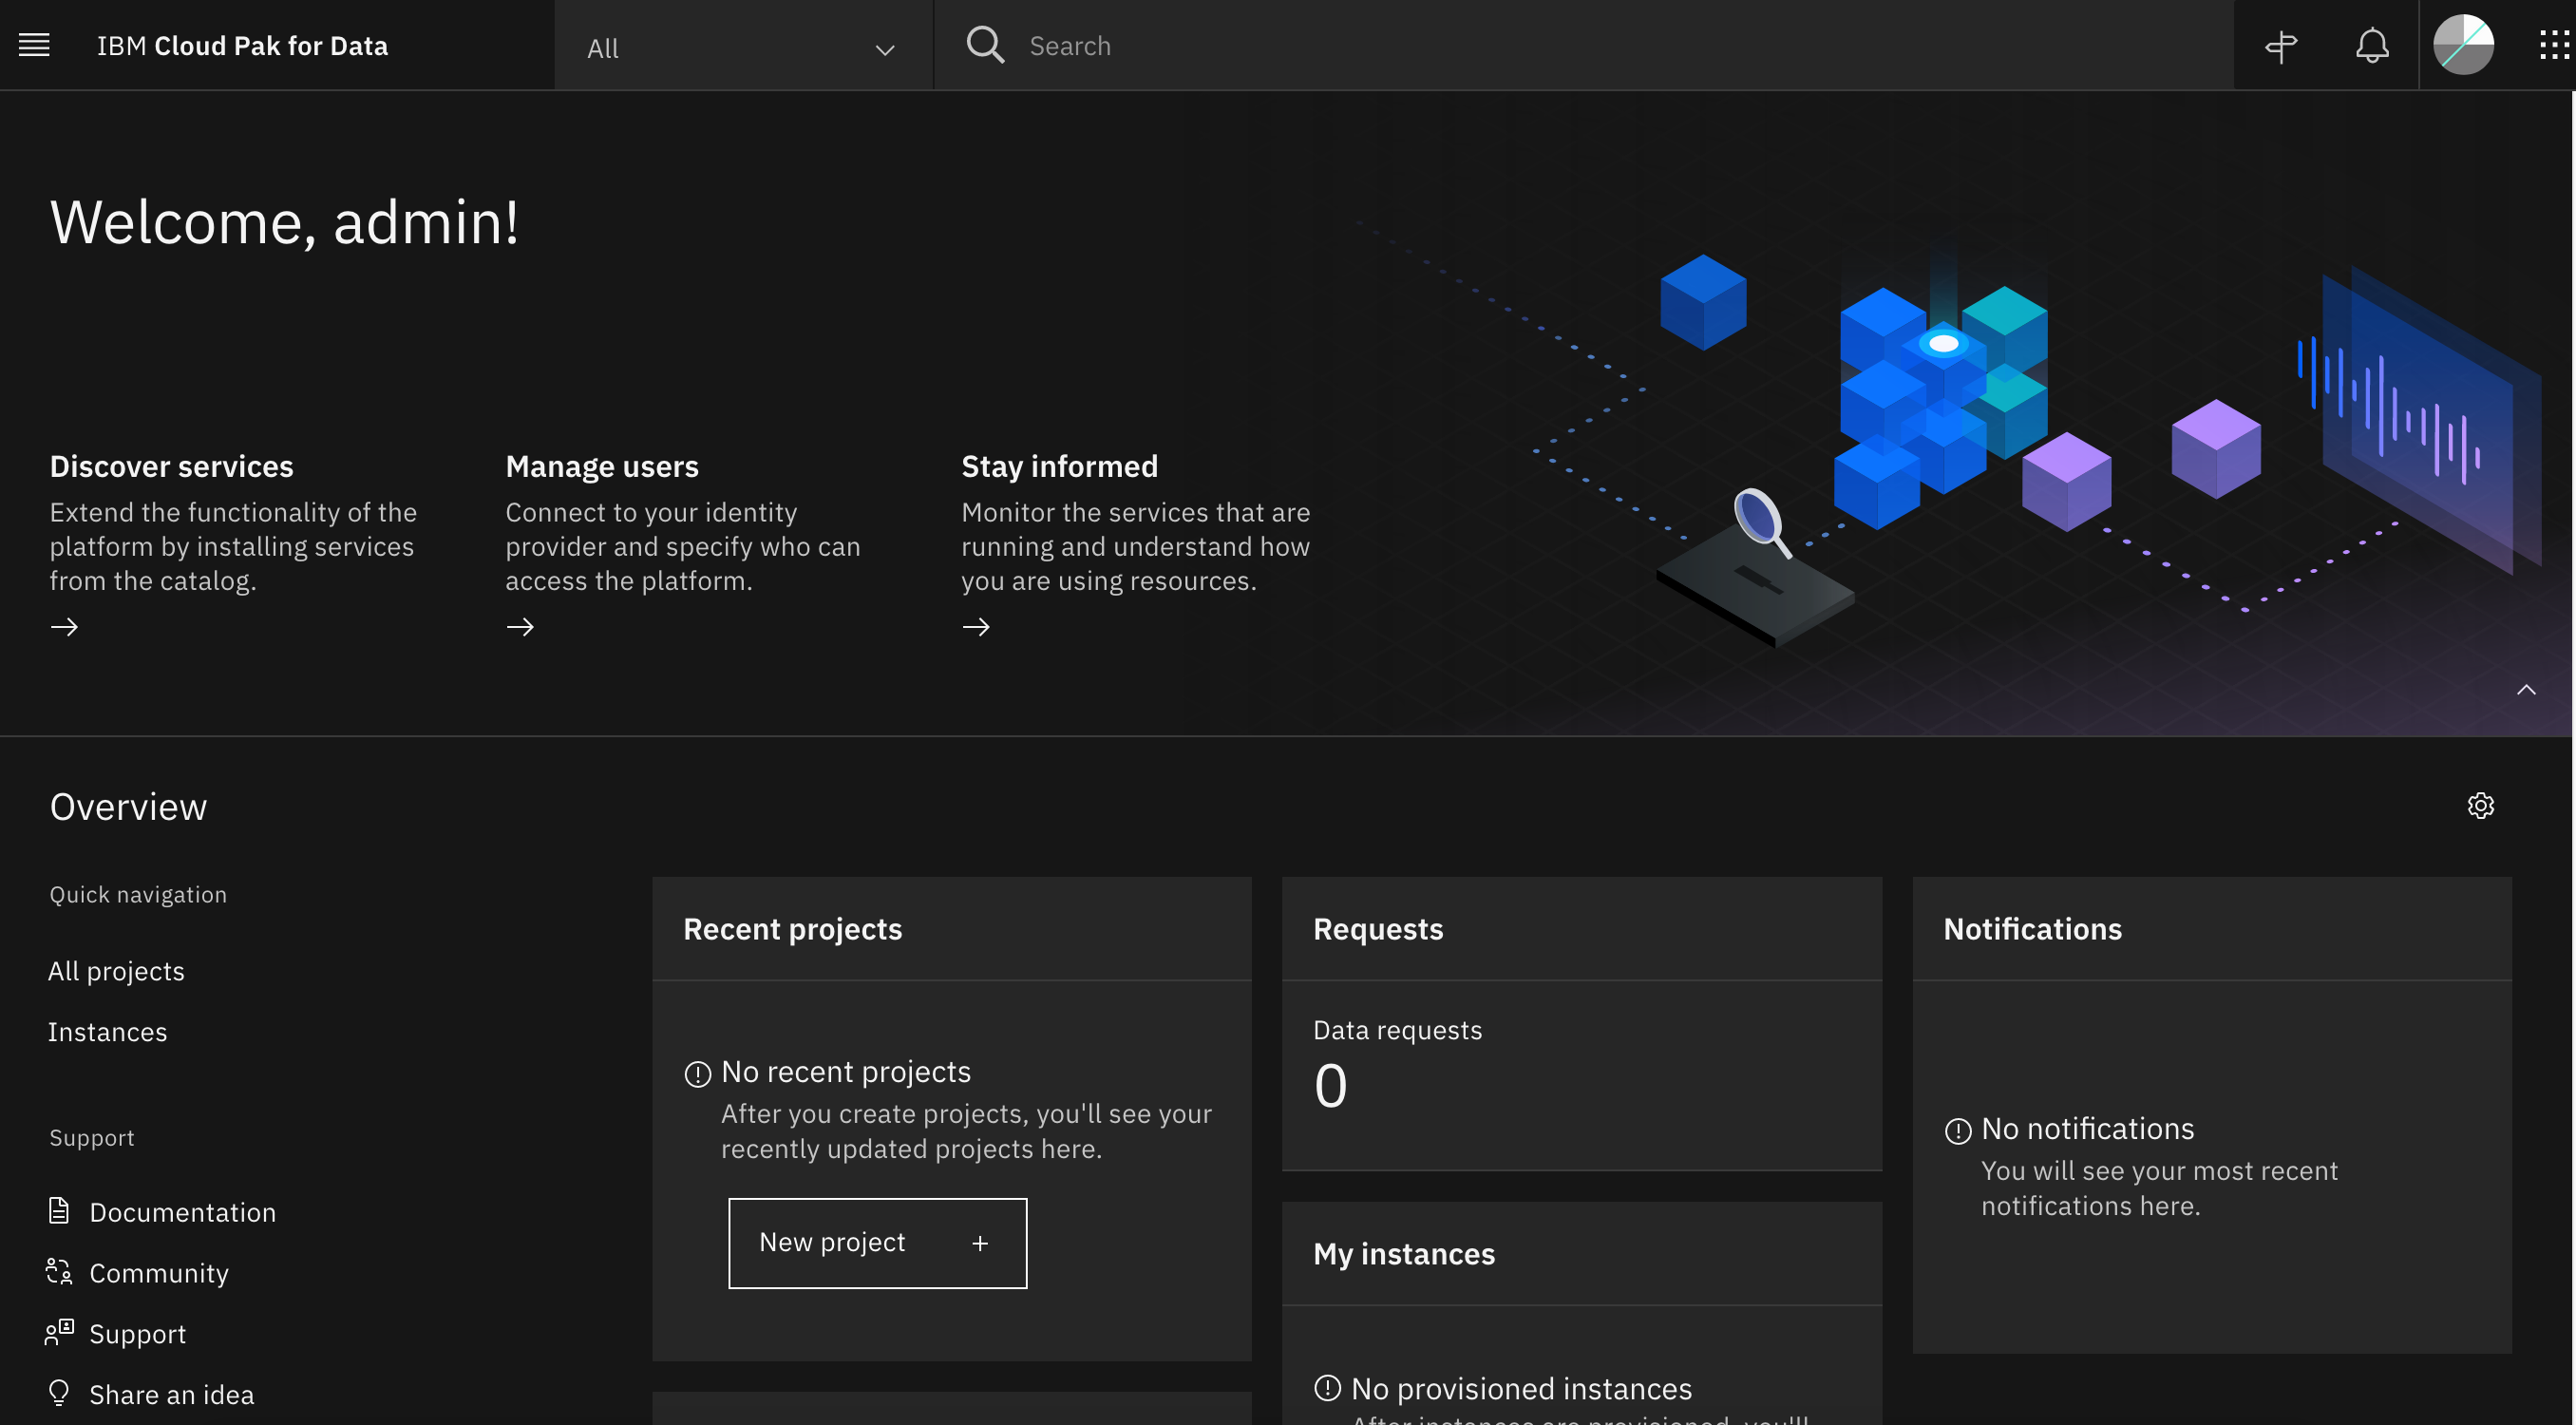
Cloud Pak for Data UI
-
Get the URL of the Cloud Pak for Data web client and open it in a browser.
echo https://`oc get ZenService lite-cr -n tools -o jsonpath="{.status.url}{'\n'}"` -
The credentials for logging into the Cloud Pak for Data web client are
admin/<password>where password is stored in a secret.oc extract secret/admin-user-details -n tools --keys=initial_admin_password --to=- -
Log into the IBM Cloud Pak for Data UI using the password from previous step.
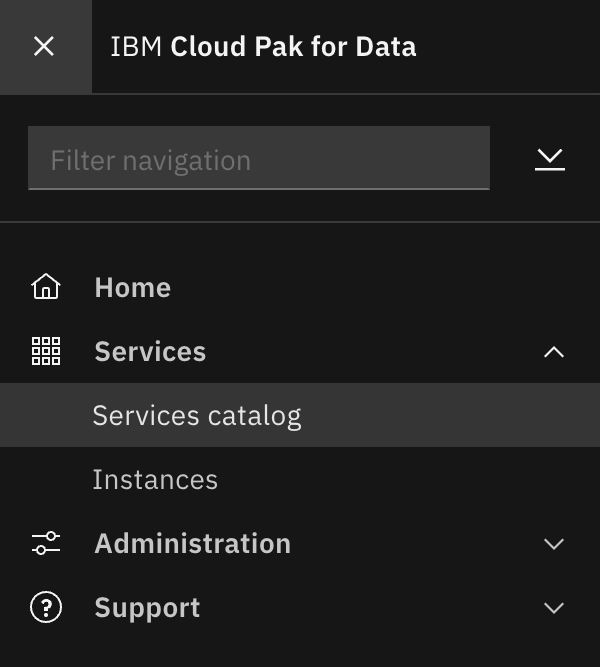
-
Click on the navigation menu icon on the top left corner. Click on Services menu option to expand it, then select Services catalog.
-
Under Status, select "Enabled" to display only the services that are installed and enabled in Cloud Pak for Data.
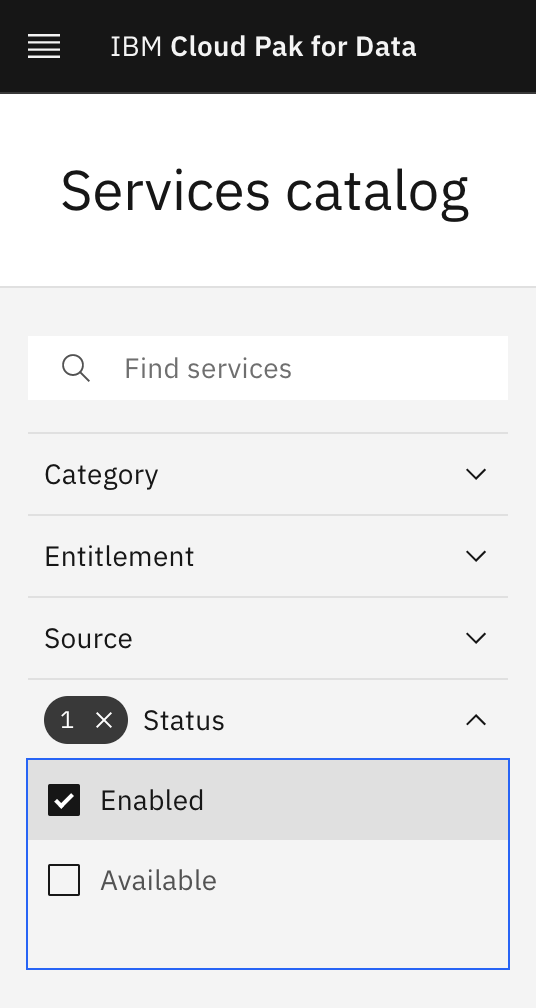
-
Notice the
Enabledtag next to the listed services. There might be other enabled services as well.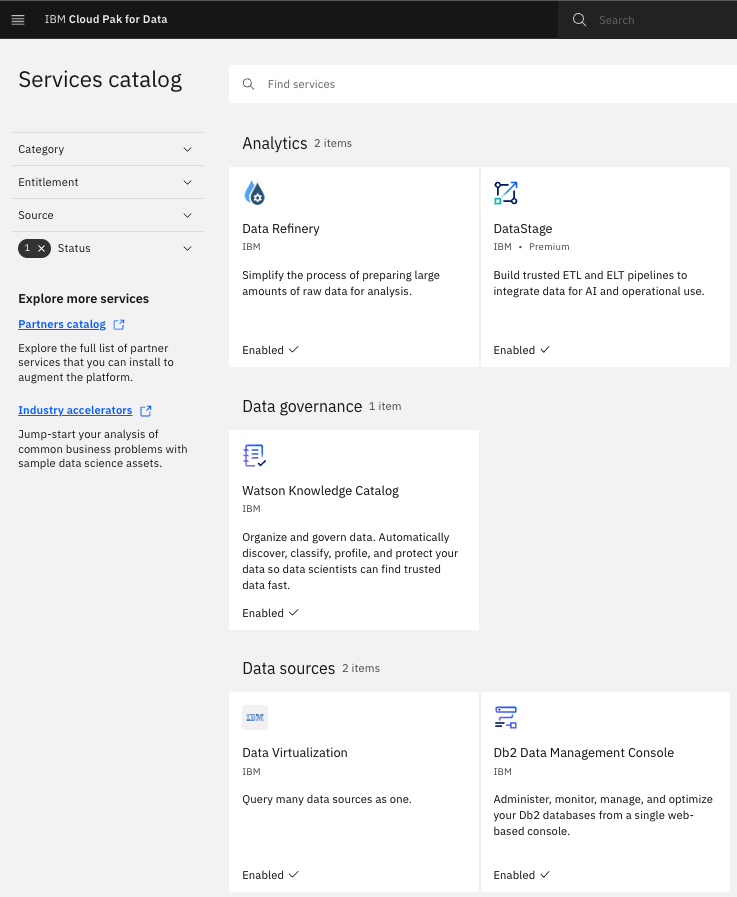
Data Governance - Healthcare Demo
Overview
The Healthcare demo looks at the interactions between data engineers, data stewards and data scientists. It walk through how to discover, classify and analyze the data, how to incorporate data privacy and finally, how the data can be consumed.
Demo artifacts
At this point, you have a Red Hat OpenShift on IBM Cloud cluster with Cloud Pak for Data services (Watson Knowledge Catalog, DataStage and Data Virtualization) deployed. The automation has also created the artifacts required for the demo using CP4D cli and APIs. Let's review what has been created.
-
Users - From the CP4D console home page, click on
Manage usersand confirm the three usersDataEngineer-auto,DataSteward-autoandDataScientist-autoexists. The default password for these users ispassw0rd!.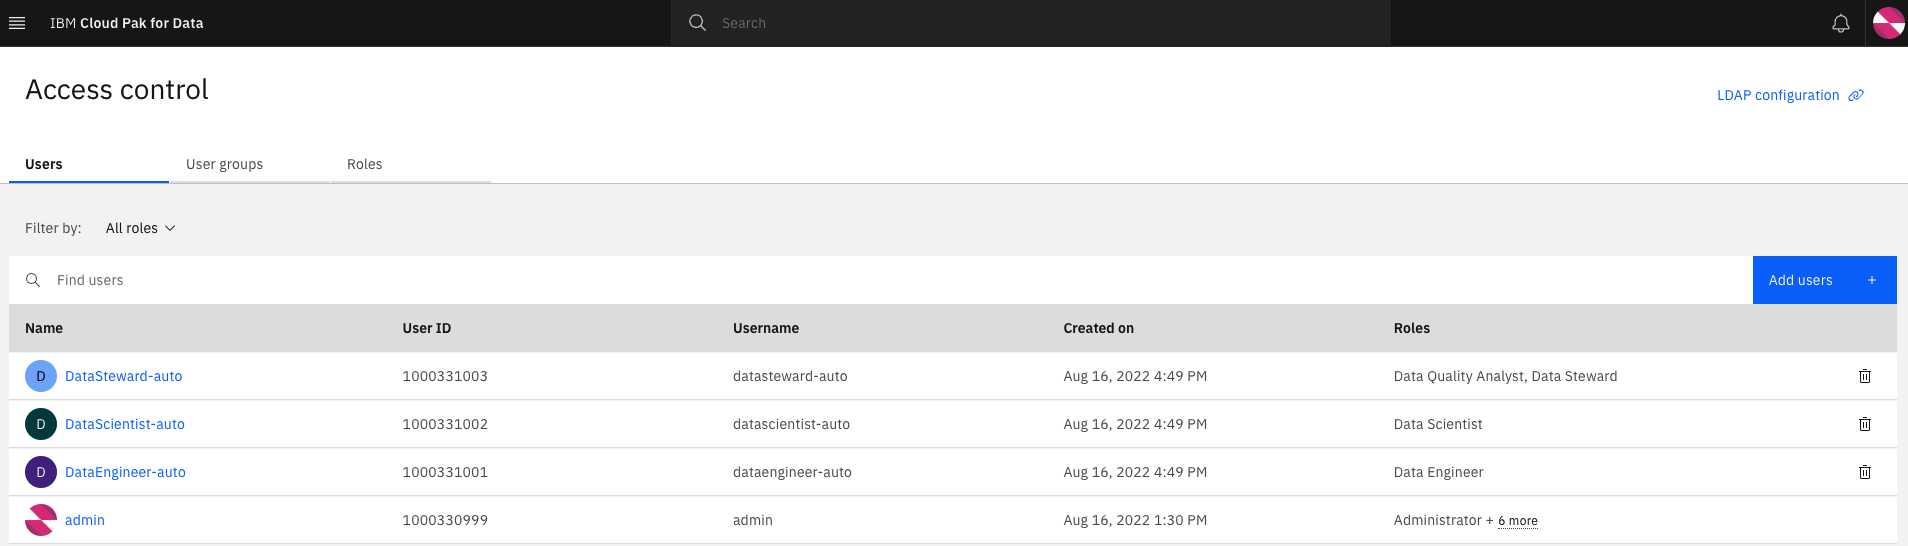
-
Data Source - From the OpenShift console in the tools namespace, a StatefulSet
db2has been deployed on the cluster and at start up, a database calledBLUDBwas created and 3 data sets were imported.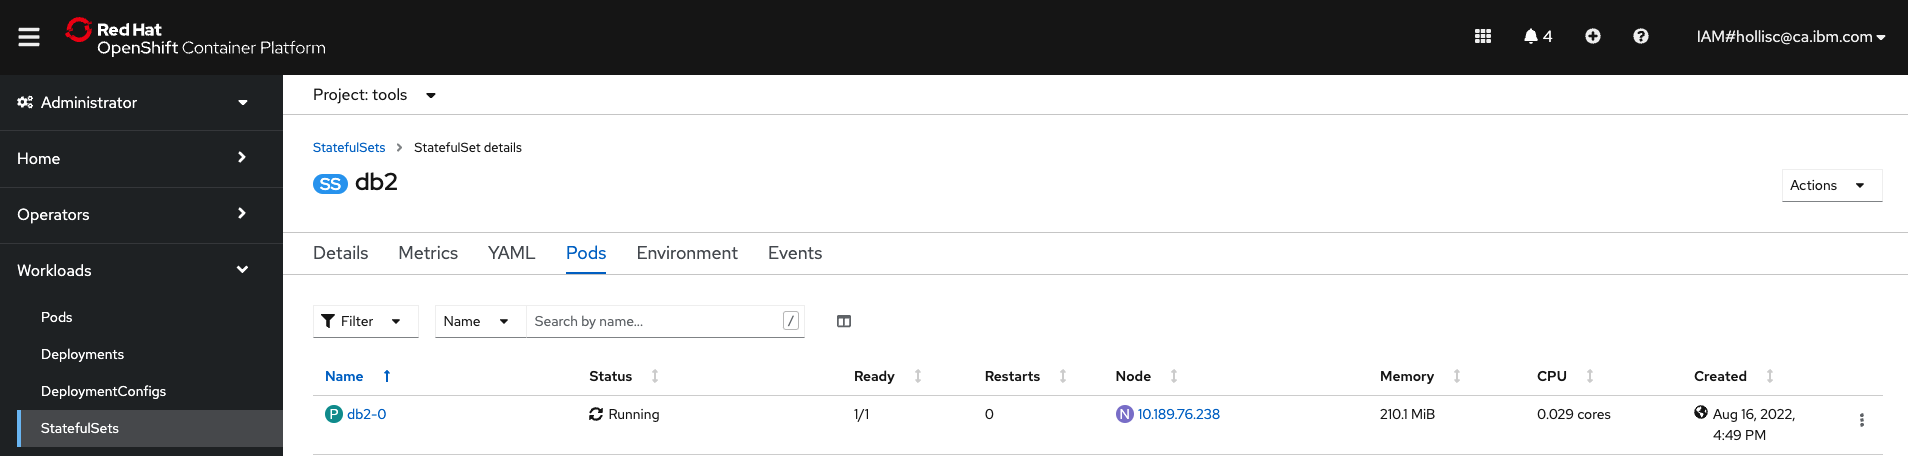
- Import of sample "patient" data
SQL3109N The utility is beginning to load data from file "patients.csv". SQL3110N The utility has completed processing. "587" rows were read from the input file. SQL3221W ...Begin COMMIT WORK. Input Record Count = "587". SQL3222W ...COMMIT of any database changes was successful. SQL3149N "587" rows were processed from the input file. "586" rows were successfully inserted into the table. "0" rows were rejected. Number of rows read = 587 Number of rows skipped = 1 Number of rows inserted = 586 Number of rows updated = 0 Number of rows rejected = 0 Number of rows committed = 587- Import of sample "conditions" data
SQL3109N The utility is beginning to load data from file "conditions.csv". SQL3110N The utility has completed processing. "4218" rows were read from the input file. SQL3221W ...Begin COMMIT WORK. Input Record Count = "4218". SQL3222W ...COMMIT of any database changes was successful. SQL3149N "4218" rows were processed from the input file. "4217" rows were successfully inserted into the table. "0" rows were rejected. Number of rows read = 4218 Number of rows skipped = 1 Number of rows inserted = 4217 Number of rows updated = 0 Number of rows rejected = 0 Number of rows committed = 4218- Import of sample "encounters" data
SQL3109N The utility is beginning to load data from file "encounters.csv". SQL3110N The utility has completed processing. "27626" rows were read from the input file. SQL3221W ...Begin COMMIT WORK. Input Record Count = "27626". SQL3222W ...COMMIT of any database changes was successful. SQL3149N "27626" rows were processed from the input file. "27625" rows were successfully inserted into the table. "0" rows were rejected. Number of rows read = 27626 Number of rows skipped = 1 Number of rows inserted = 27625 Number of rows updated = 0 Number of rows rejected = 0 Number of rows committed = 27626 -
DataStage flow - From the CP4D console home page, click on the hamburger button on the top left and go back to the
Homepage. Under the Recent projects tile, click onhealthcare-data-stageproject and select theAssetstab.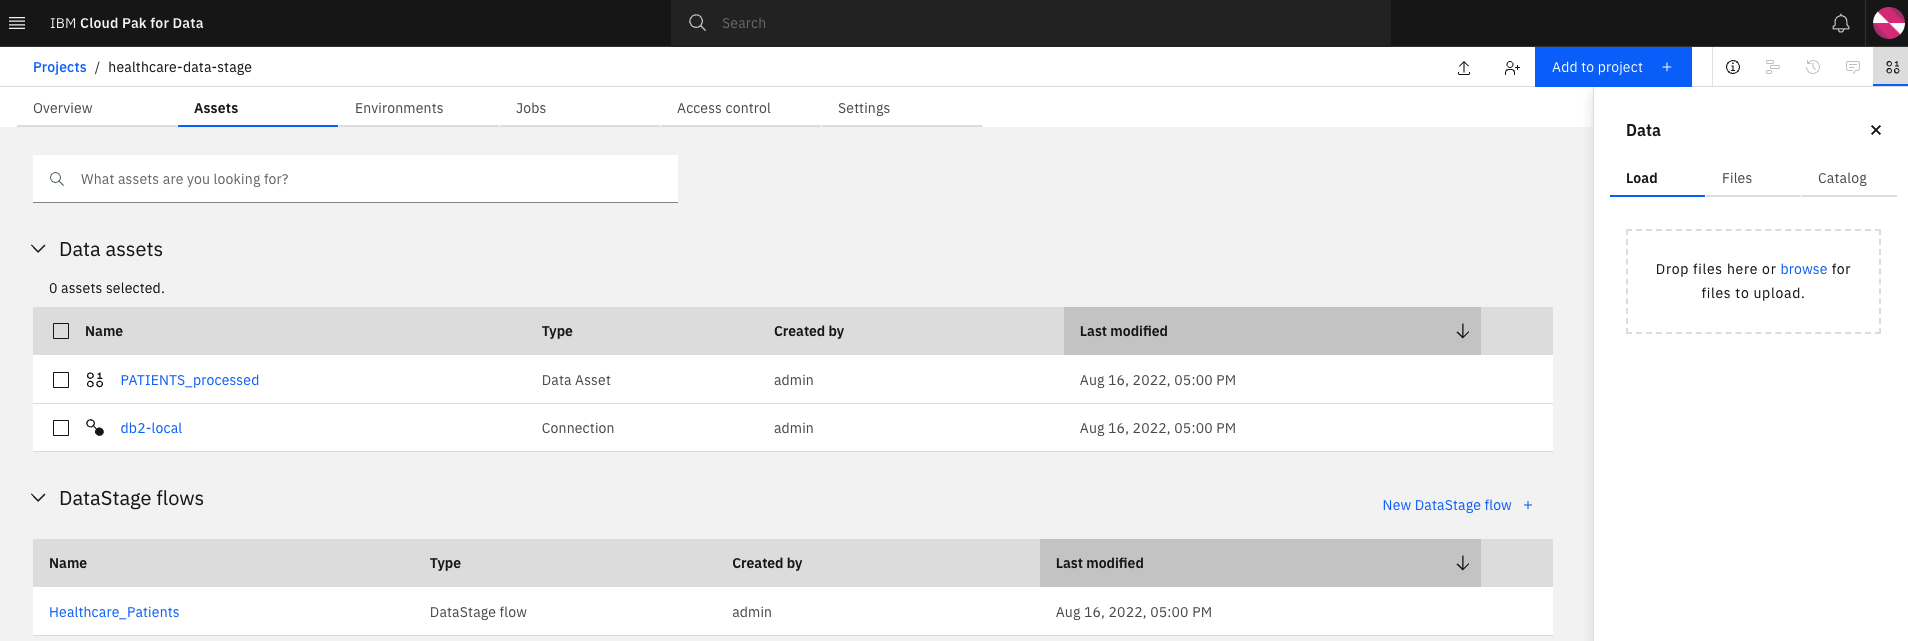
The imported project contains the following assets:
- Connection - A connection to the DB2 container running on the OpenShift cluster.
-
DataStage flow - A flow that will take the
PATIENTSdata from DB2 as input and transform the data to add a new columnAGEwhich is calculated based on the patient's birth date. The new column is written to a new db schema in the DB2 container.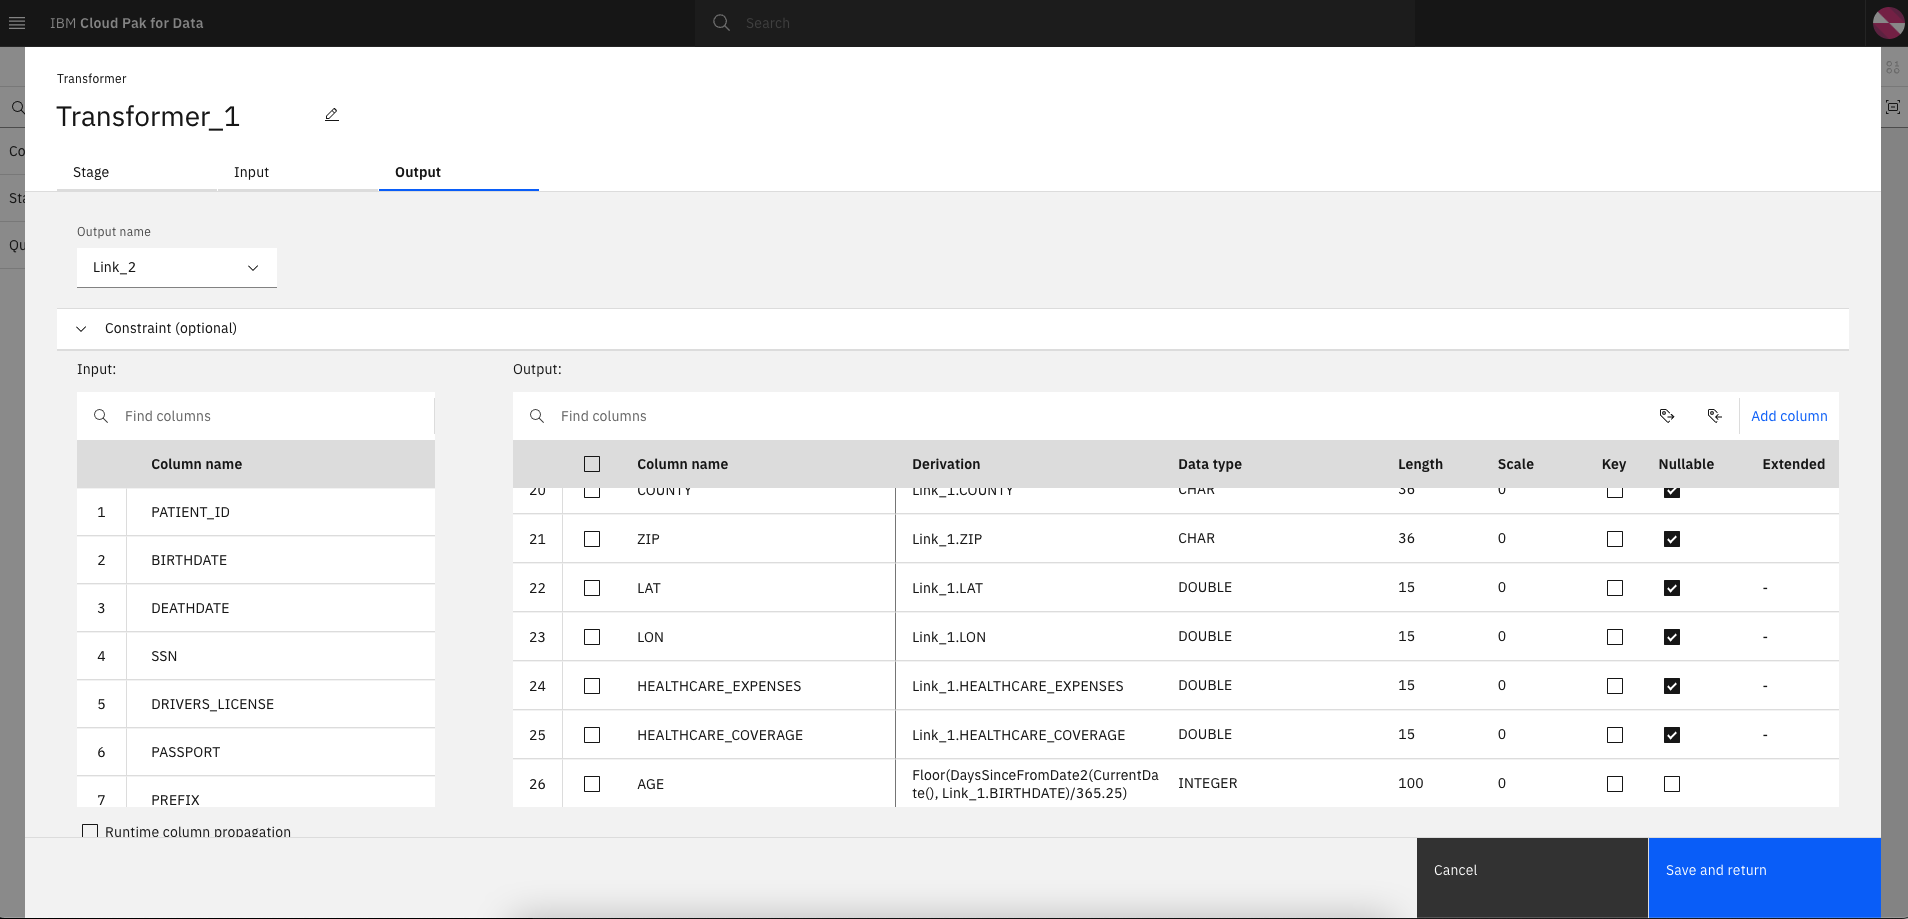
-
Data Asset - For this specific flow, a new db schema which contains the additional AGE column is written to DB2 and can be previewed from within the CP4D console.s
-
Governance artifacts - From the CP4D console home page, click on the hamburger button on the top left and go back to the
Homepage. Healthcare specific Business terms and Data classes have been imported and will be used during the Data Quality analysis.- Under the All governance artifacts tile, click on
Business termsand review the imported business terms. - Under the All governance artifacts tile, click on
Data classesand review the imported data classes.

- Under the All governance artifacts tile, click on
-
Data Virtualization instance - From the CP4D console home page, click on the hamburger button on the top left and go back to the
Homepage. Under the My instances tile, click onView alland confirm that an instance ofdvhas been created.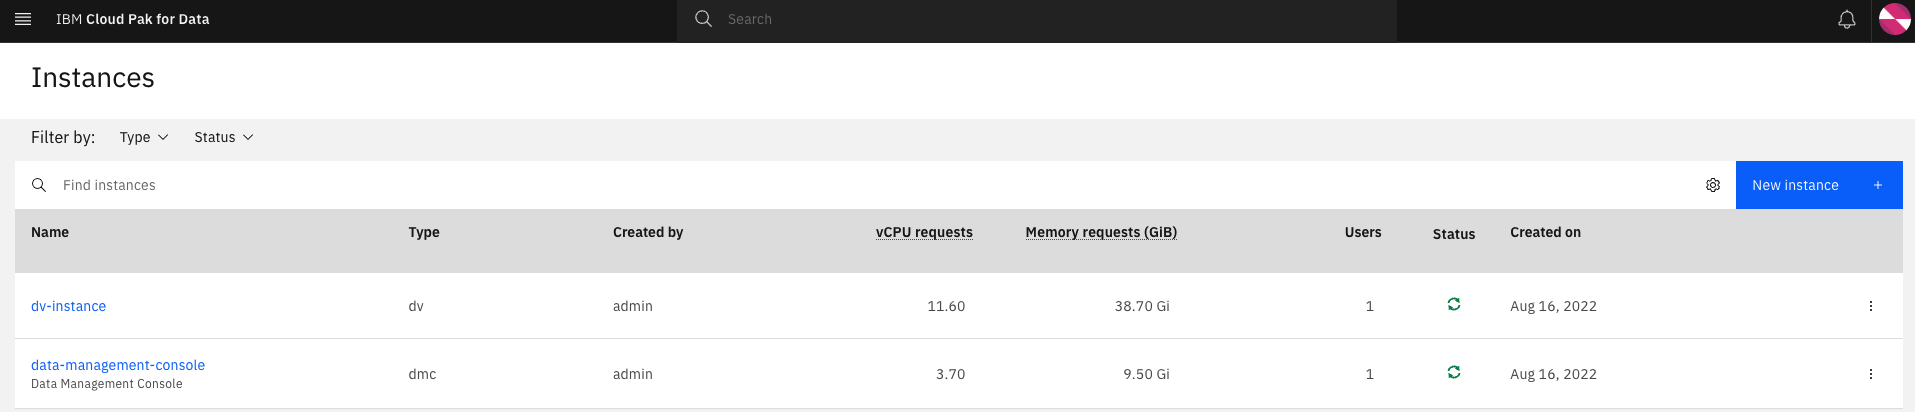
Demo 1 - Run a DataStage flow
The imported DataStage flow will read the PATIENT data from the DB2 container, create a copy of the data with an additional AGE, and save the data in a new table in the database.
-
Get the URL of the Cloud Pak for Data web client and open it in a browser.
echo https://`oc get ZenService lite-cr -n tools -o jsonpath="{.status.url}{'\n'}"` -
The credentials for logging into the Cloud Pak for Data web client are
admin/<password>where password is stored in a secret.oc extract secret/admin-user-details -n tools --keys=initial_admin_password --to=- -
From the home page, under the Recent projects tile, click on
healthcare-data-stageproject and select theAssetstab. -
Select the
Healthcare_PatientsDataStage flow and click on the Compile button.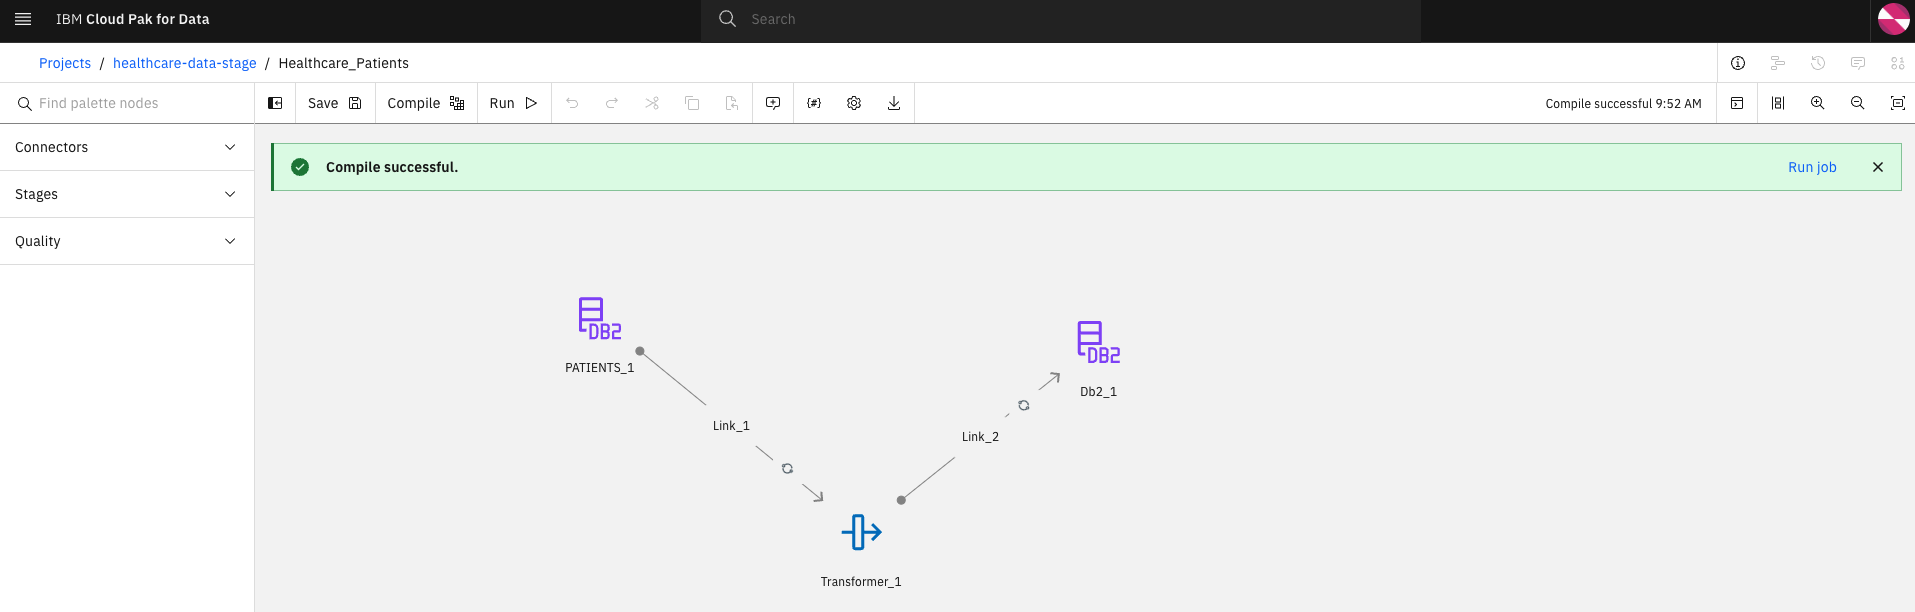
-
Once the compilation has completed successfully, execute the flow by selecting the Run button. Access the logs by selecting the View log link.
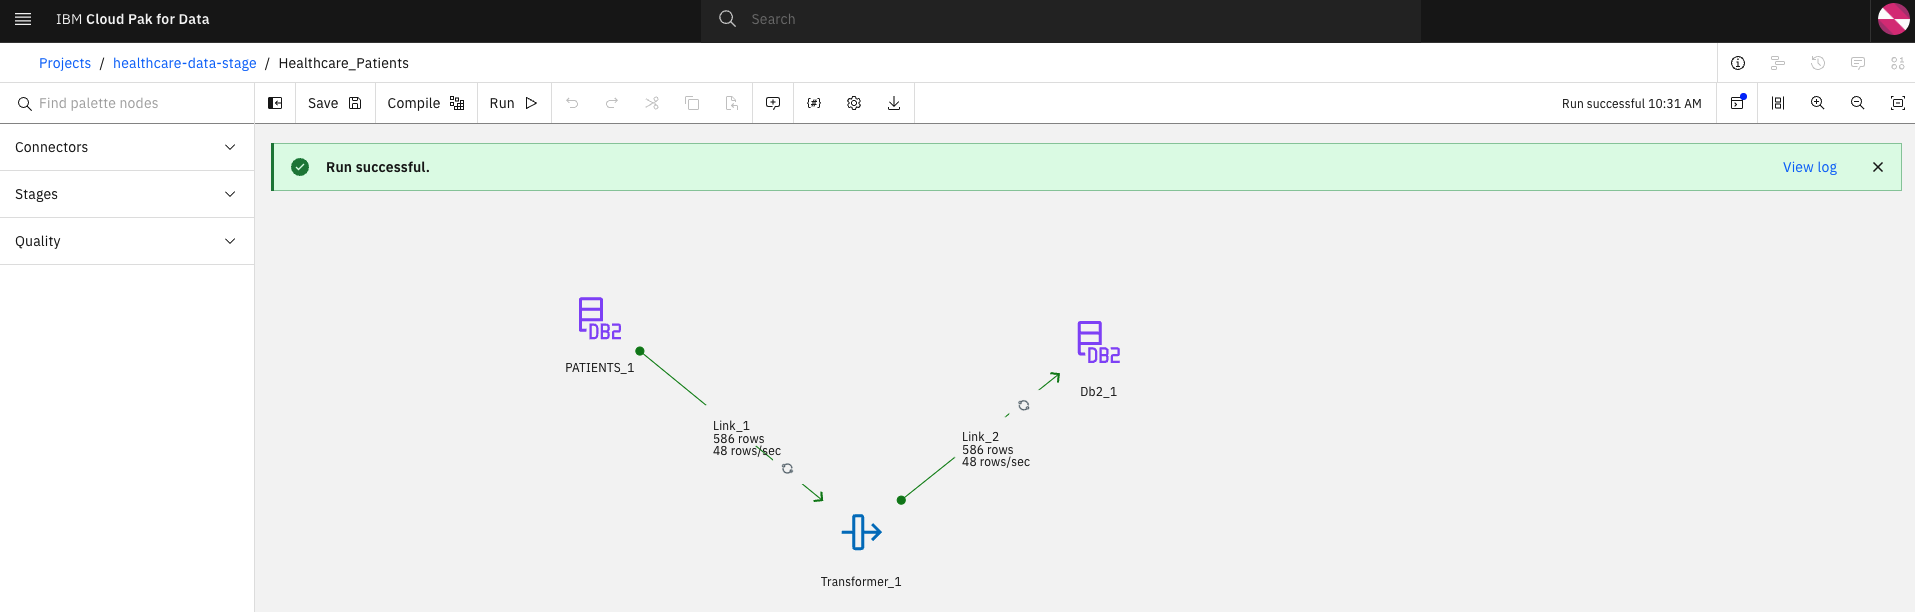
-
Preview the new database table with the added
AGEcolumn by selecting thehealthcare-data-stageproject and under theAssetstab, select the PATIENTS_processed Data Asset. On the Preview page, notice that there are 26 columns and scrolling to the right, you can view theAGEcolumn and the calculated values for each patient.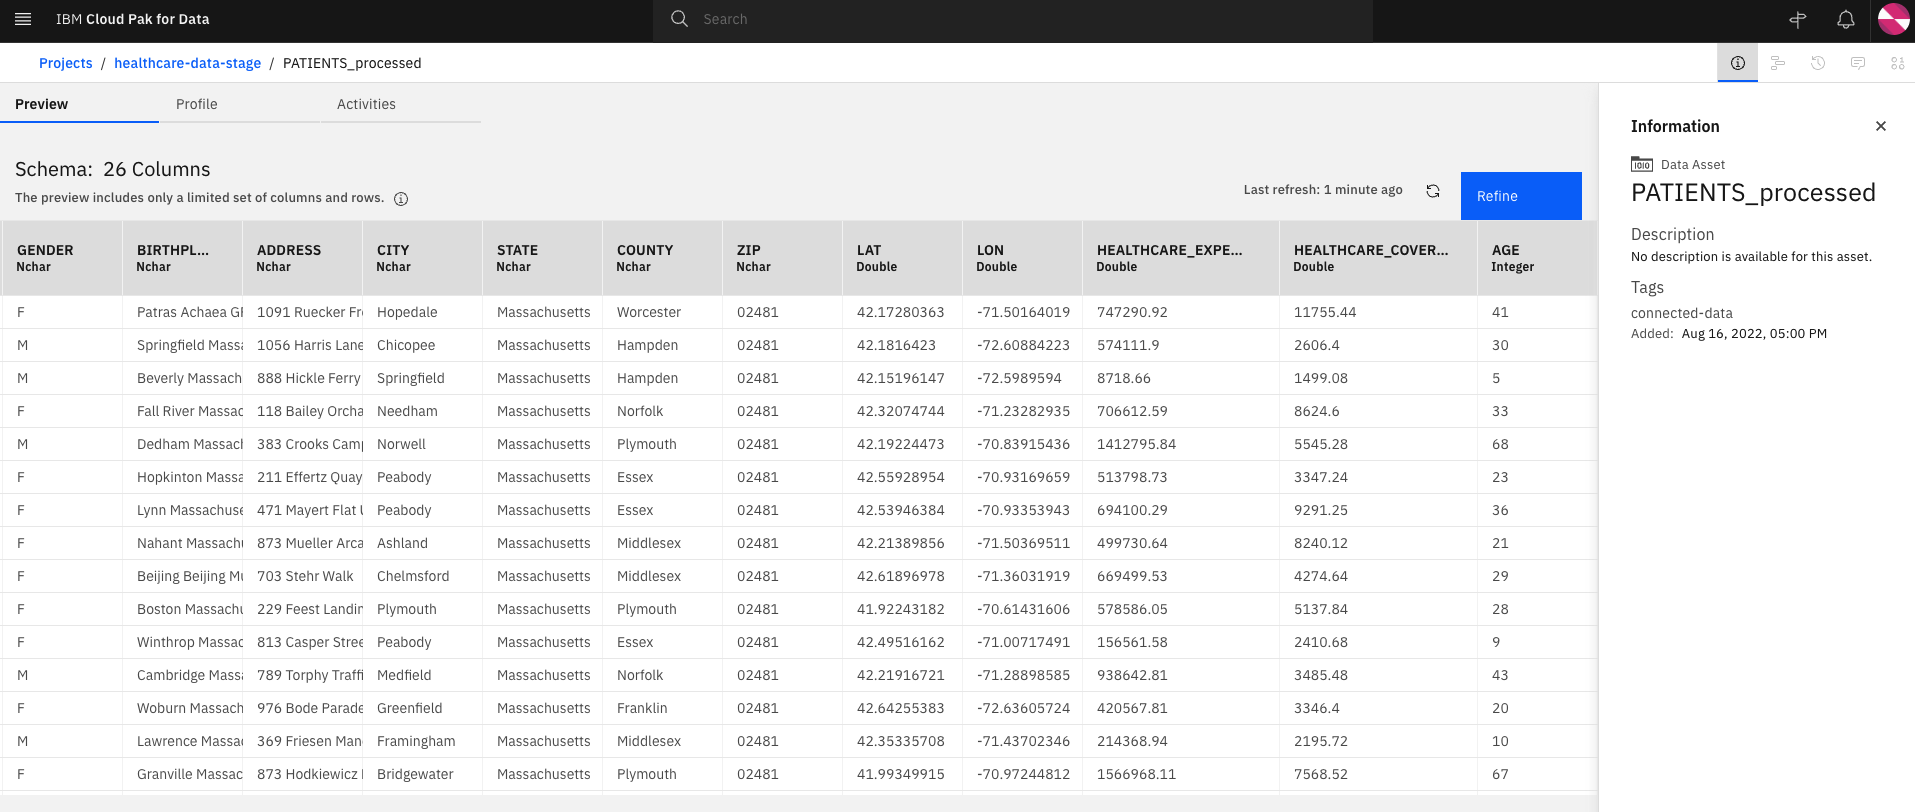
-
From the CP4D console home page, click on the hamburger button on the top left and go back to the
Homepage and proceed to Demo 2a.
Demo 2a - Perform data discovery
-
As the DB2 data source and governance artifacts has already been set up, we can use Watson Knowledge Catalog to perform an automated discovery on the
PATIENTStable. Click on the hamburger button and select Governance > Data discovery.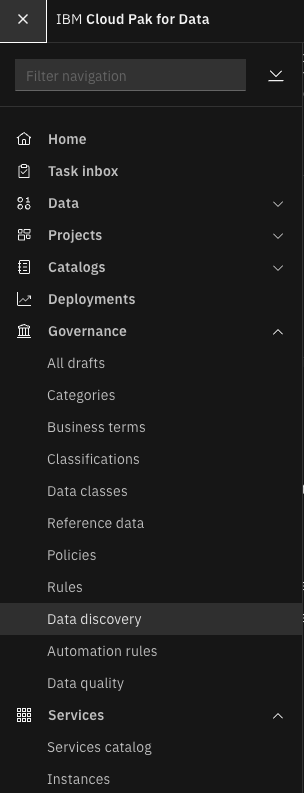
-
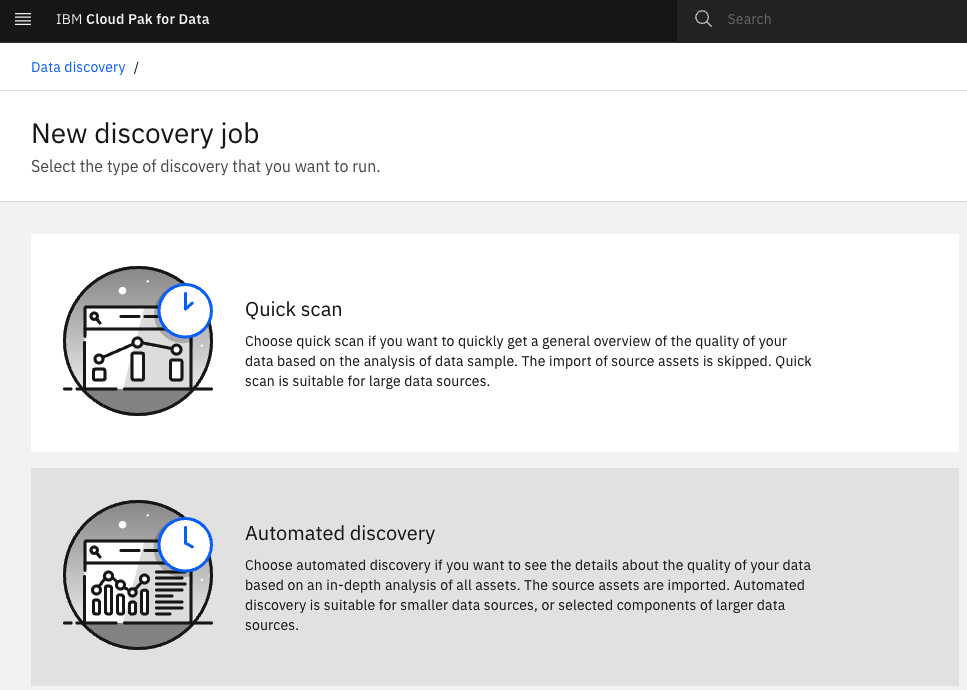
Select Automated discovery.
-
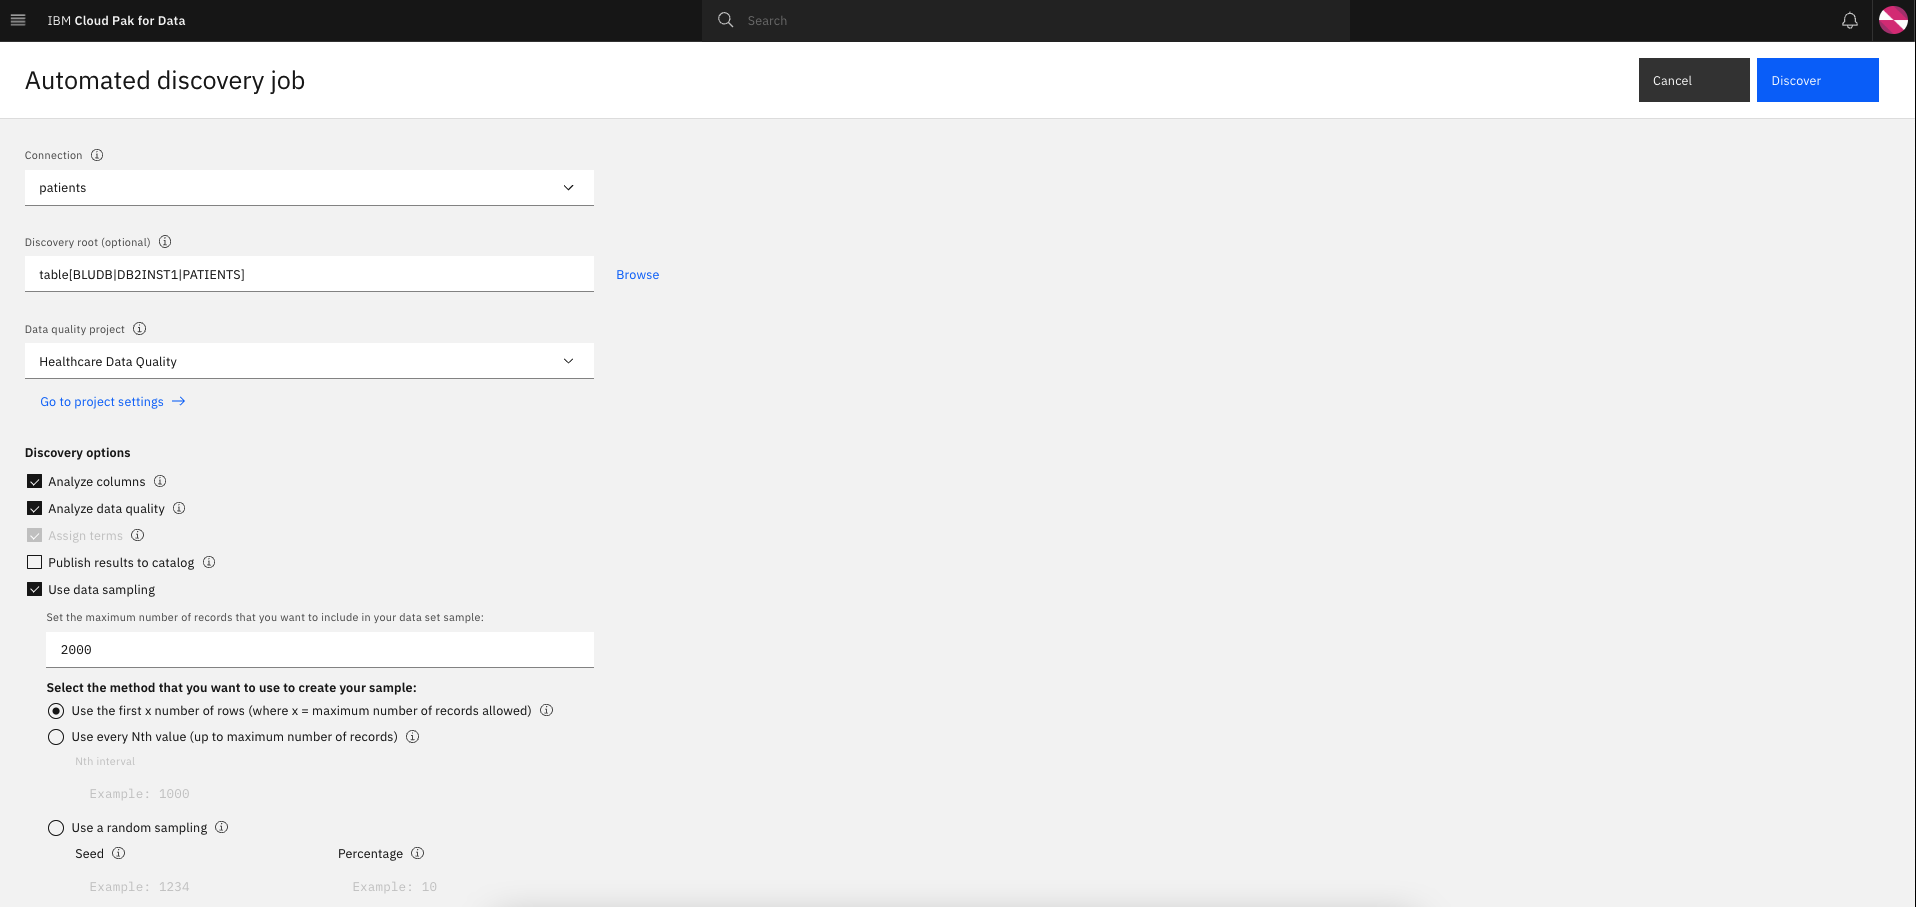
Configure the automated discovery job.
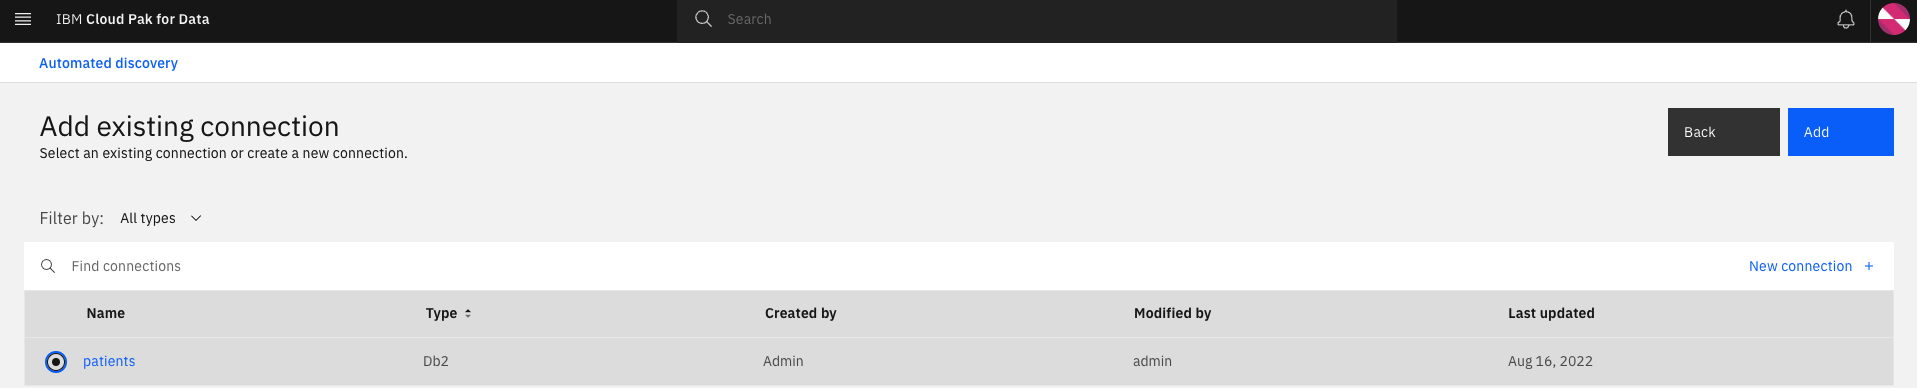
- Connection: Select the drop down and click on
Find or add connection. A platform connection (patients) to the DB2 instance has already been created for you. Select the bullet and click Add.
- Connection: Select the drop down and click on
-
Discovery root: Click on Browse and expand
BLUDB>DB2INST1and select thePATIENTStable. Click Select.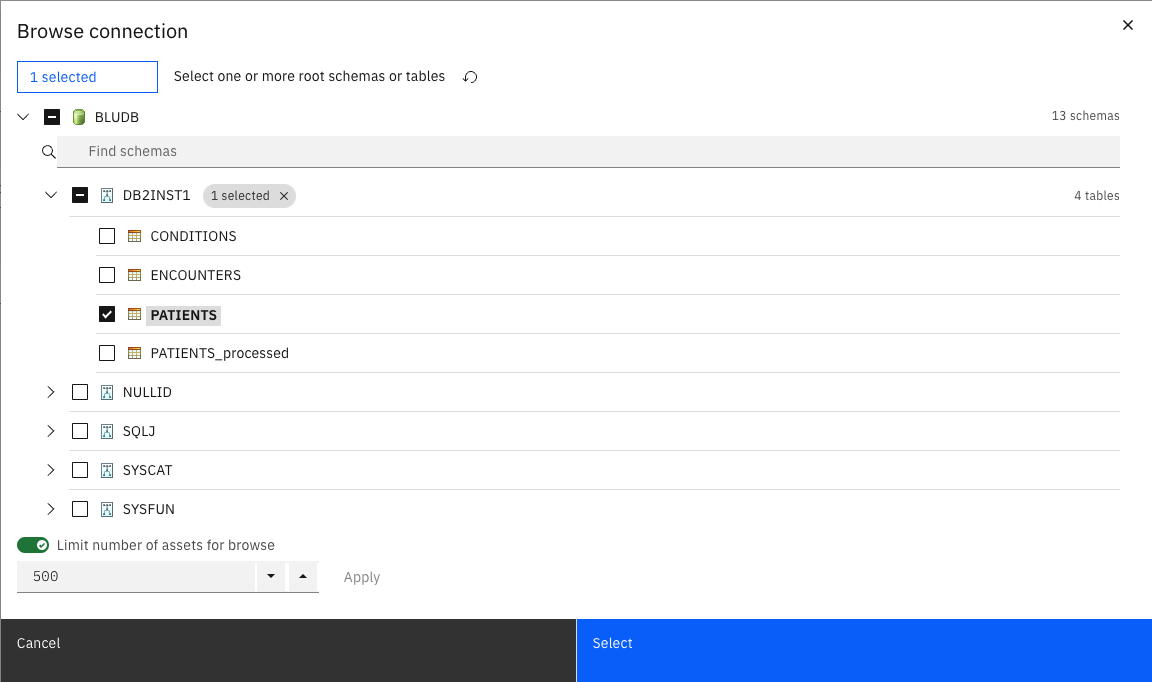
-
Data quality project: Select the drop down and click on
Add a project. Provide a nameHealthcare Data Qualityand click Create.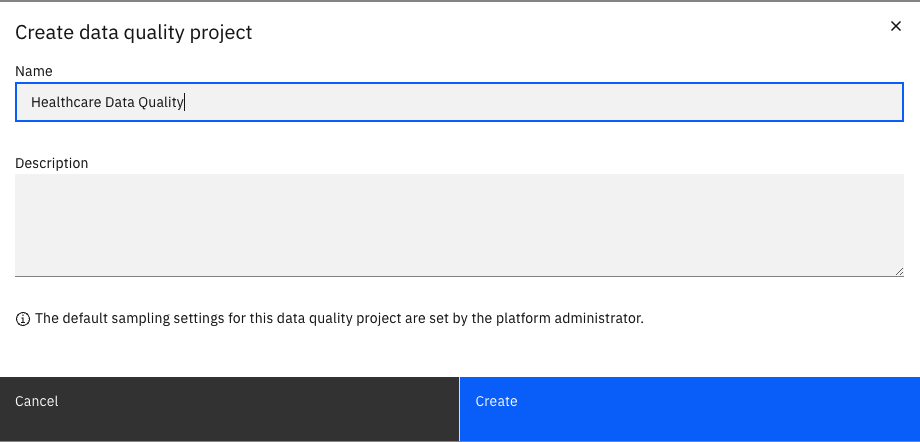
-
Discovery options: Select the following checkboxes (Analyze columns, Analyze data quality, and Use data sampling with 2000 as the maximum number of records) and click Discover.
-
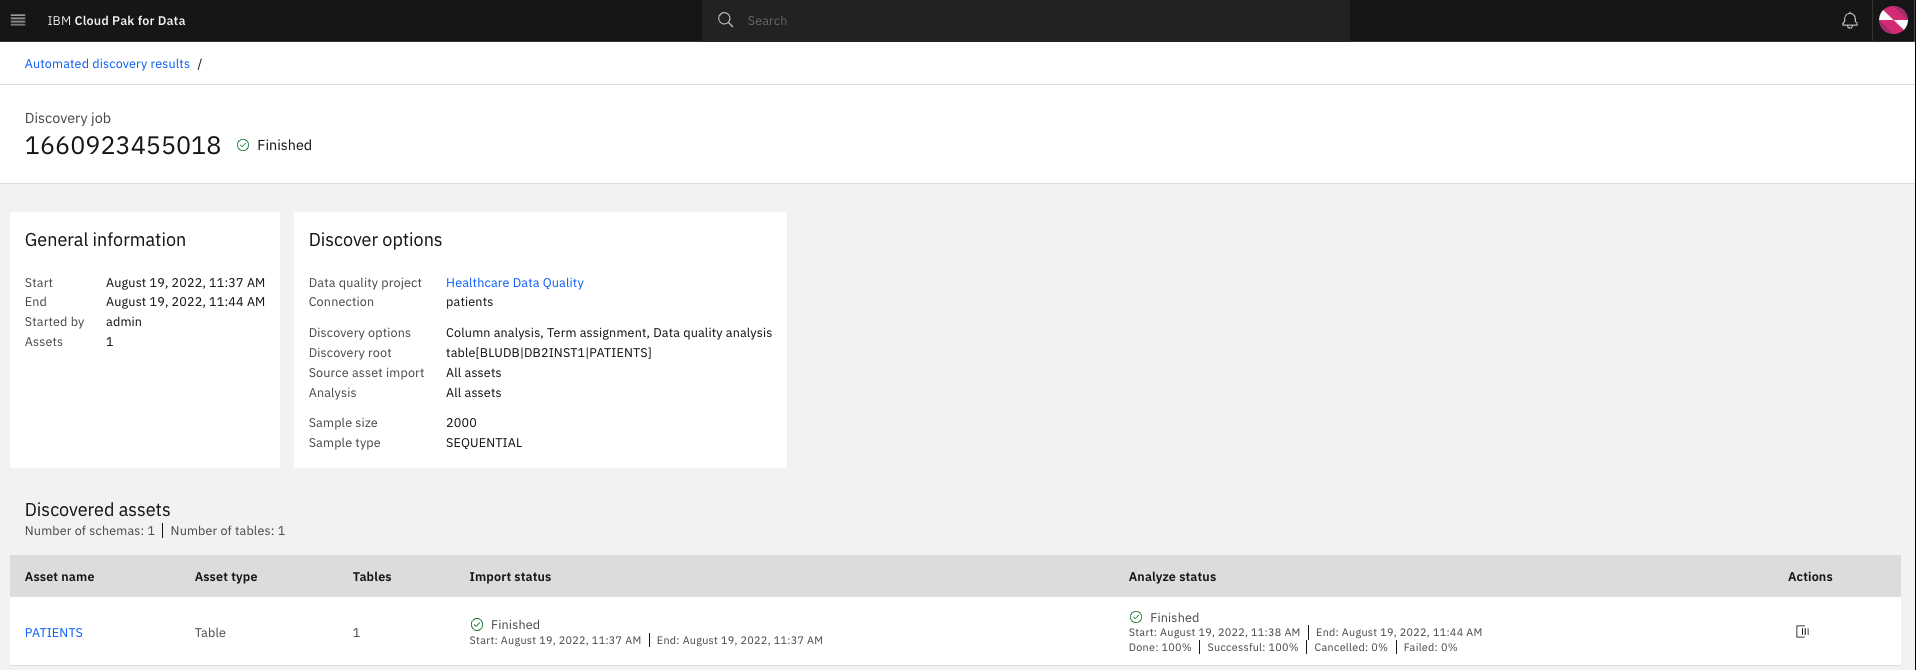
The data discovery job will take some time to import and analyze the data. Refresh the page to view the updated status and let the job run to completion.
-
From the CP4D console home page, click on the hamburger button on the top left and go back to the
Homepage and proceed to Demo 2b.
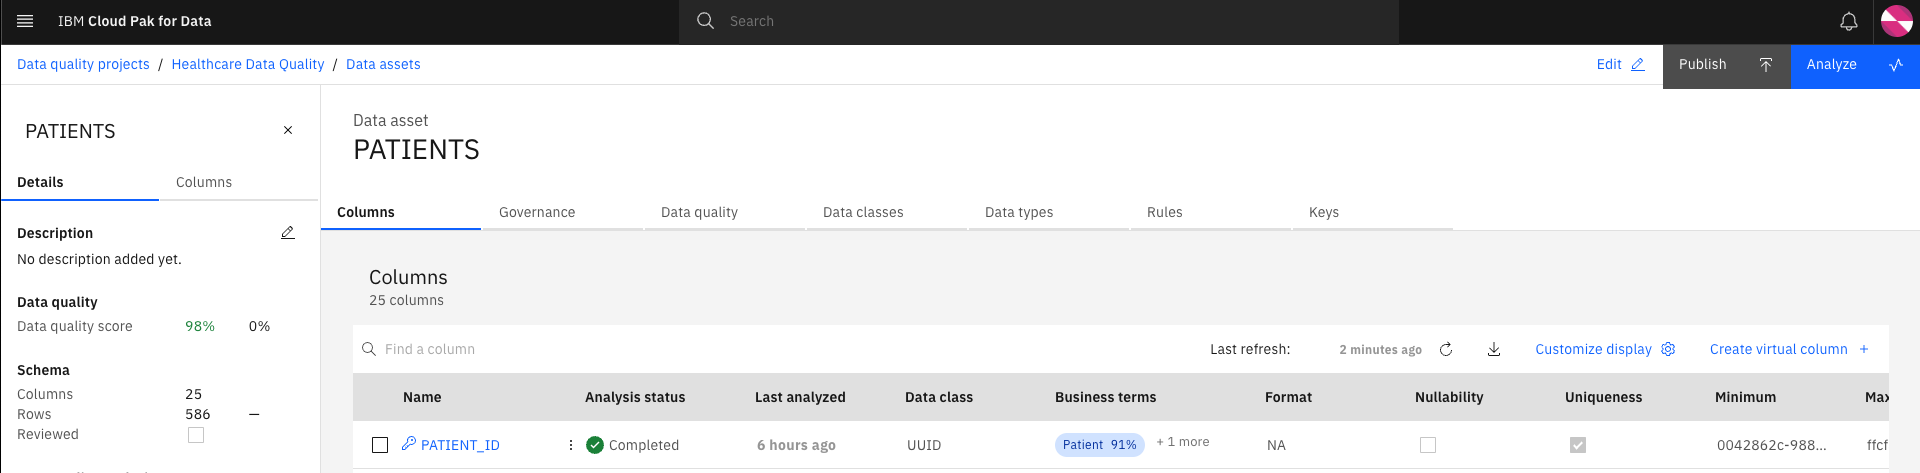
Demo 2b - Perform data quality analysis
-
Now that the automated data discovery job has completed, we can have a look at the data quality project and view the governance artifacts associated with the data. Click on the hamburger button and select Governance > Data quality.
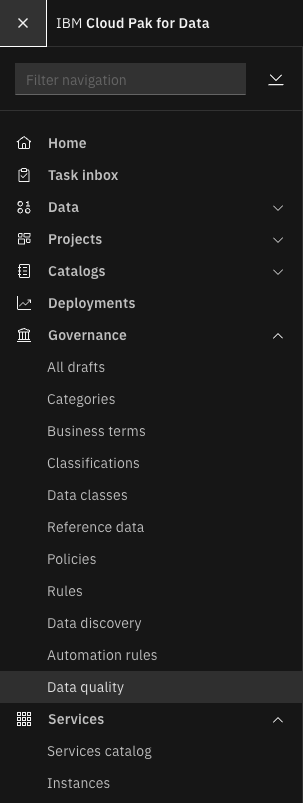
-
Select the
Healthcare Data Qualityproject.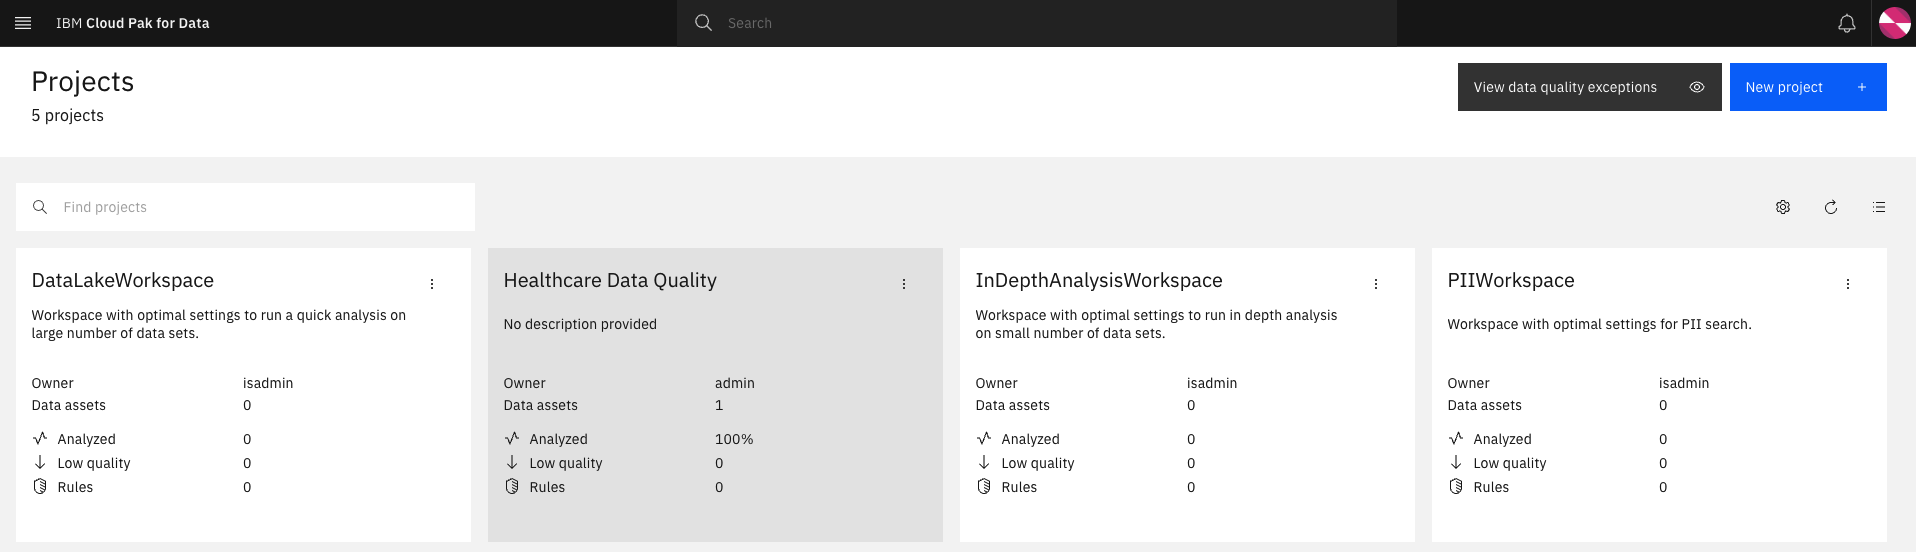
-
Select the
PATIENTSdata asset.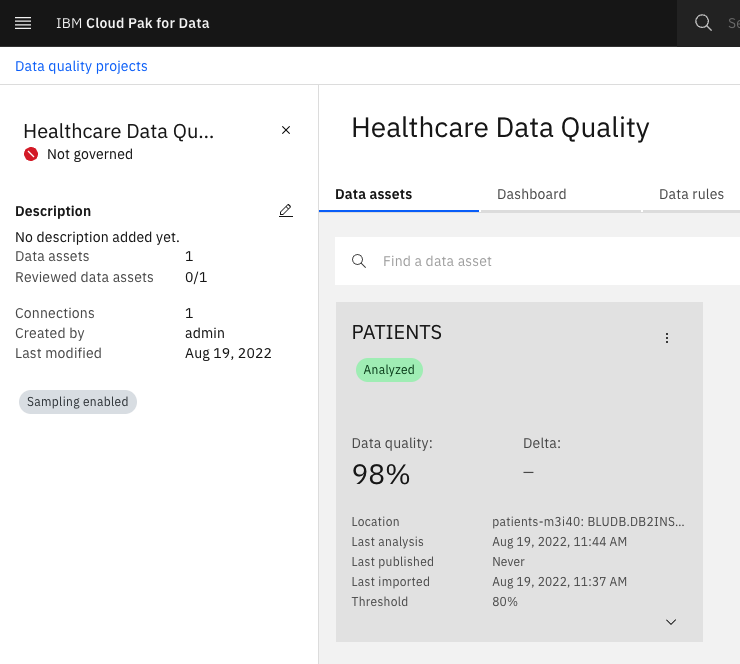
-
The data analysis from the discovery job has automatically associated Data classes and Business terms for some of the columns. By default, only Business terms with a confidence level above 80% will be associated. There are some columns with no Business Terms associated. We will now walk through how to add a Business Term to a column. Click on the
SSNcolumn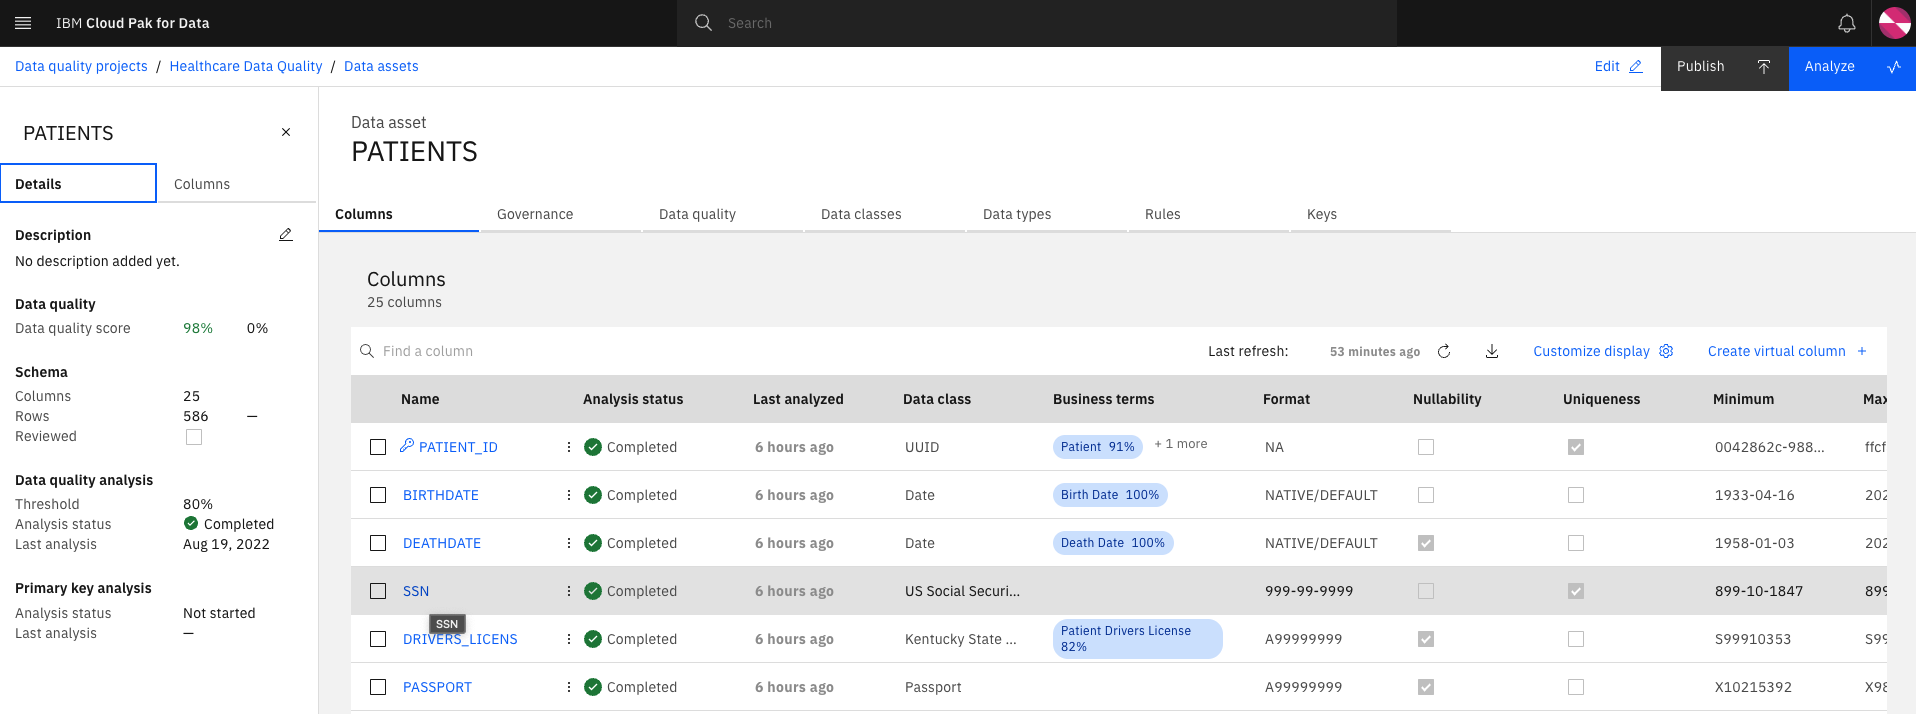
-
You should now be on the
Governancetab. Click the Edit button.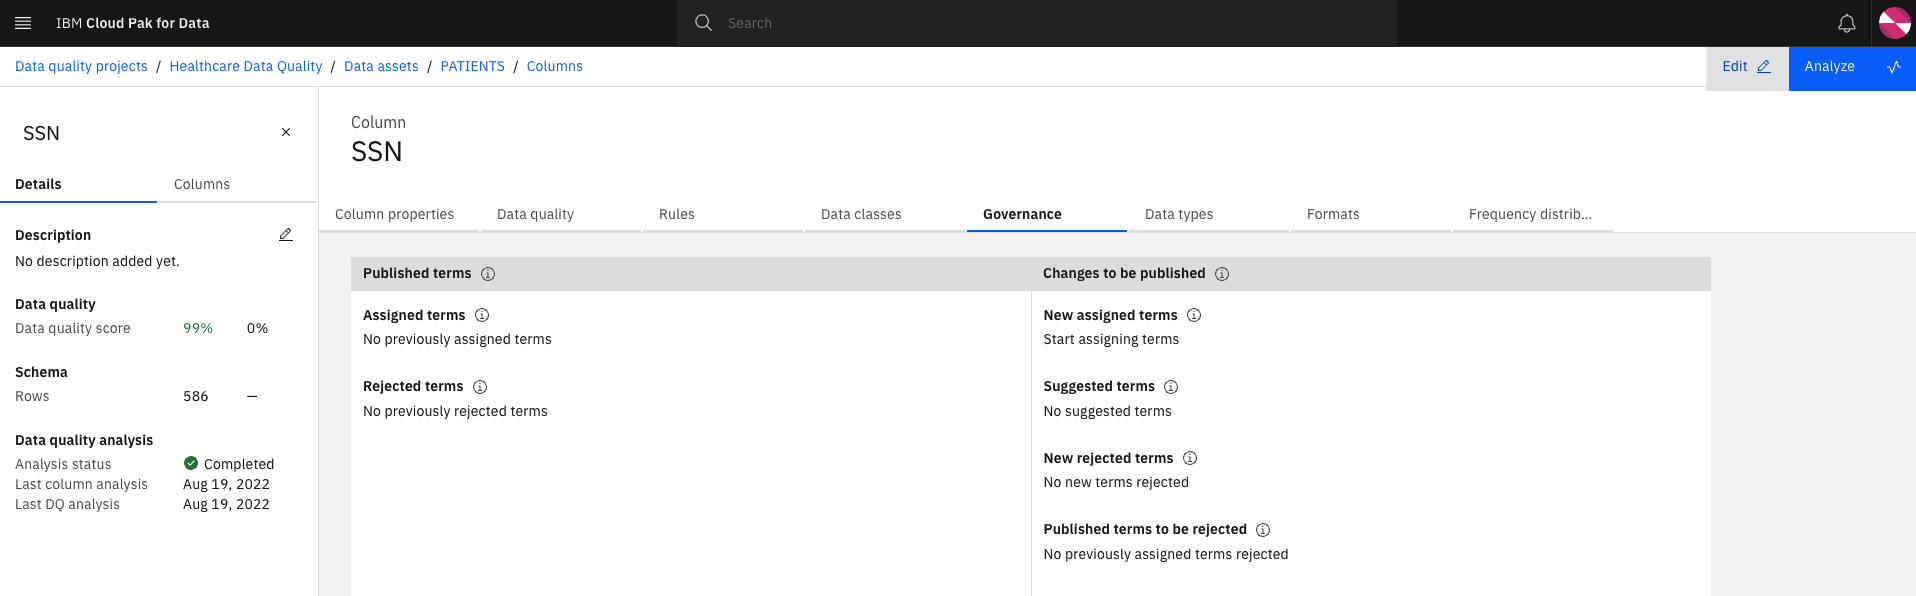
-
In the New assigned terms search field, enter
Social Security Numberand select the Patient Social Security Number Business Term and click Save.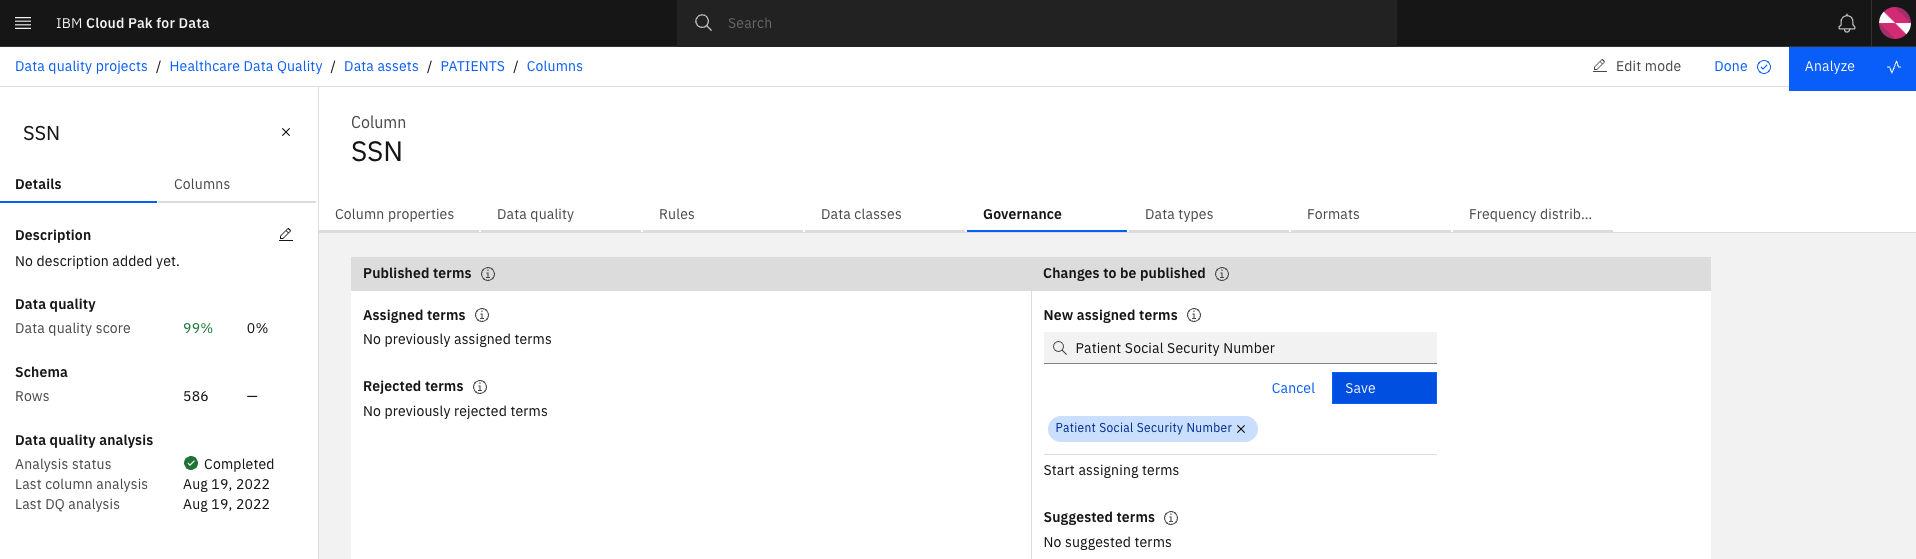
-
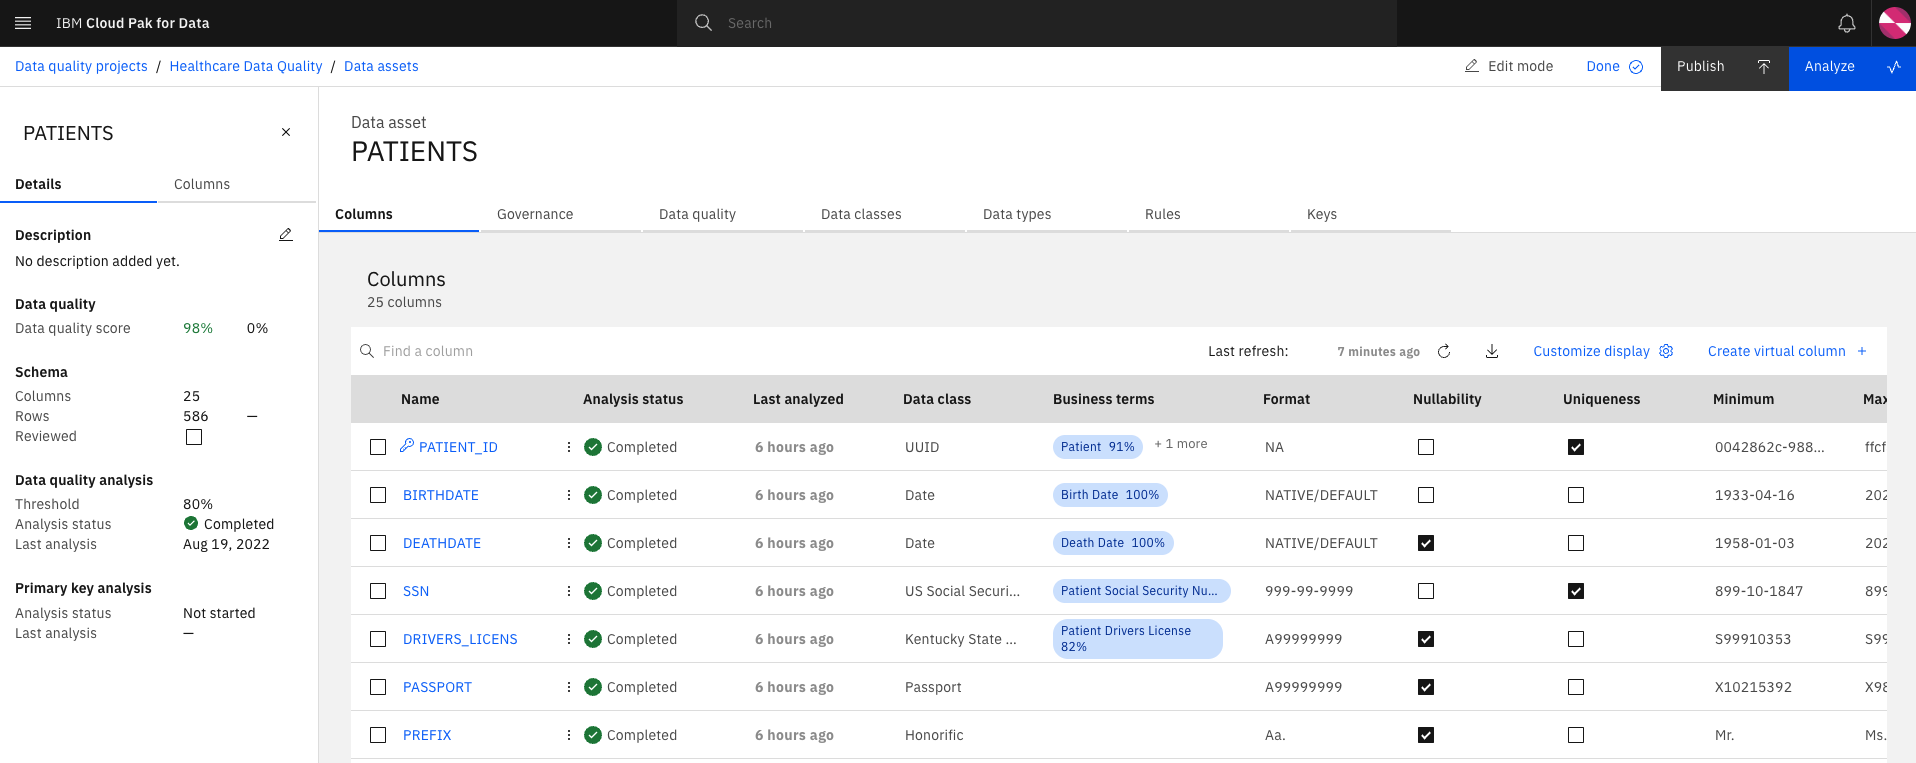
(Optional) Review the Business Terms associated to the columns and add/remove/edit as needed.
-
Click Analyze to re-analyze the asset based on the updates.
-
Select the
Analyze data qualitycheckbox and click Analyze. Refresh the page to view the updated status and let the analysis run to completion.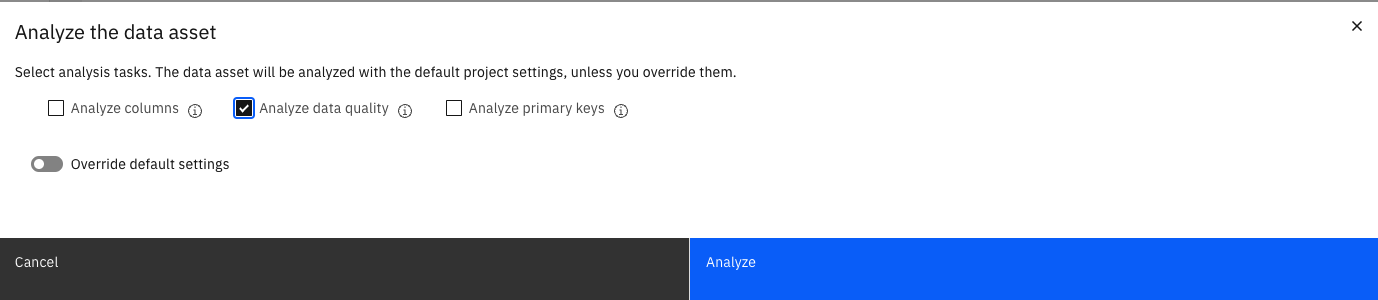
-
We will now publish the asset to a catalog so a Data Scientist can access the data. Click the Publish button and click Publish on the pop-up.
-
Click on the
Healthcare Data Qualityproject link on the top left and confirm theLast published datehas been updated.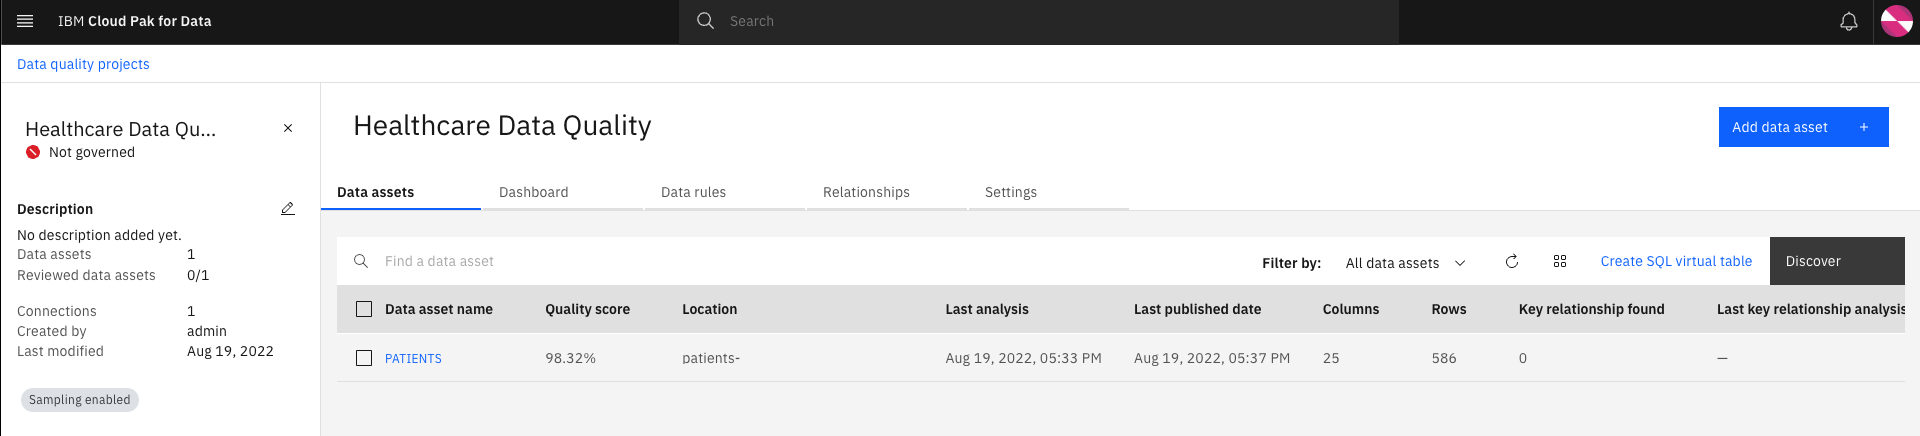
-
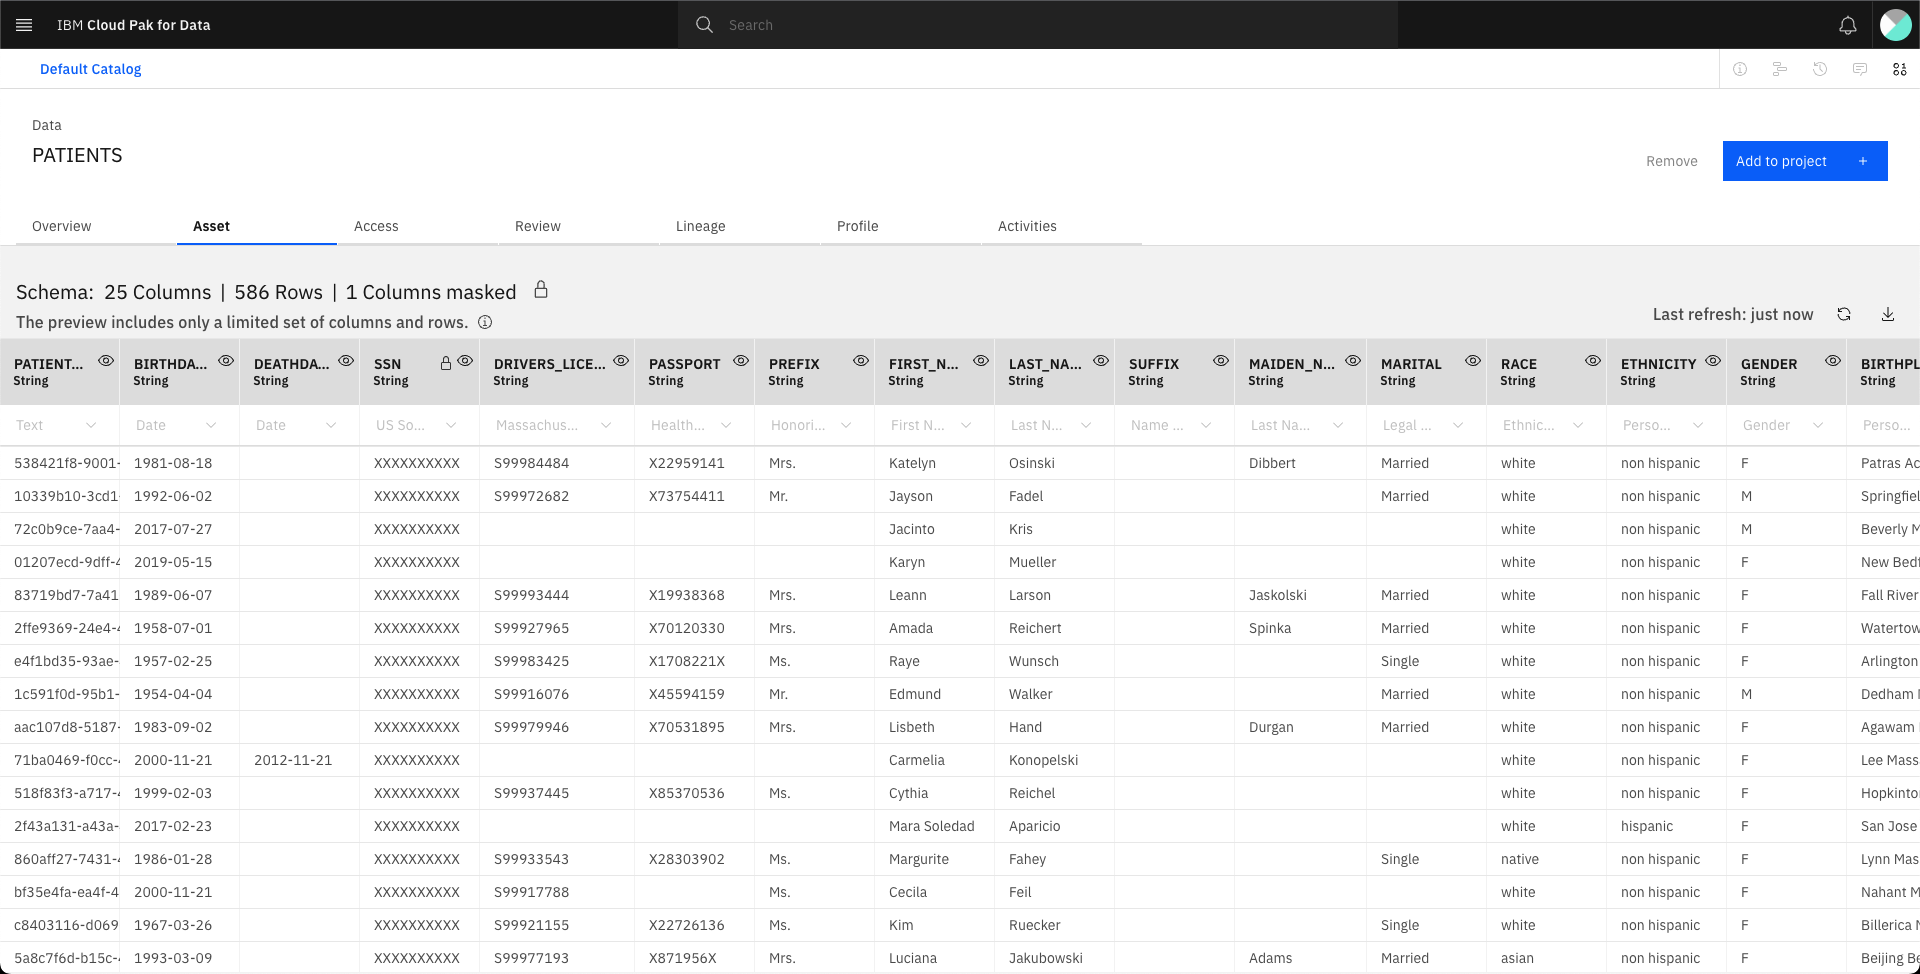
Let's verify the asset is available in the catalog. Click the hamburger button and select
Catalogs>All catalogs, selectDefault catalogand click onPATIENTS. Select the Assets tab for a preview of the data.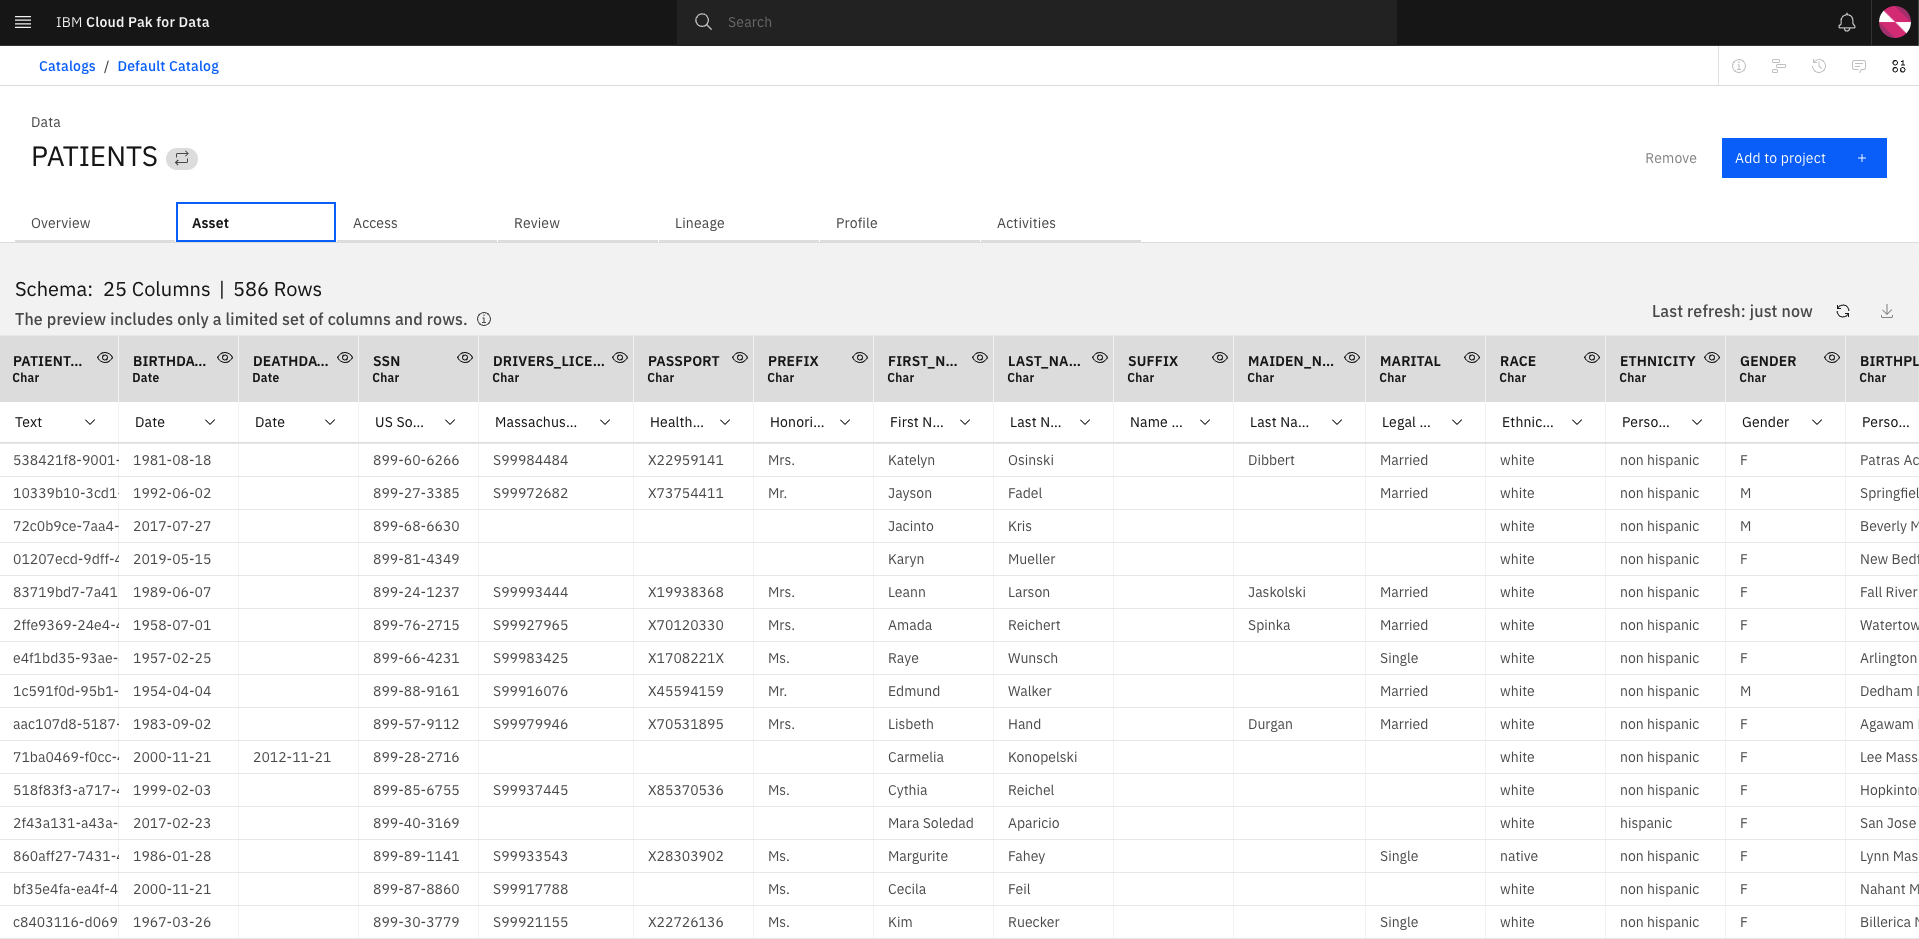
-
Grant the Datascientist user with access to the Default Catalog by selecting the link to Default catalog on the top left and click on the
Access controltab.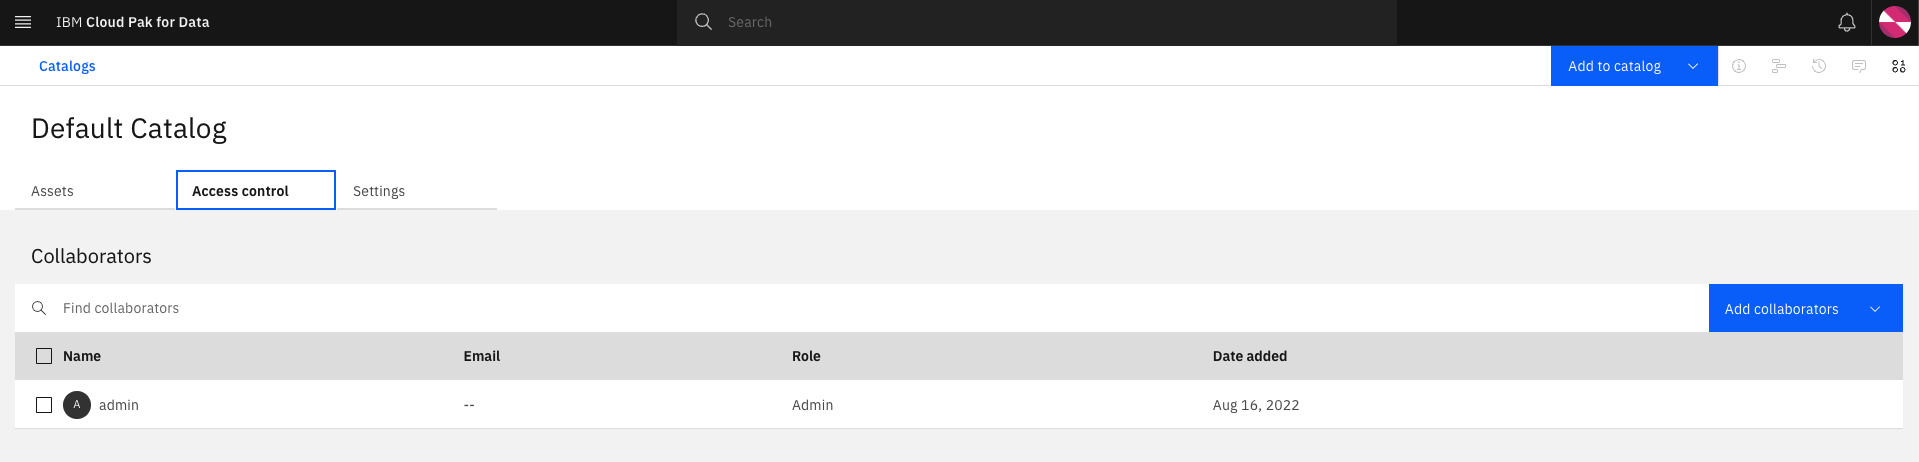
-
Select the
Add collaboratorsbutton and click onAdd user.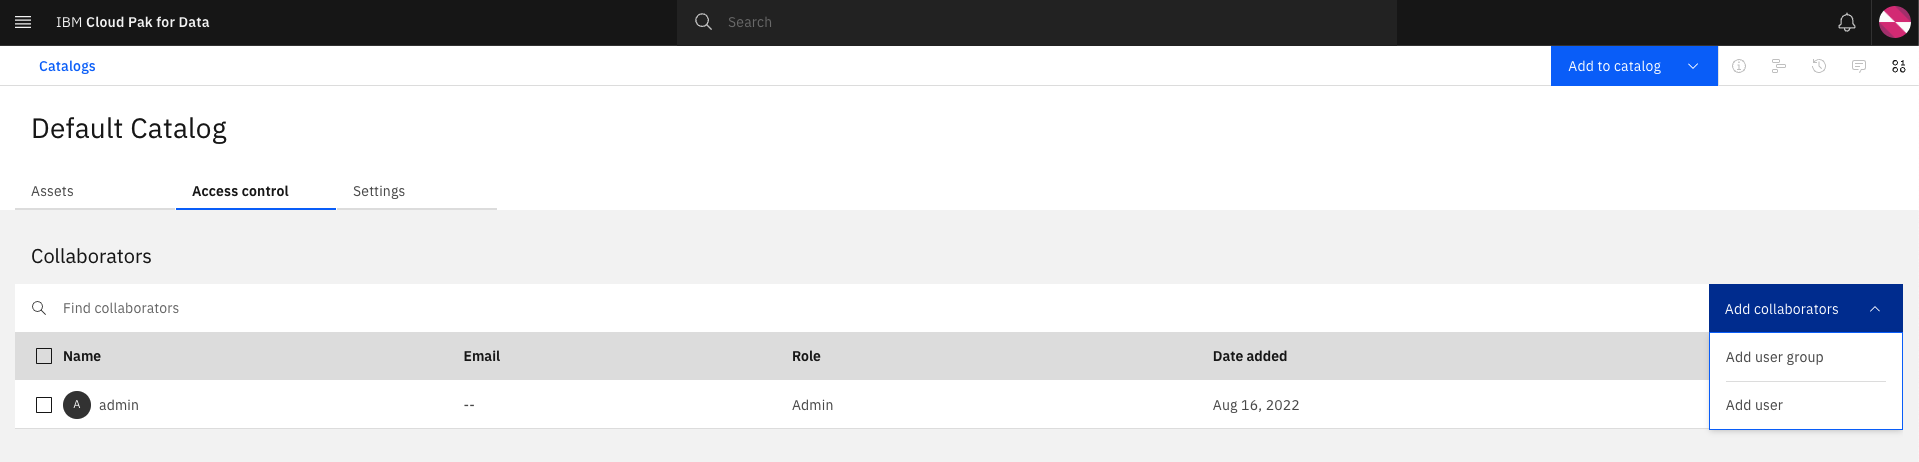
-
Leave the
Roleas Viewer and search forDataScientist-autounder Collaborators and clickAdd.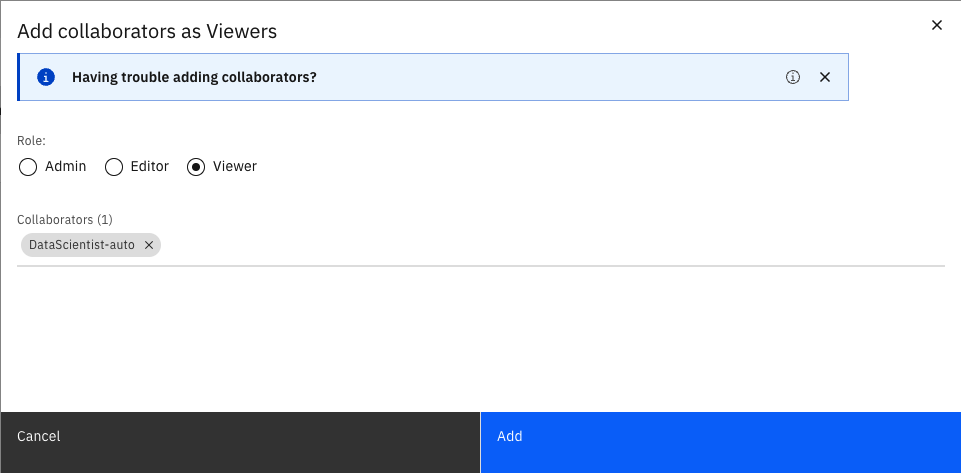
-
Log out of the Cloud Pak for Data console and log in as
datascientist-auto/passw0rd!.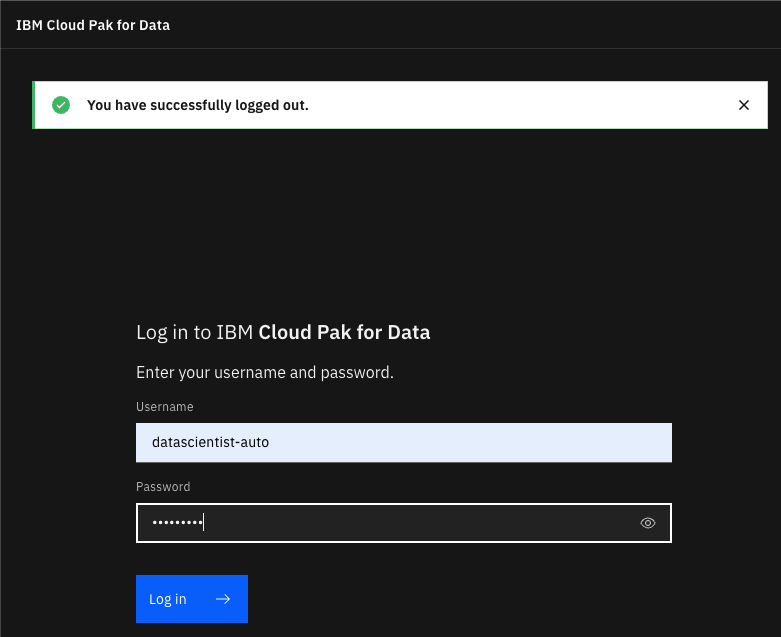
-
Click the hamburger button and select
Catalogs>All catalogs,Default catalog, click onPATIENTSData and select the Asset tab and confirm the datascientist has access to the data.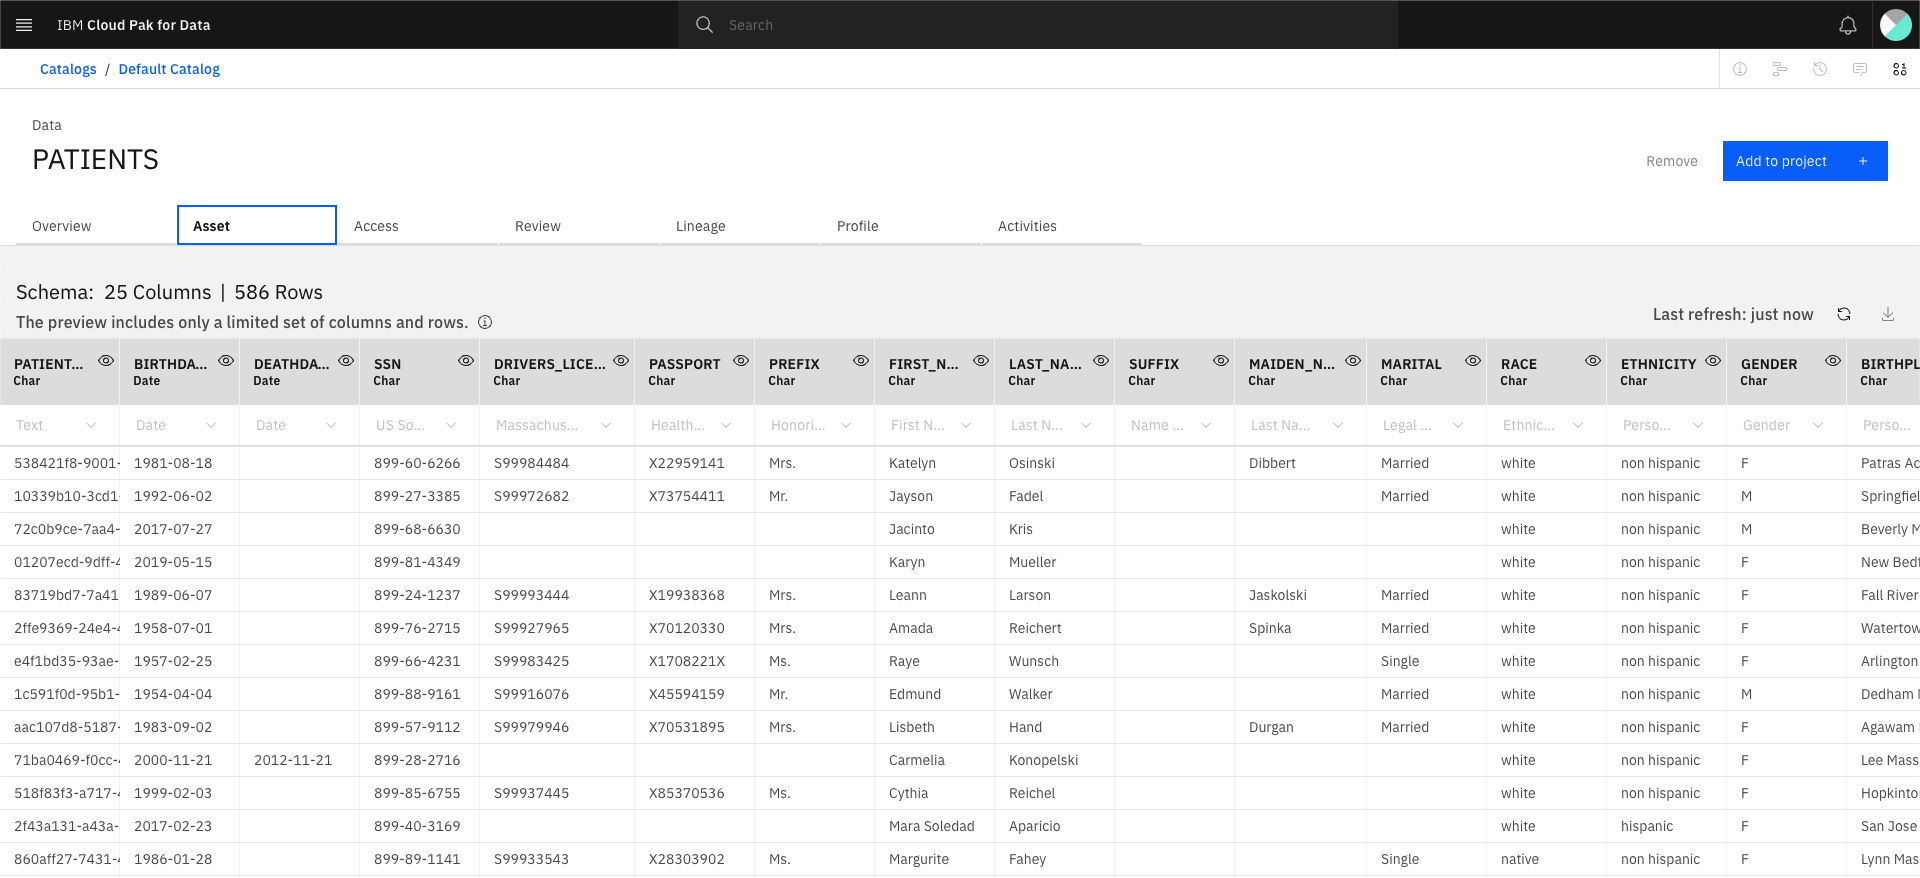
-
Log out of the Cloud Pak for Data console and log in as
admin/<password>where password is stored in a secret.oc extract secret/admin-user-details -n tools --keys=initial_admin_password --to=-
Demo 2c - Add data protection rule
In this part of the demo, we will be adding a data protection rule to mask the social security number of the patients so a datascientist consuming the data cannot view this data.
-
Click the hamburger button in the top left and select
Governance>Rules.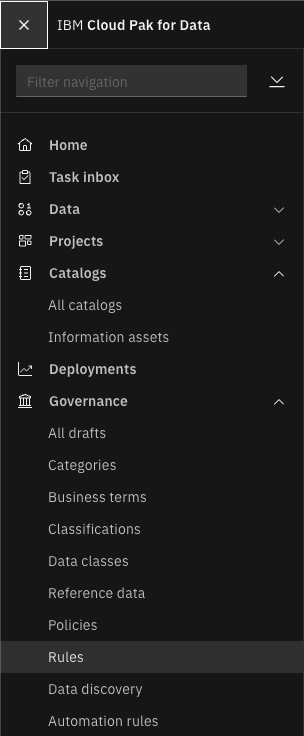
-
Click on the Add rule button and select
New rule.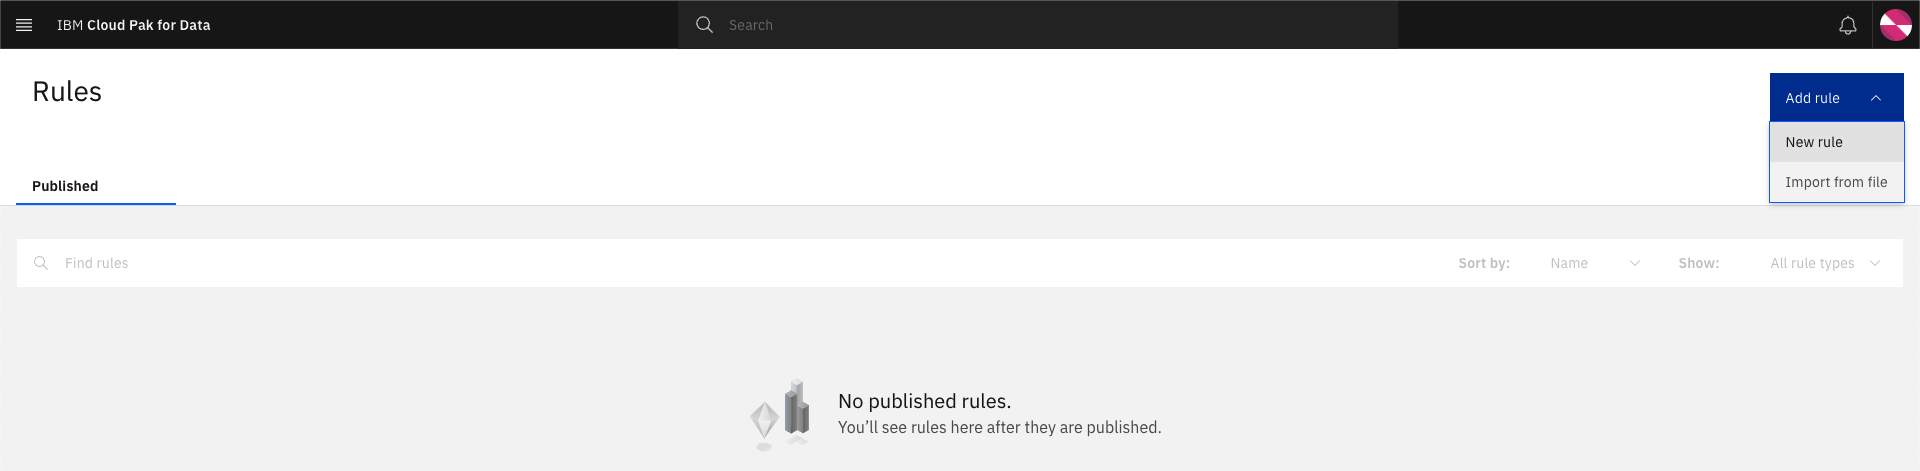
-
Select
Data protection ruleand click Next.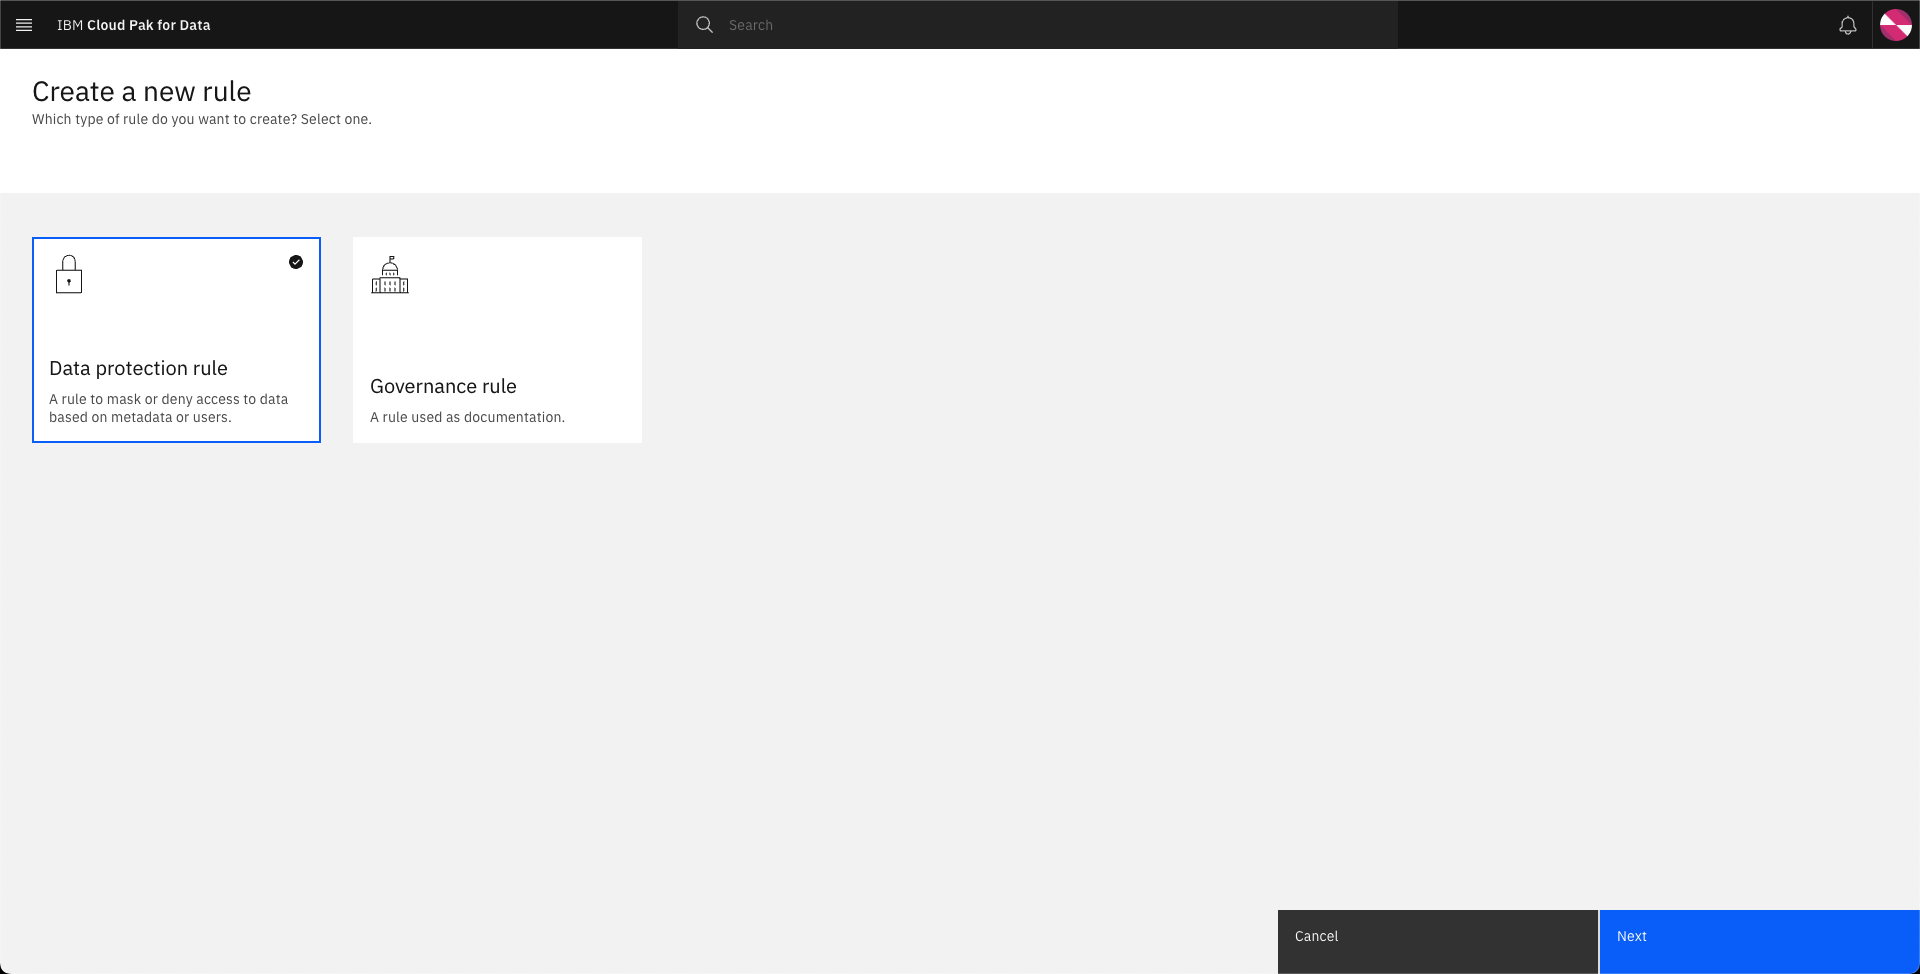
-
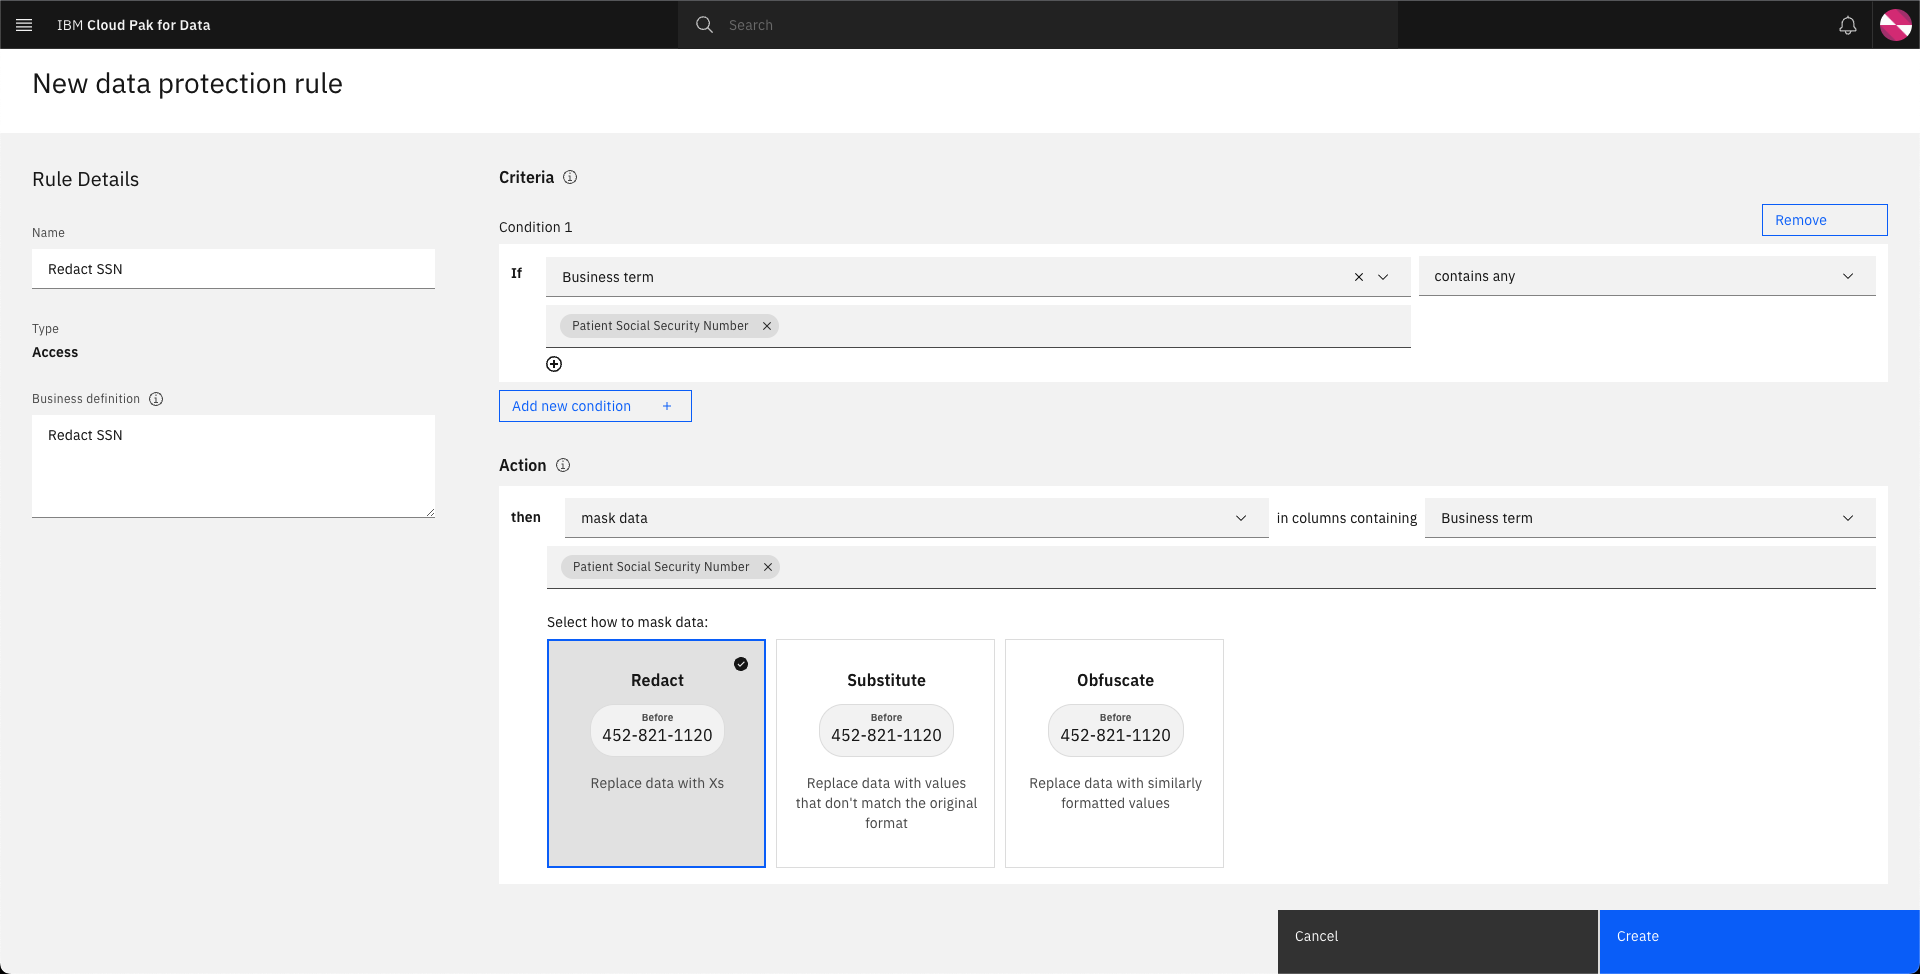
Complete the New data protection rule form to match the image below and click Create.
-
Click
Ruleson the top left to see the newly added data protection rule.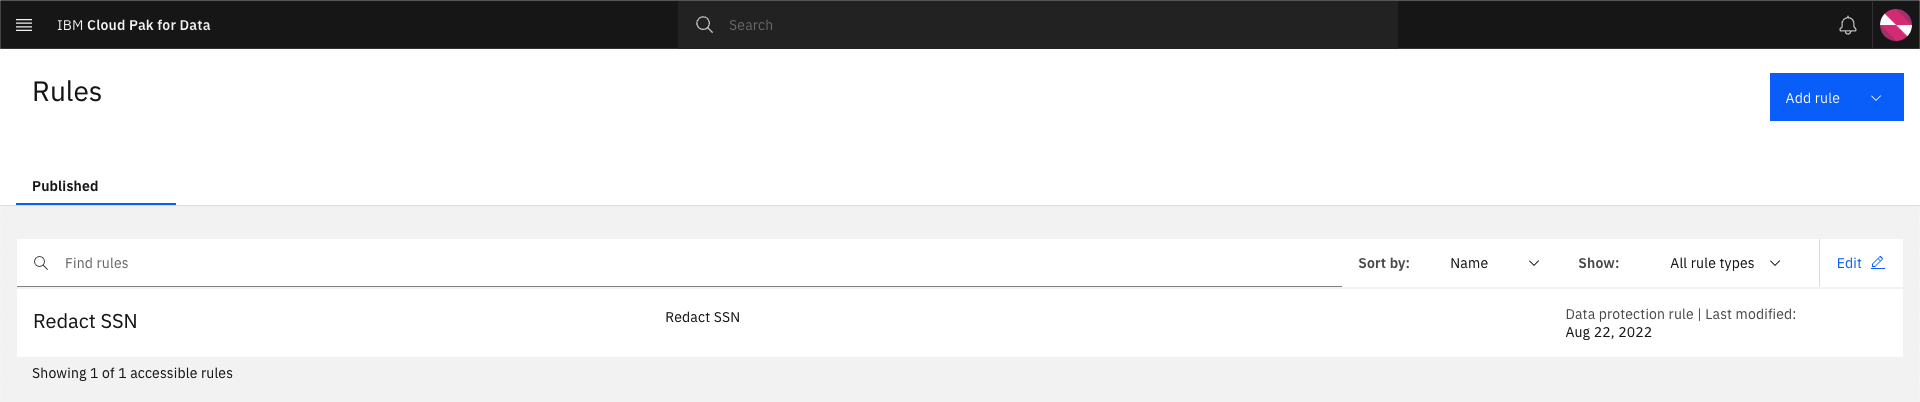
-
Log out of the Cloud Pak for Data console and log in as
datascientist-auto/passw0rd!. -
Click the hamburger button and select
Catalogs>All catalogs,Default catalog, click onPATIENTSData and select the Assets tab. Confirm that the SSN data is masked.