Creating a Red Hat OpenShift cluster
Audience: Architects, Application developers, Administrators
Overview
In this topic we're going to:
- Introduce you to IBM Technology Zone
- Provision an OpenShift cluster
By the end of this topic you'll have created an OpenShift cluster for the MQ tutorials.
IBM Technology Zone
IBM Technology Zone is a one-stop shop to get access to technical environments and software for demos, prototyping and deployment. We're going to use it to provision the OpenShift cluster used by our tutorial.
Technology zone can be used to provision a Red Hat OpenShift cluster on different infrastructure including IBM Cloud, Azure, AWS and VMWare. There is also a degree of flexibility to configure the compute, storage and network for these infrastructures. The MQ tutorial will work on all of these platforms.
It is also possible to provision a cluster via the command line using the instructions in the Hands-on section of this guide.
Decide infrastructure
Decide which infrastructure platform you are going to use for your Red Hat OpenShift cluster from the available options:
Click on your chosen infrastructure link above or scroll to down to the appropriate section in this topic.
OpenShift on IBM Cloud
-
Navigate to the IBM Technology Zone
In your browser, navigate to the IBM Technology Zone to create your cluster.
- You will need to sign-in with your IBM credentials if your browser has not authenticated.
- You will need to read and accept
Terms and conditionsto proceed to the IBM Technology Zone.
-
Reserve a cluster
You can reserve a cluster immediately on IBM Cloud.
Click on the
Reserve nowradio button.Info
It takes between 30 and 60 minutes to provision a cluster. Moreover, once a cluster has been provisioned, by default, it will be deleted after 3 days -- unless you renew it. It can therefore be helpful to schedule the environment to be created later if you are not going to be using it for a while -- such as for a future demonstration or classroom session. Come back and explore the
Schedule for lateroption another time. -
Complete reservation details - step 1
You will be asked to complete your reservations details in two steps.
Firstly, when you make a cluster reservation, you can supply a set of details that describe:
- The cluster name
- The purpose of the reservation from a pre-defined set
- A description, which will appear when you set the purpose of your reservation to
Practice/Self-Education.
Complete the details as follows:
- Type a helpful
Namesuch asMy cluster 1 - Select
Practice/Self-Educationfrom thePurposedrop-down list - Type a helpful
Purpose Descriptionsuch asEducation - Do not select
Preferred Geographyyet; we will do that in a moment - Add some helpful
Notessuch asLearn how to build a cloud native production reference deployment using a CloudPak and OpenShift on IBM Cloud
-
Complete reservation details - step 2
The second step in registration is to specify the physical details of the compute infrastructure for your cluster.
When you make a cluster reservation, you can supply a set of details that describe:
- The cluster's geographical location
- The version of OpenShift Container Platform used by the cluster
- The number of CPUs in the cluster and their memory size
- The number of Kubernetes worker nodes in the cluster
- The OCS storage size for the cluster
- The End date and time for the cluster
Complete the details as follows:
- Select your
Preferred Geographysuch asLondon 5,HongKong 2orSan Jose 04. - Under
End date and time, select a date and specify the time along with its time zone. - Select
OpenShift Versionas4.10from the drop-down-list - Select
Worker Node Countas3from the drop-down list - Select
Worker Node Flavorasb3c.8x32 (8 vCPU x 32GB - 100GB Secondary Storage)from the drop-down list - Select
NFS Sizeas500 GBfrom the drop-down list
Info
By default, your cluster will be reserved for three days, after which time it will be deleted. This is more than enough time to complete this tutorial. If required, you can increase the cluster lifetime by configuring the
End date and time. Don't do this unless you really need to do so; as you'll learn in the tutorial, the use of GitOps makes it quick and easy to provision a cluster when you need to do so. -
Create the cluster
Check your reservation details and press
Submitwhen you're ready to create the cluster: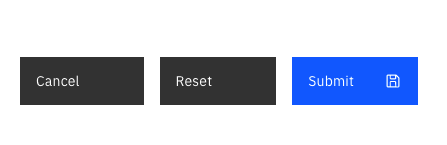
Info
The cluster provisioning process will take between 30 and 60 minutes to complete on IBM Cloud.
-
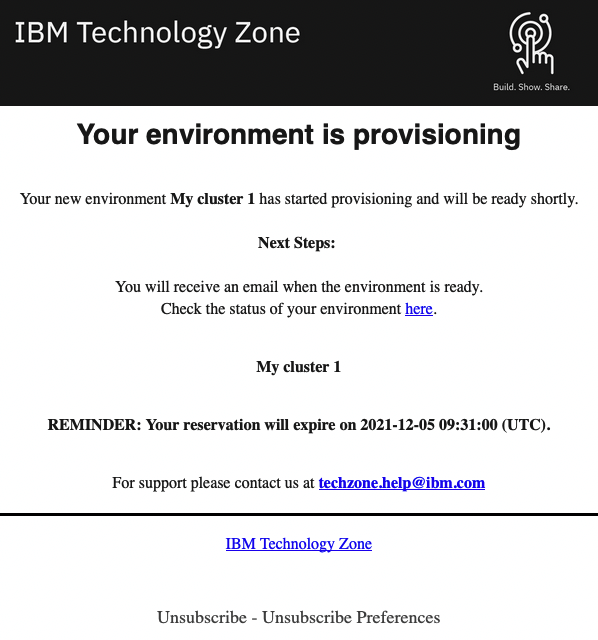
Provisioning email
As the provisioning process starts, you will receive an email to confirm that the provisioning process has started:
-
Checking the cluster provisioning status
You can also view the status of your provisioning request on IBM Technology Zone.
Click on My reservations to see:
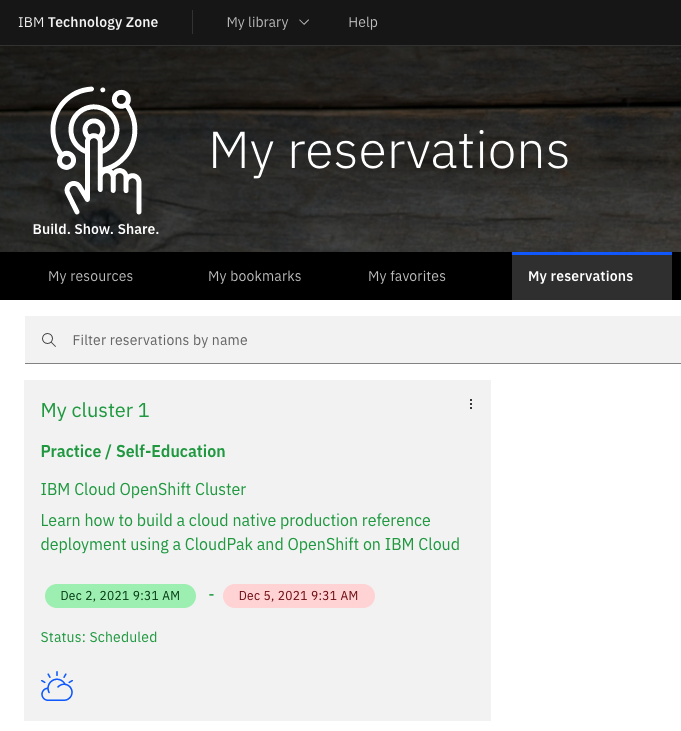
Note:
- The
Statusfield will beReadywhen the cluster has been provisioned. - The creation and expiry date-time for your cluster.
You can return to the reservation at any time to get the details of your cluster.
- The
-
Cluster provisioned email
You will receive another email once your cluster is ready:
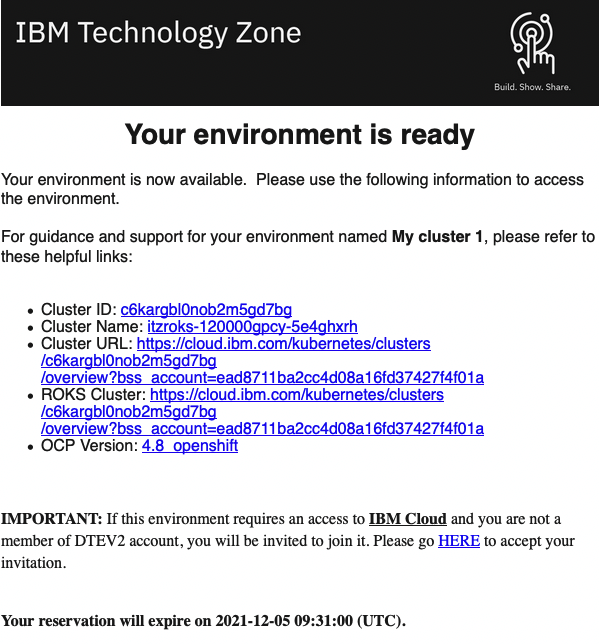
Success
Your cluster is now provisioned and ready to use.
Warning
Note the expiry date-time.
Note
Be sure to read the IMPORTANT: clause at the end of the email. If your cluster has been provisioned to an IBM Cloud account you have not used before, and you have not accepted the invitation to that account, you will not be able to see your cluster when you click on the Cluster URL link in the following step. It is recommended to always click on the HERE link in the clause to see if you need to accept an invitation.
-
Navigate to your cluster
You can use the information in the notification email to access your cluster.
Click on the
Cluster URLlink to login to IBM Cloud and locate your OpenShift cluster: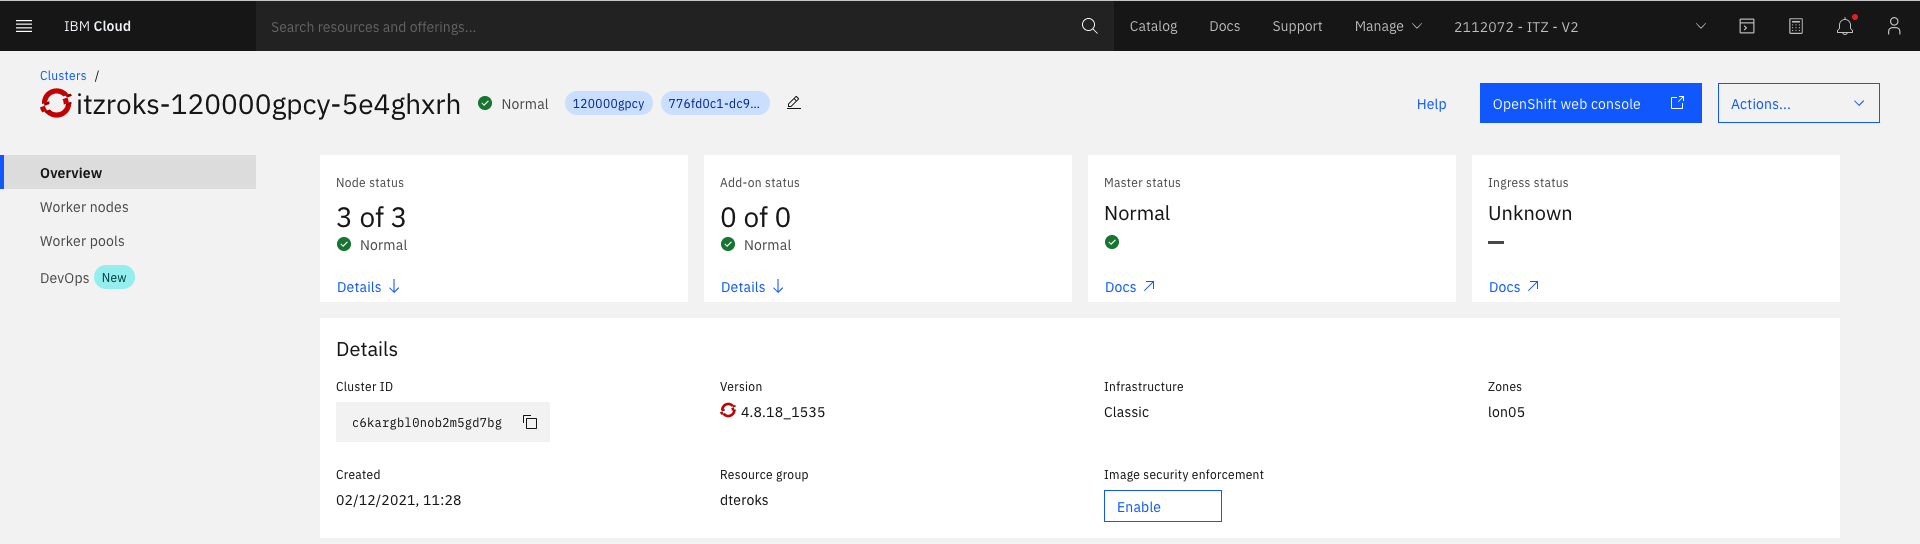
Note:
- The
Cluster IDthat has been assigned by IBM Cloud. - The
Zonematches your requested geography. - The OCP
Versionmatches your requested version of OCP. - The
Node statusidentifies the 3 worker nodes in theNormalstate.
Feel free to explore this web page.
- The
-
Receiving cluster deletion email and extending your cluster's lifetime
When your cluster is within 3 days of deletion, you will receive a daily email:
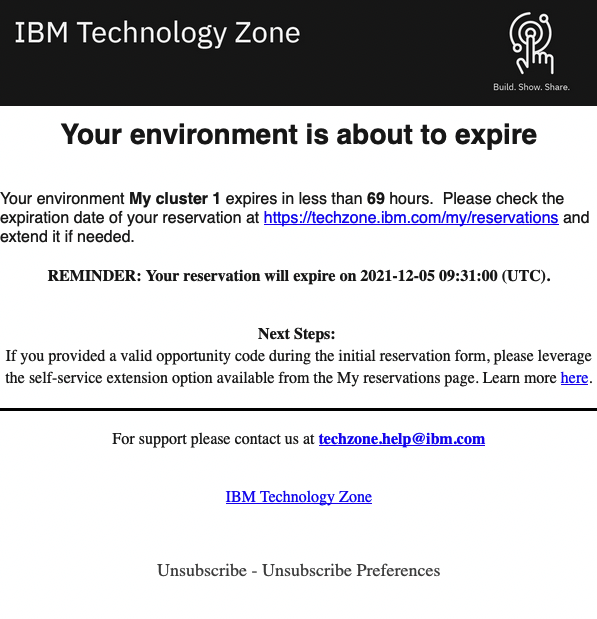
Note:
- You can extend your cluster if required.
- This option may be limited to certain types of reservations.
- The My reservations page allows you to manage your cluster reservation
Congratulations, you've now created your cluster. In the next topic, we're going to configure the cluster for GitOps, so that we can manage it quickly, easily and effectively.