Deploy backend service
Audience: Architects, Application developers, Administrators
Timing: 20 minutes
Overview
In the section Cloud Native Example we explained that our sample ACE integration application will integrate with a SOAP-based backend service.
In this section, we will deploy this backend service.
Note
Scope of this tutorial does not include the SOAP service, but rather the ACE integration application. But for the sake of completeness of this tutorial, we will deploy this SOAP backend service within our cluster so that we can demonstrate our sample ACE integration application.
In this section, we will deploy pre-built image of the SOAP service. In a later section, we will show how to use OpenShift Build to deploy from the source.
Deploy backend SOAP service
-
Ensure you are logged in to the cluster
Start a terminal window and log into your OCP cluster, substituting the
--tokenand--serverparameters with your values:oc login --token=<token> --server=<server>If you are unsure of these values, click your user ID in the OpenShift web console and select "Copy Login Command".
-
Locate your GitOps repository
If necessary, change to the root of your GitOps repository, which is stored in the
$GIT_ROOTenvironment variable.Issue the following command to change to your GitOps repository:
cd $GIT_ROOT cd multi-tenancy-gitops -
Deploy the applications layer in the GitOps repo
Access the
0-bootstrap/single-cluster/kustomization.yaml:cat 0-bootstrap/single-cluster/kustomization.yamlLet us deploy
appsresources to the cluster. Open0-bootstrap/single-cluster/kustomization.yamland uncomment3-apps/3-apps.yamlas follows:resources: - 1-infra/1-infra.yaml - 2-services/2-services.yaml - 3-apps/3-apps.yaml ... # omitted for brevityIf you take a diff:
git diff --unified=0diff --git a/0-bootstrap/single-cluster/kustomization.yaml b/0-bootstrap/single-cluster/kustomization.yaml index 3d7f7d8..4bac6d7 100644 --- a/0-bootstrap/single-cluster/kustomization.yaml +++ b/0-bootstrap/single-cluster/kustomization.yaml @@ -4 +4 @@ resources: -# - 3-apps/3-apps.yaml +- 3-apps/3-apps.yamlOnce we push this change to GitHub, it will be seen by the
bootstrap-single-clusterapplication in ArgoCD, and the changes will be applied to the cluster:git add . git commit -s -m "Intial boostrap setup for applications" git push origin $GIT_BRANCH -
The
bootstrap-single-clusterapplication detects the change and re-syncsOnce these changes to our GitOps repository are seen by ArgoCD, it will re-sync the cluster to the desired new state.
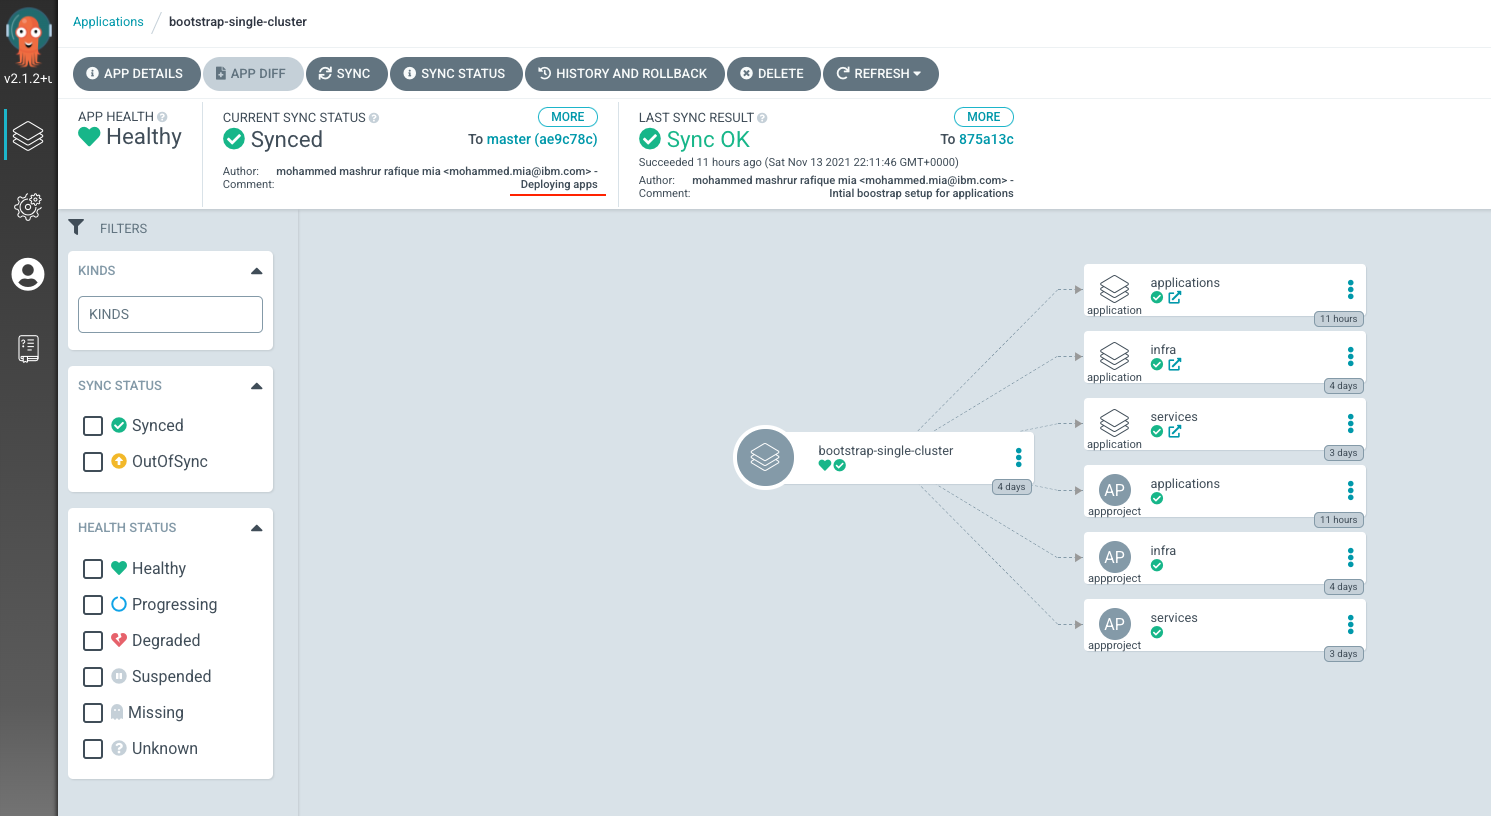
Switch to the ArgoCD UI Applications view to see the changes:
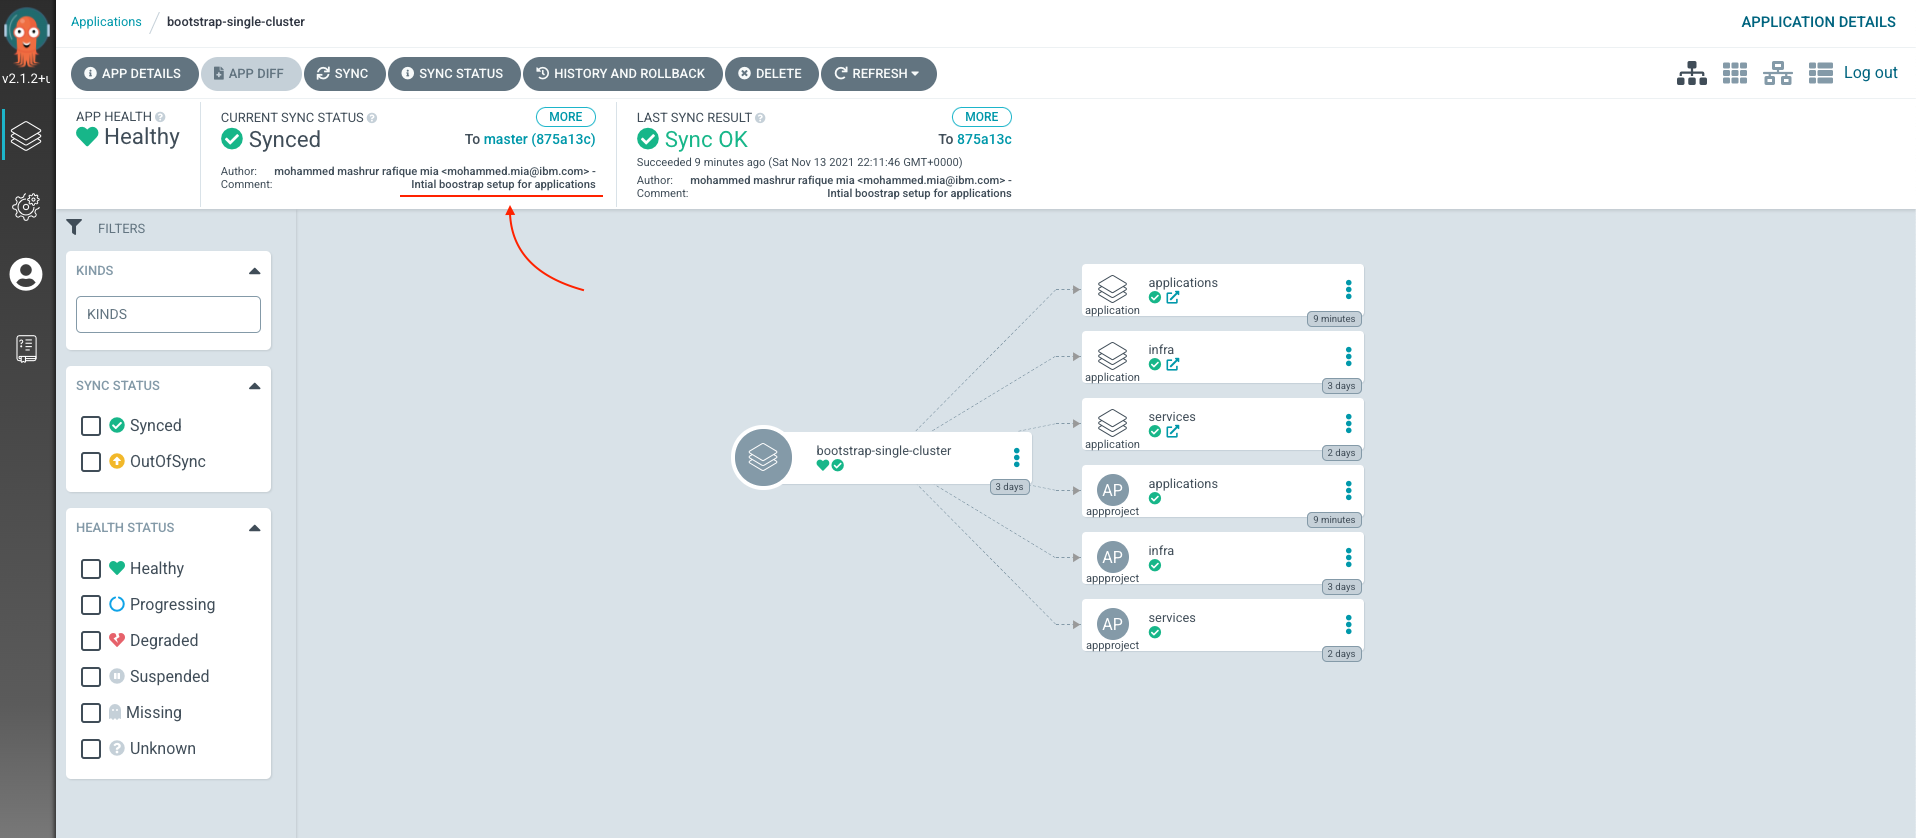
Note the the commit message in sync status. It should be of commit from the last step.
-
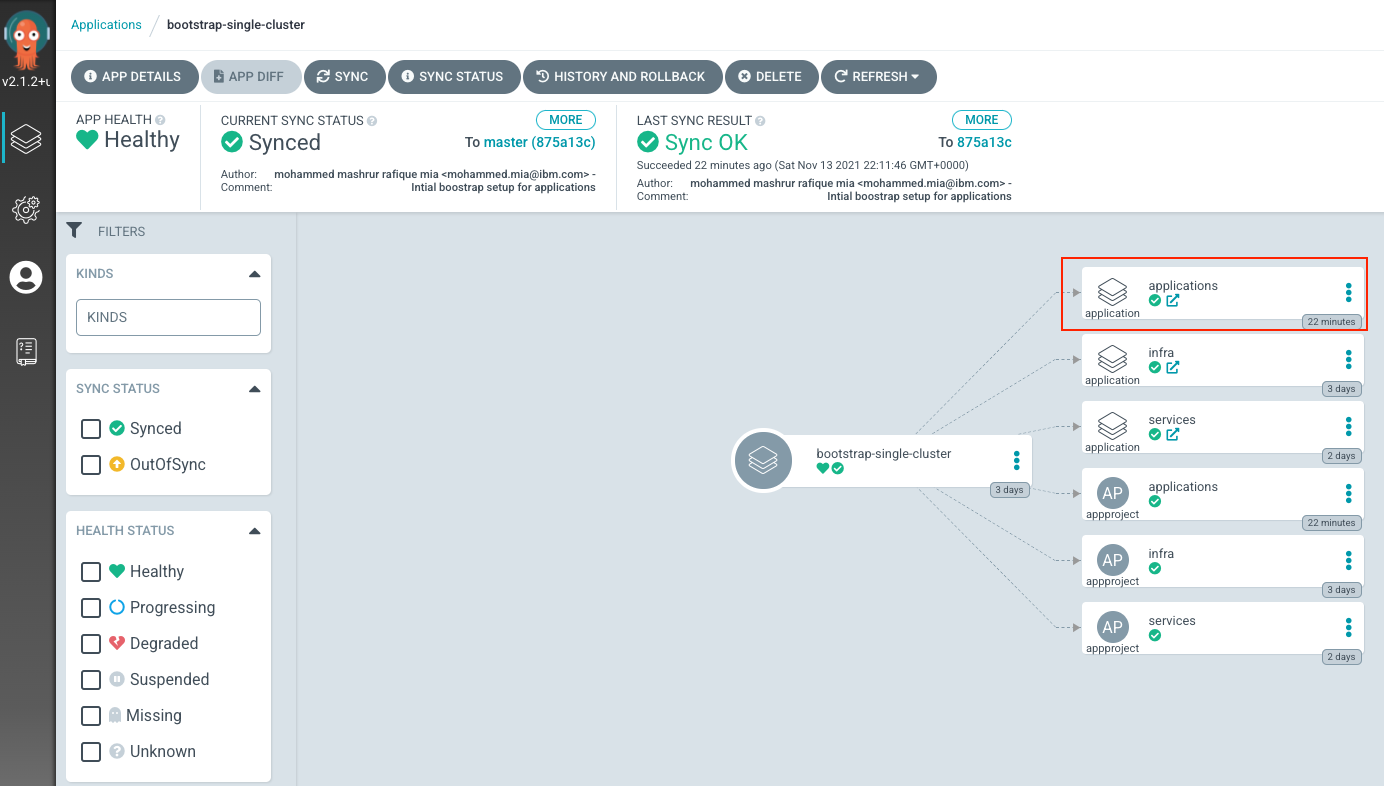
The
bootstrap-single-clusterapplication deployed the "applications" ArgoCD Application and AppProjectNote the "applications" ArgoCD application icon which should appears new:
We can examine the this "applications" ArgoCD application, either from
Applications > applicationstop menu, or simply clicking the link sub-icon within the applications icon: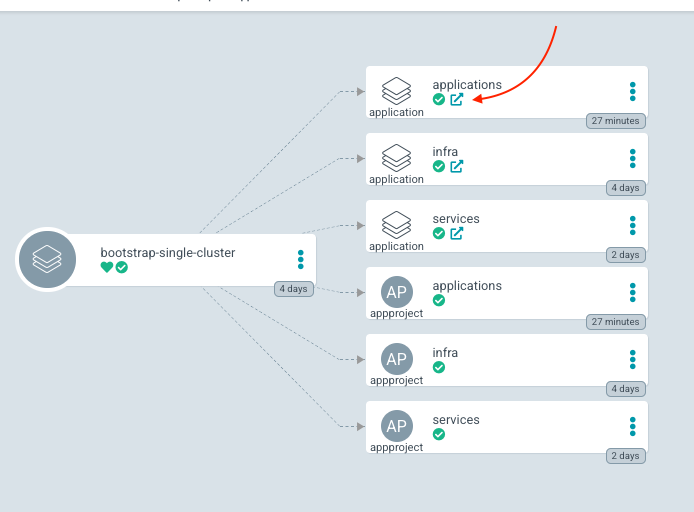
-
Select resources to deploy
At this time, the
applicationsArgoCD application has not yet deploy any other applications in turn.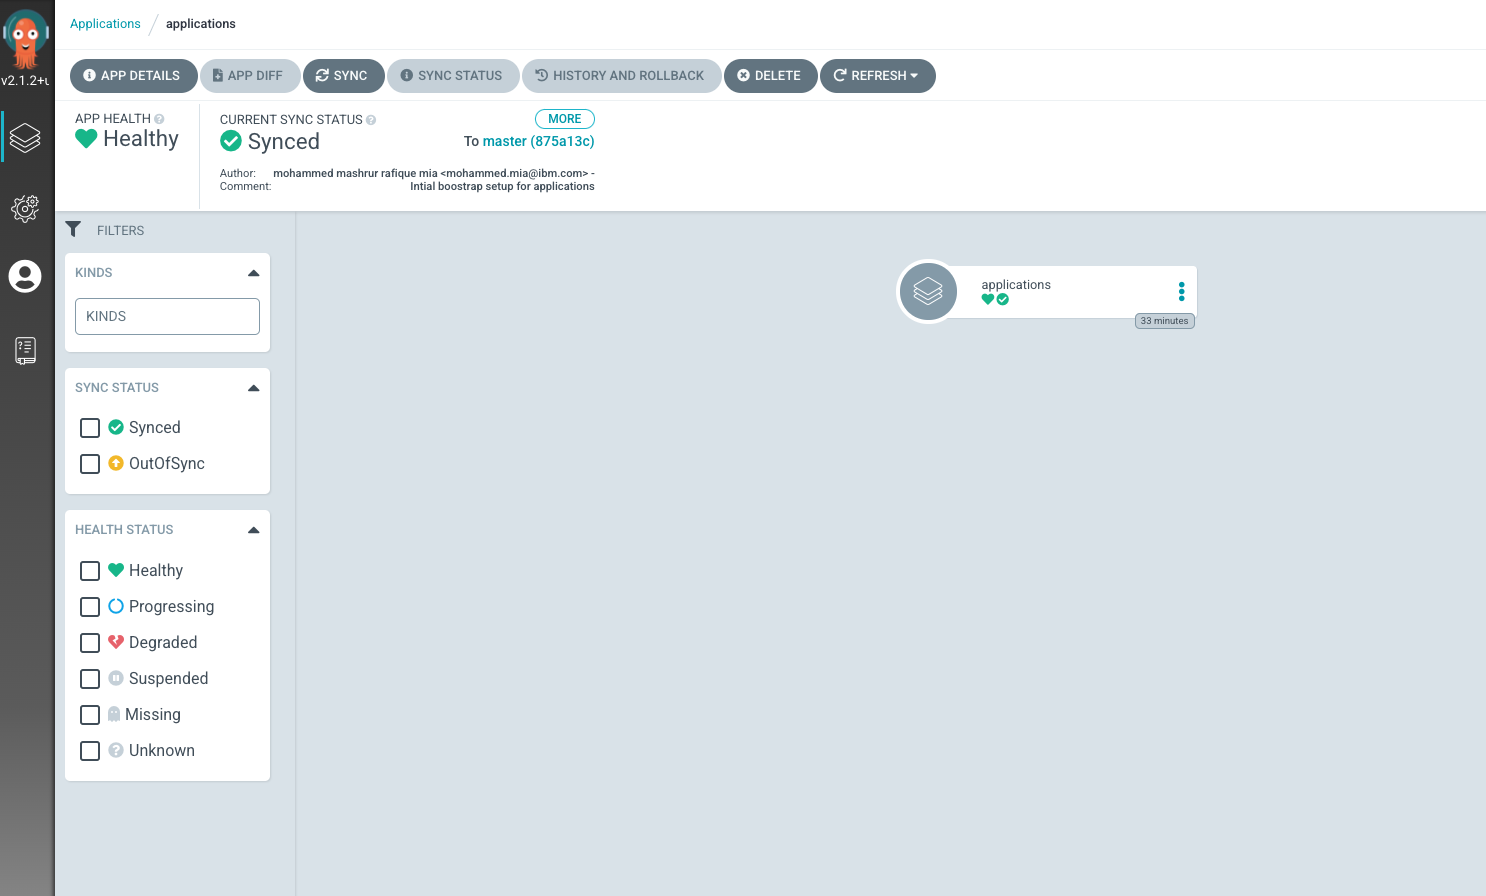
The reason is that it is kustomize based application definition, where all resources are commented out at this time.
Access the
0-bootstrap/single-cluster/3-apps/kustomization.yaml:cat 0-bootstrap/single-cluster/3-apps/kustomization.yamland you should notice all resources are commented out.
Open
0-bootstrap/single-cluster/3-apps/kustomization.yamland uncomment the following:- argocd/soapserver/soapserver.yamlIf you take a diff now:
git diff --unified=0You should see the following:
diff --git a/0-bootstrap/single-cluster/3-apps/kustomization.yaml b/0-bootstrap/single-cluster/3-apps/kustomization.yaml index 7a3bce4..c695ae5 100644 --- a/0-bootstrap/single-cluster/3-apps/kustomization.yaml +++ b/0-bootstrap/single-cluster/3-apps/kustomization.yaml @@ -22 +22 @@ resources: -#- argocd/soapserver/soapserver.yaml +- argocd/soapserver/soapserver.yaml -
Push GitOps changes to GitHub
Let’s make these GitOps changes visible to the ArgoCD
bootstrap-single-clusterapplication via GitHub.Add all changes in the current folder to a git index, commit them, and push them to GitHub:
git add . git commit -s -m "Deploying soapserver" git push origin $GIT_BRANCH -
The
bootstrap-single-clusterapplication detects the change and resyncsOnce these changes to our GitOps repository are seen by ArgoCD, it will resync the cluster to the desired new state.
Switch to the ArgoCD UI Applications view to see the changes:
Note the the commit message in sync status. It should be of commit from the last step.
-
The
applicationsapplicationSwitch to "applications" ArgoCD application on the ArgoCD UI (either by clicking on the link sub-icon from the "applications" resource icon, or from the top menu
Applications -> applications)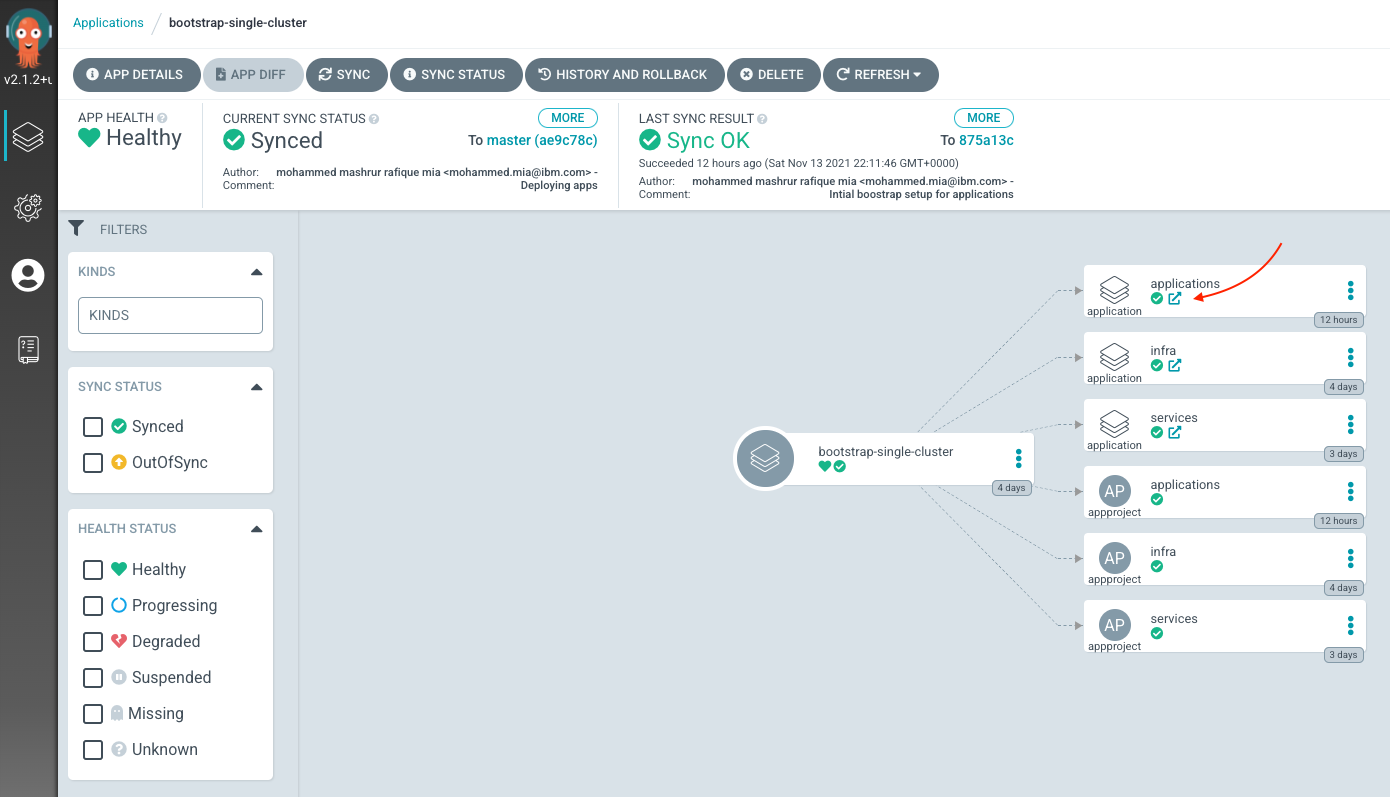
The "applications" ArgoCD application will be updated to have
apps-soapserver-toolsapplication: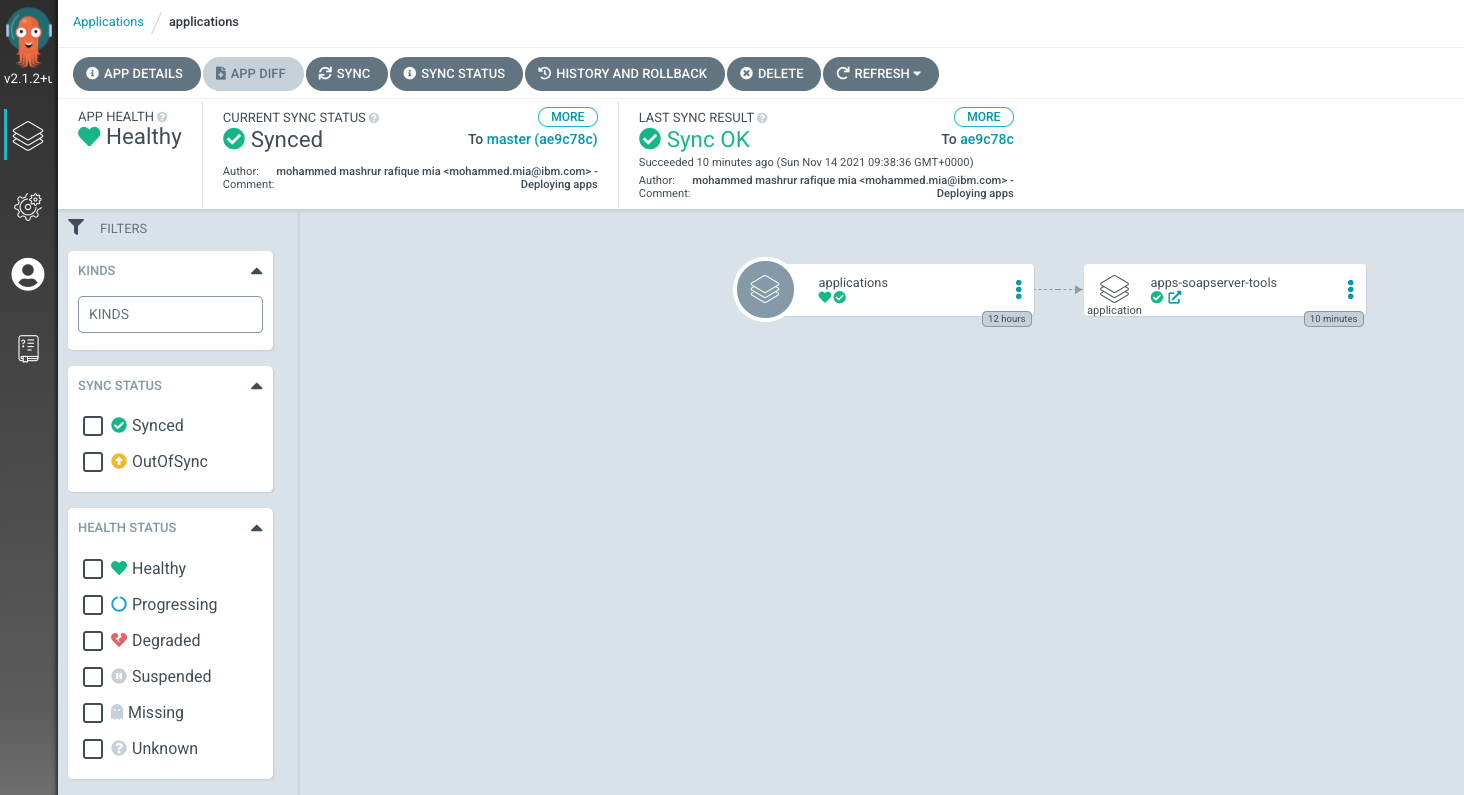
-
apps-soapserver-tools application*
Open the
apps-soapserver-toolsapplication (either by clicking on the link sub-icon from the "apps-soapserver-tools" resource icon, or from the top menuApplications > apps-soapserver-tools)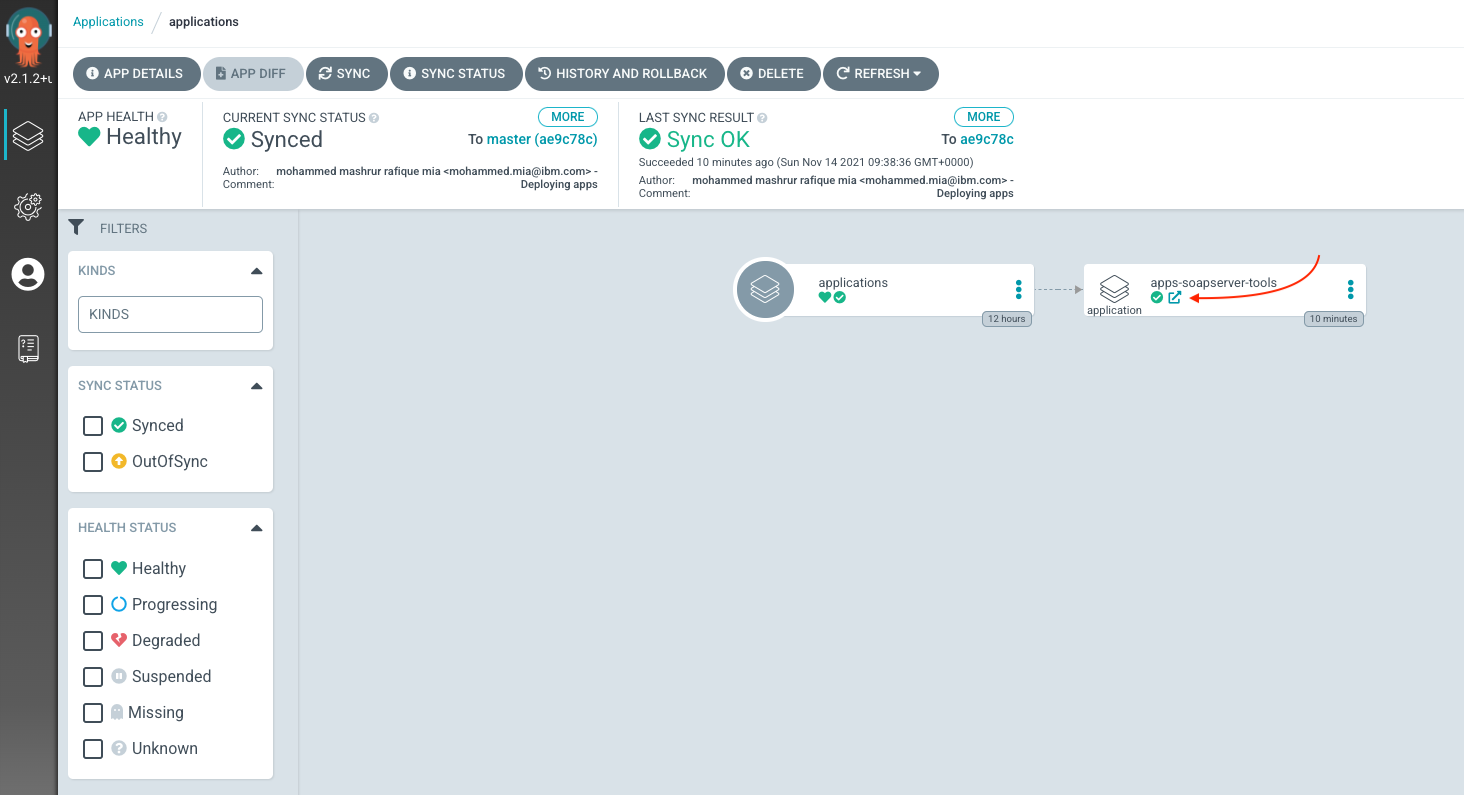
The
apps-soapserver-toolsapplication, in turn deploysprod-app-soapserverapplication:Open the application (either by clicking on the link sub-icon from the "applications" resource icon, or from the top menu
Applications > prod-app-soapserver)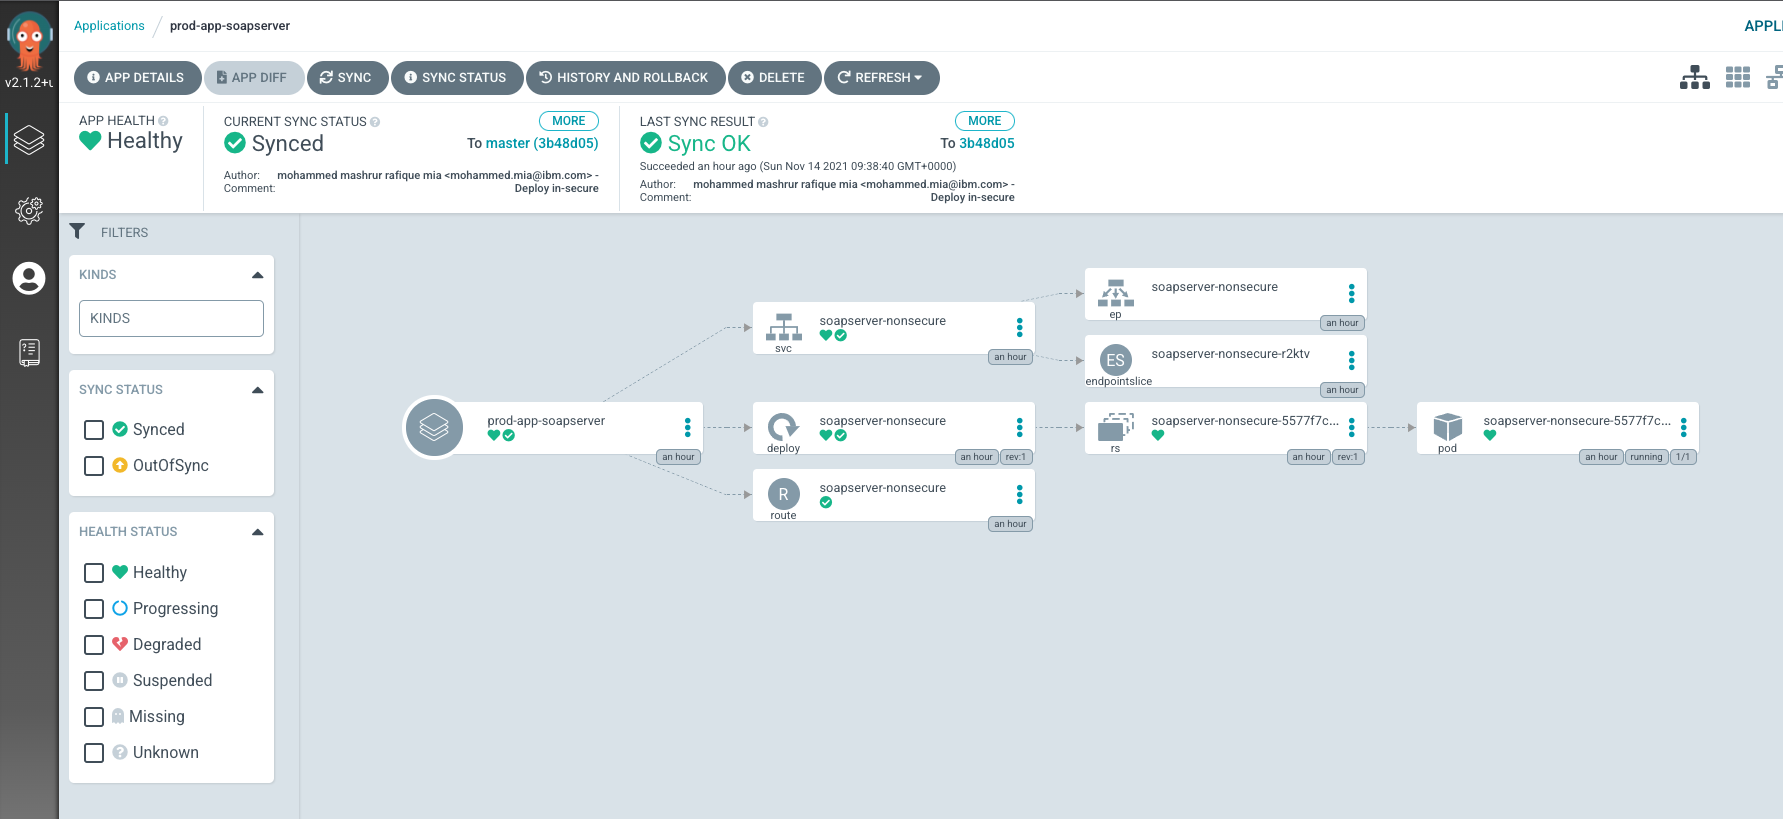
Notice the resources deployed by the application:
- Deployment,
soapserver-nonsecure - Service,
soapserver-nonsecure - Route,
soapserver-nonsecure
Click on the resource icons to see details of their deployments.
For instance, the Deployment,
soapserver-nonsecure, provides a summary page showing the status and health: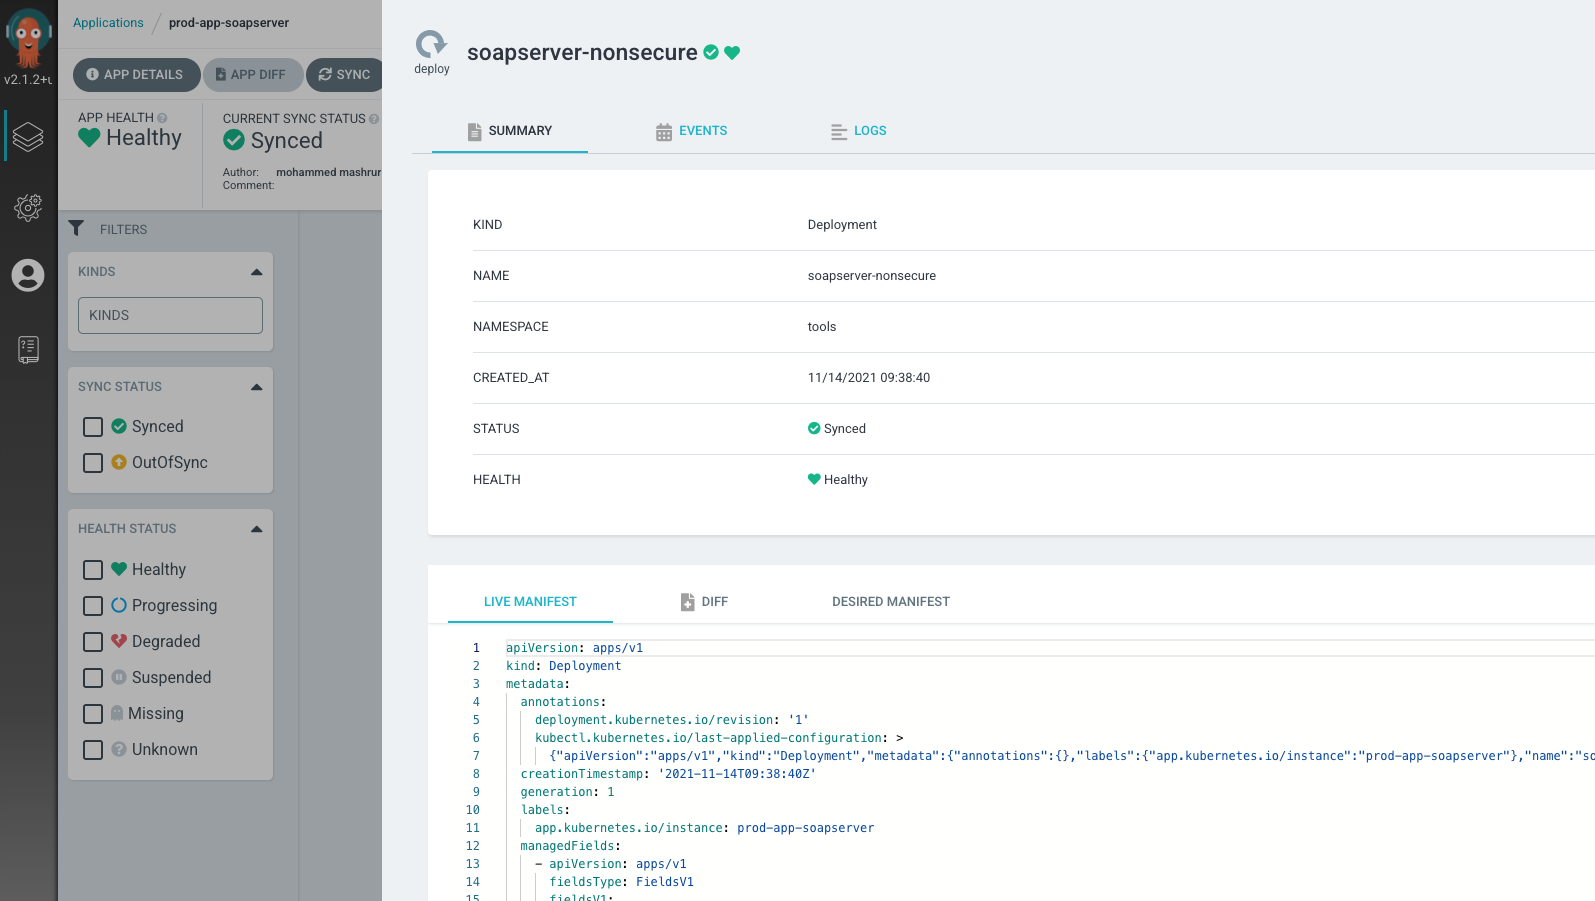
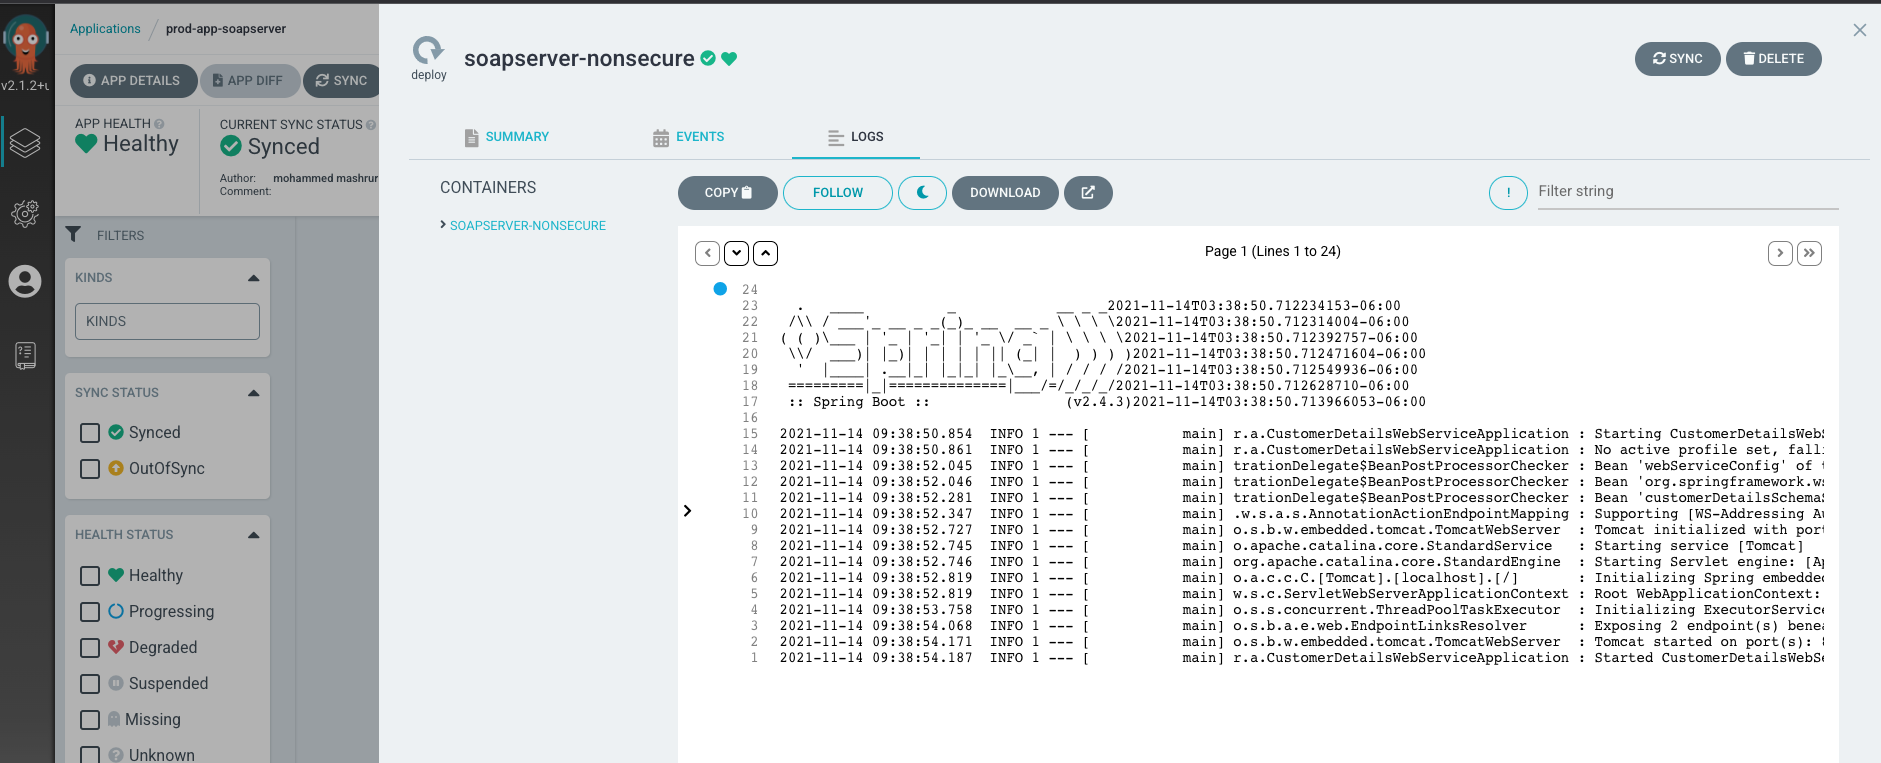
events:

and logs:
- Deployment,
Verify deployment
Now that the service has been deployed, you can see the resource instances in your OCP cluster. From the Route object under tools namespace, you can see the exposed route, soapserver-nonsecure, and you can find the host name of the SOAP service. The host name can be used externally outside the cluster to send SOAP request. Following video shows how you can use OCP and SOAP UI to verify the service deployment: